
Yes, I copied and pasted the letter “ø”. When I dive into Scandinavian cuisines, there are all sorts of new letters that I need to find hidden in my keyboard.
A few weeks ago I cooked “Fiskeboller”, aka Norwegian fish balls for some friends. The balls were given to me as a gift in a beautiful green can by a visiting friend (I call him “The Norwegian”) and I thought it would be nice to bake some delicious bread with it – of course, it had to be Norwegian too! And everywhere I looked, I came across this bread, which was the exact same recipe everywhere, and was originally given by Nigella Lawson.


As it was only Nigella who called it “Norwegian Mountain Bread” and almost everyone referred to her, I had to make sure that what I baked was real Norwegian bread. So I asked “The Norwegian” if it is real and he gave me the Norwegian name: fjellbr..(wait i have to paste it)..ød.
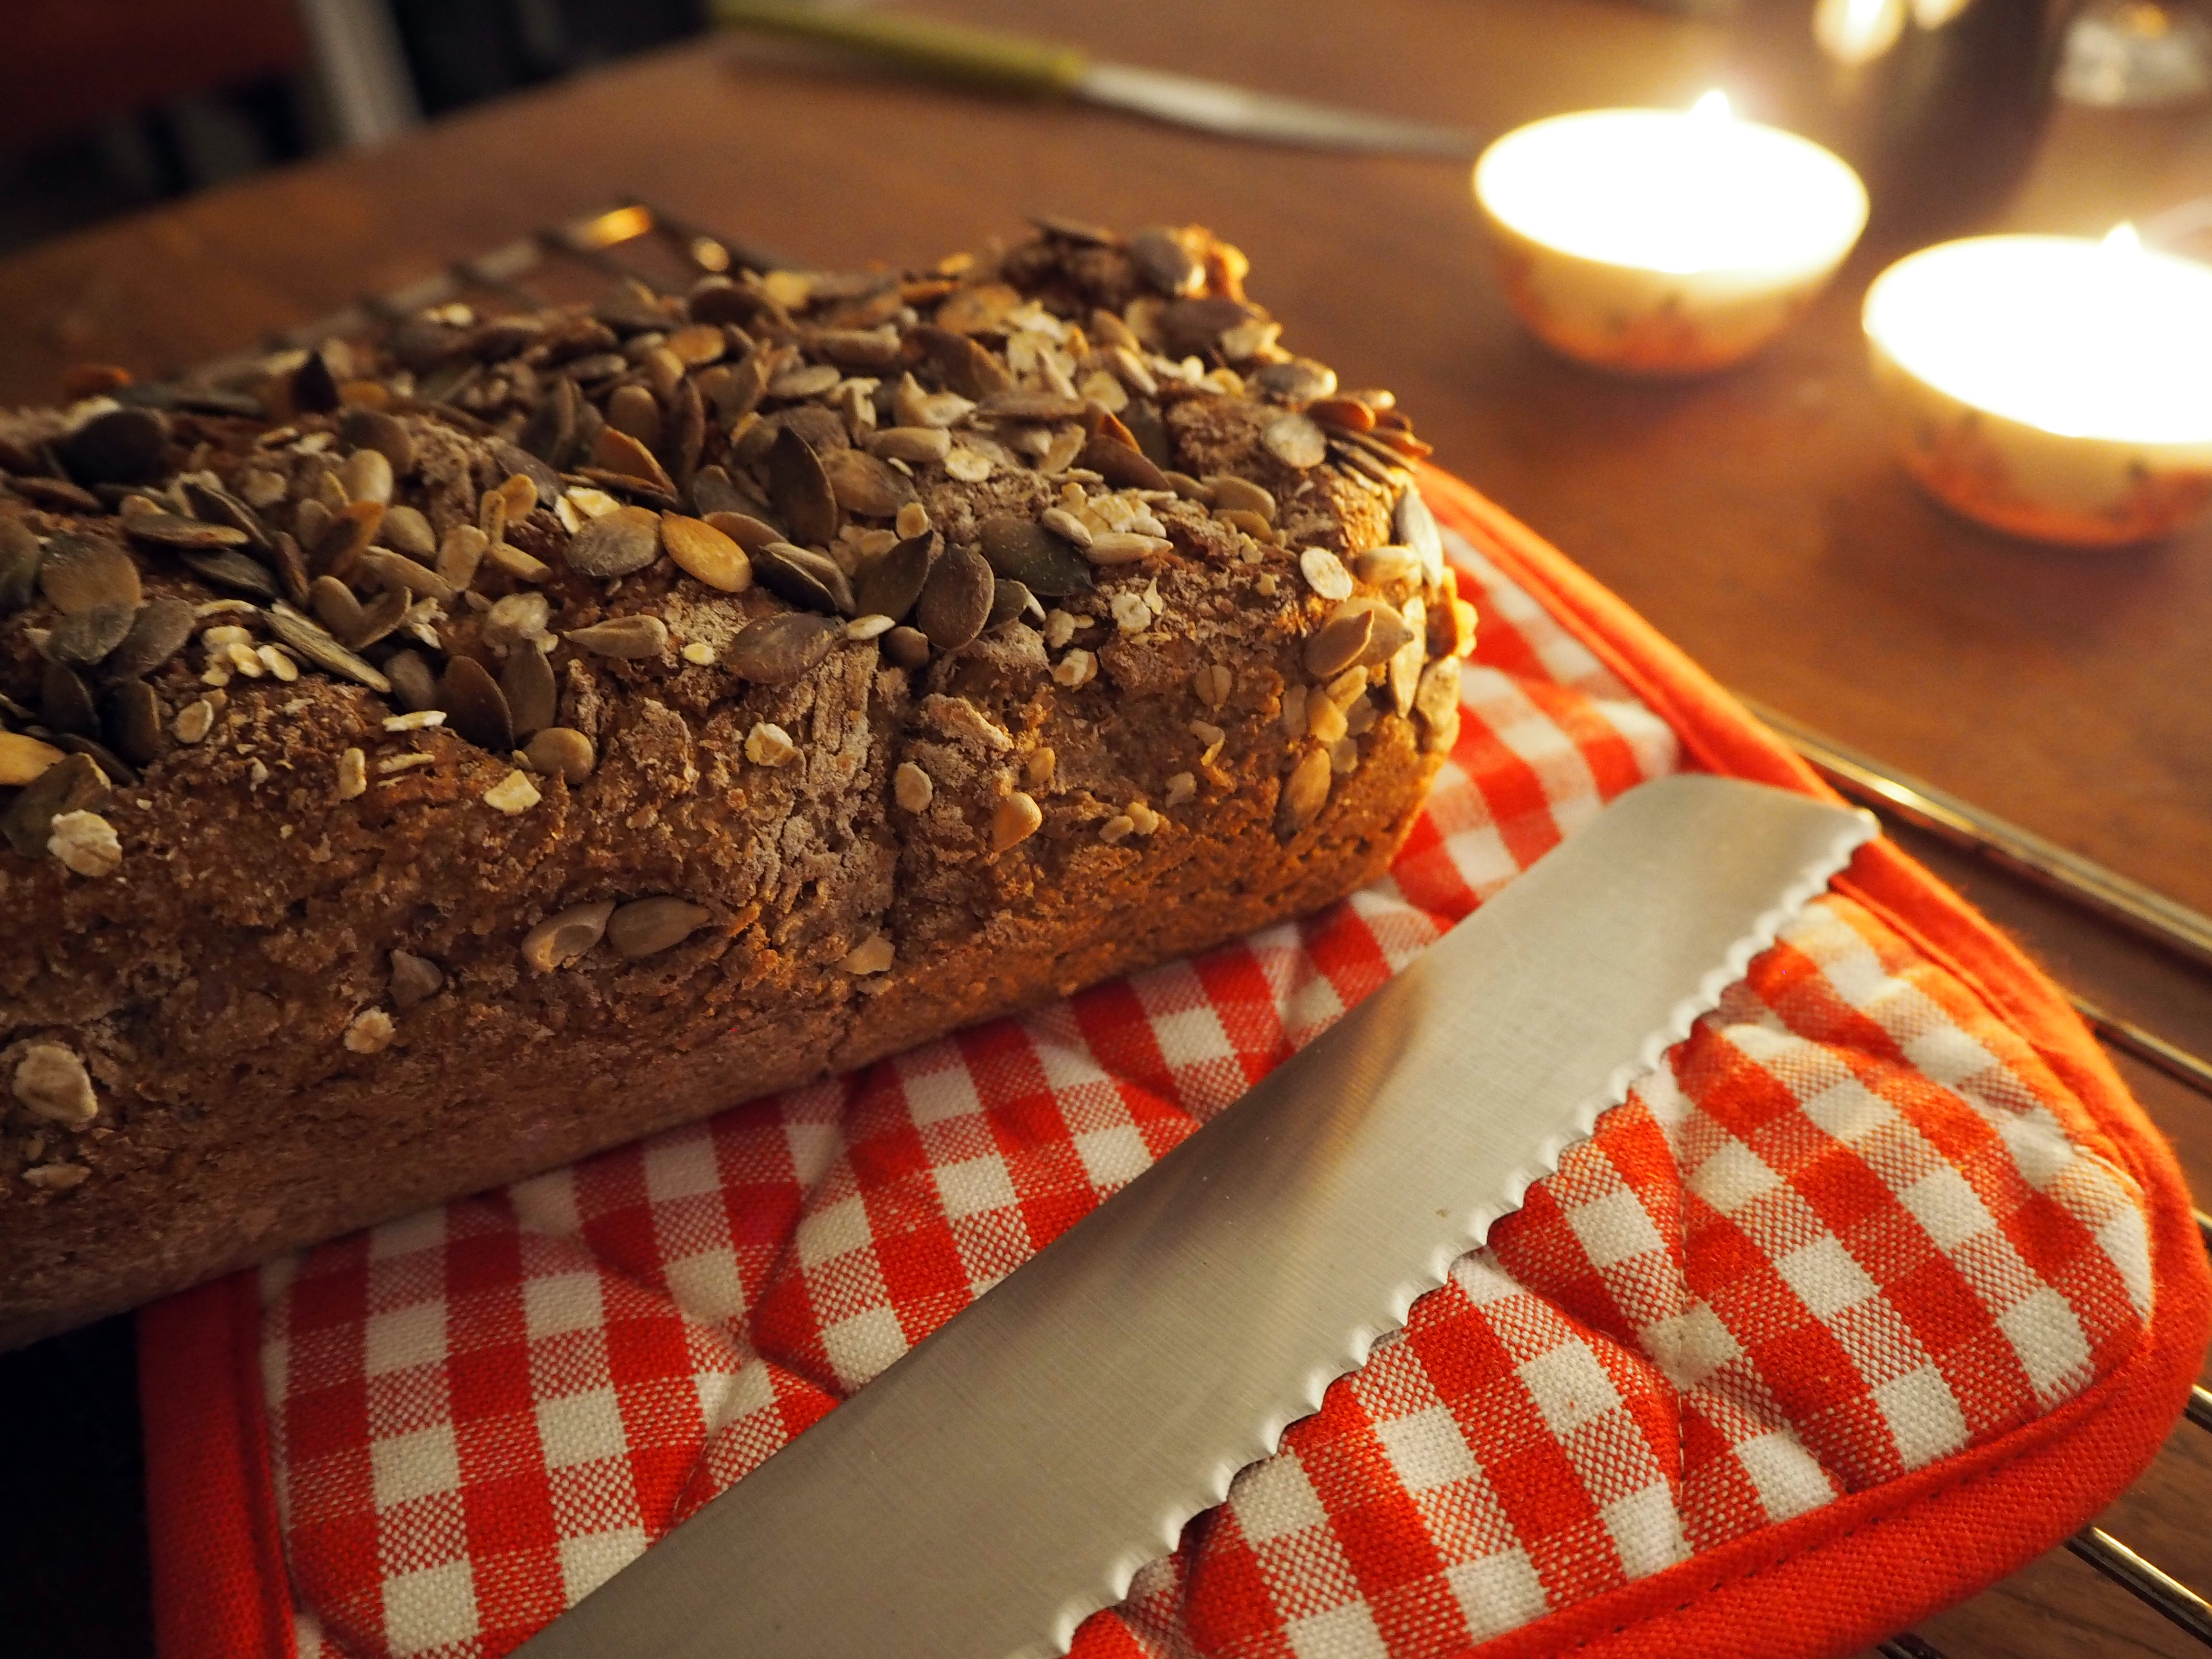
In any case, whatever its nationality is, this bread is extremely delicious and also very nutritious. There are all sorts of seeds in it, there is no white flour but a mixture of whole-wheat and rye flour, plus, there are rolled oats. In regular, basic bread recipes, there is always some time when you leave the bread dough to rise, and most of the time you also have to leave it for final proofing. But this bread does not need any of that! It is a no-knead bread and you put the dough in the oven while it is heating, so you save time!
If you leave it covered in room temperature, this bread stays in good condition for 3-4 days! This is good because you can eat only 1 (maybe 2, if you are really hungry) slice at one meal, it is really filling. Do try it, and you’ll see!
Wow and I just realized: this is the first Norwegian recipe in my blog – and certainly not the last one, as I am starting to seriously love Norwegian cuisine!
—
Ingredients:
(makes 1 loaf)
1 cup plus 2 tbsp / 2.7 dl milk (I used whole milk as usual, täysmaito)
1 cup plus 2 tbsp / 2.7 dl lukewarm water
2 plus 1/4 tsp / 11 ml dry yeast
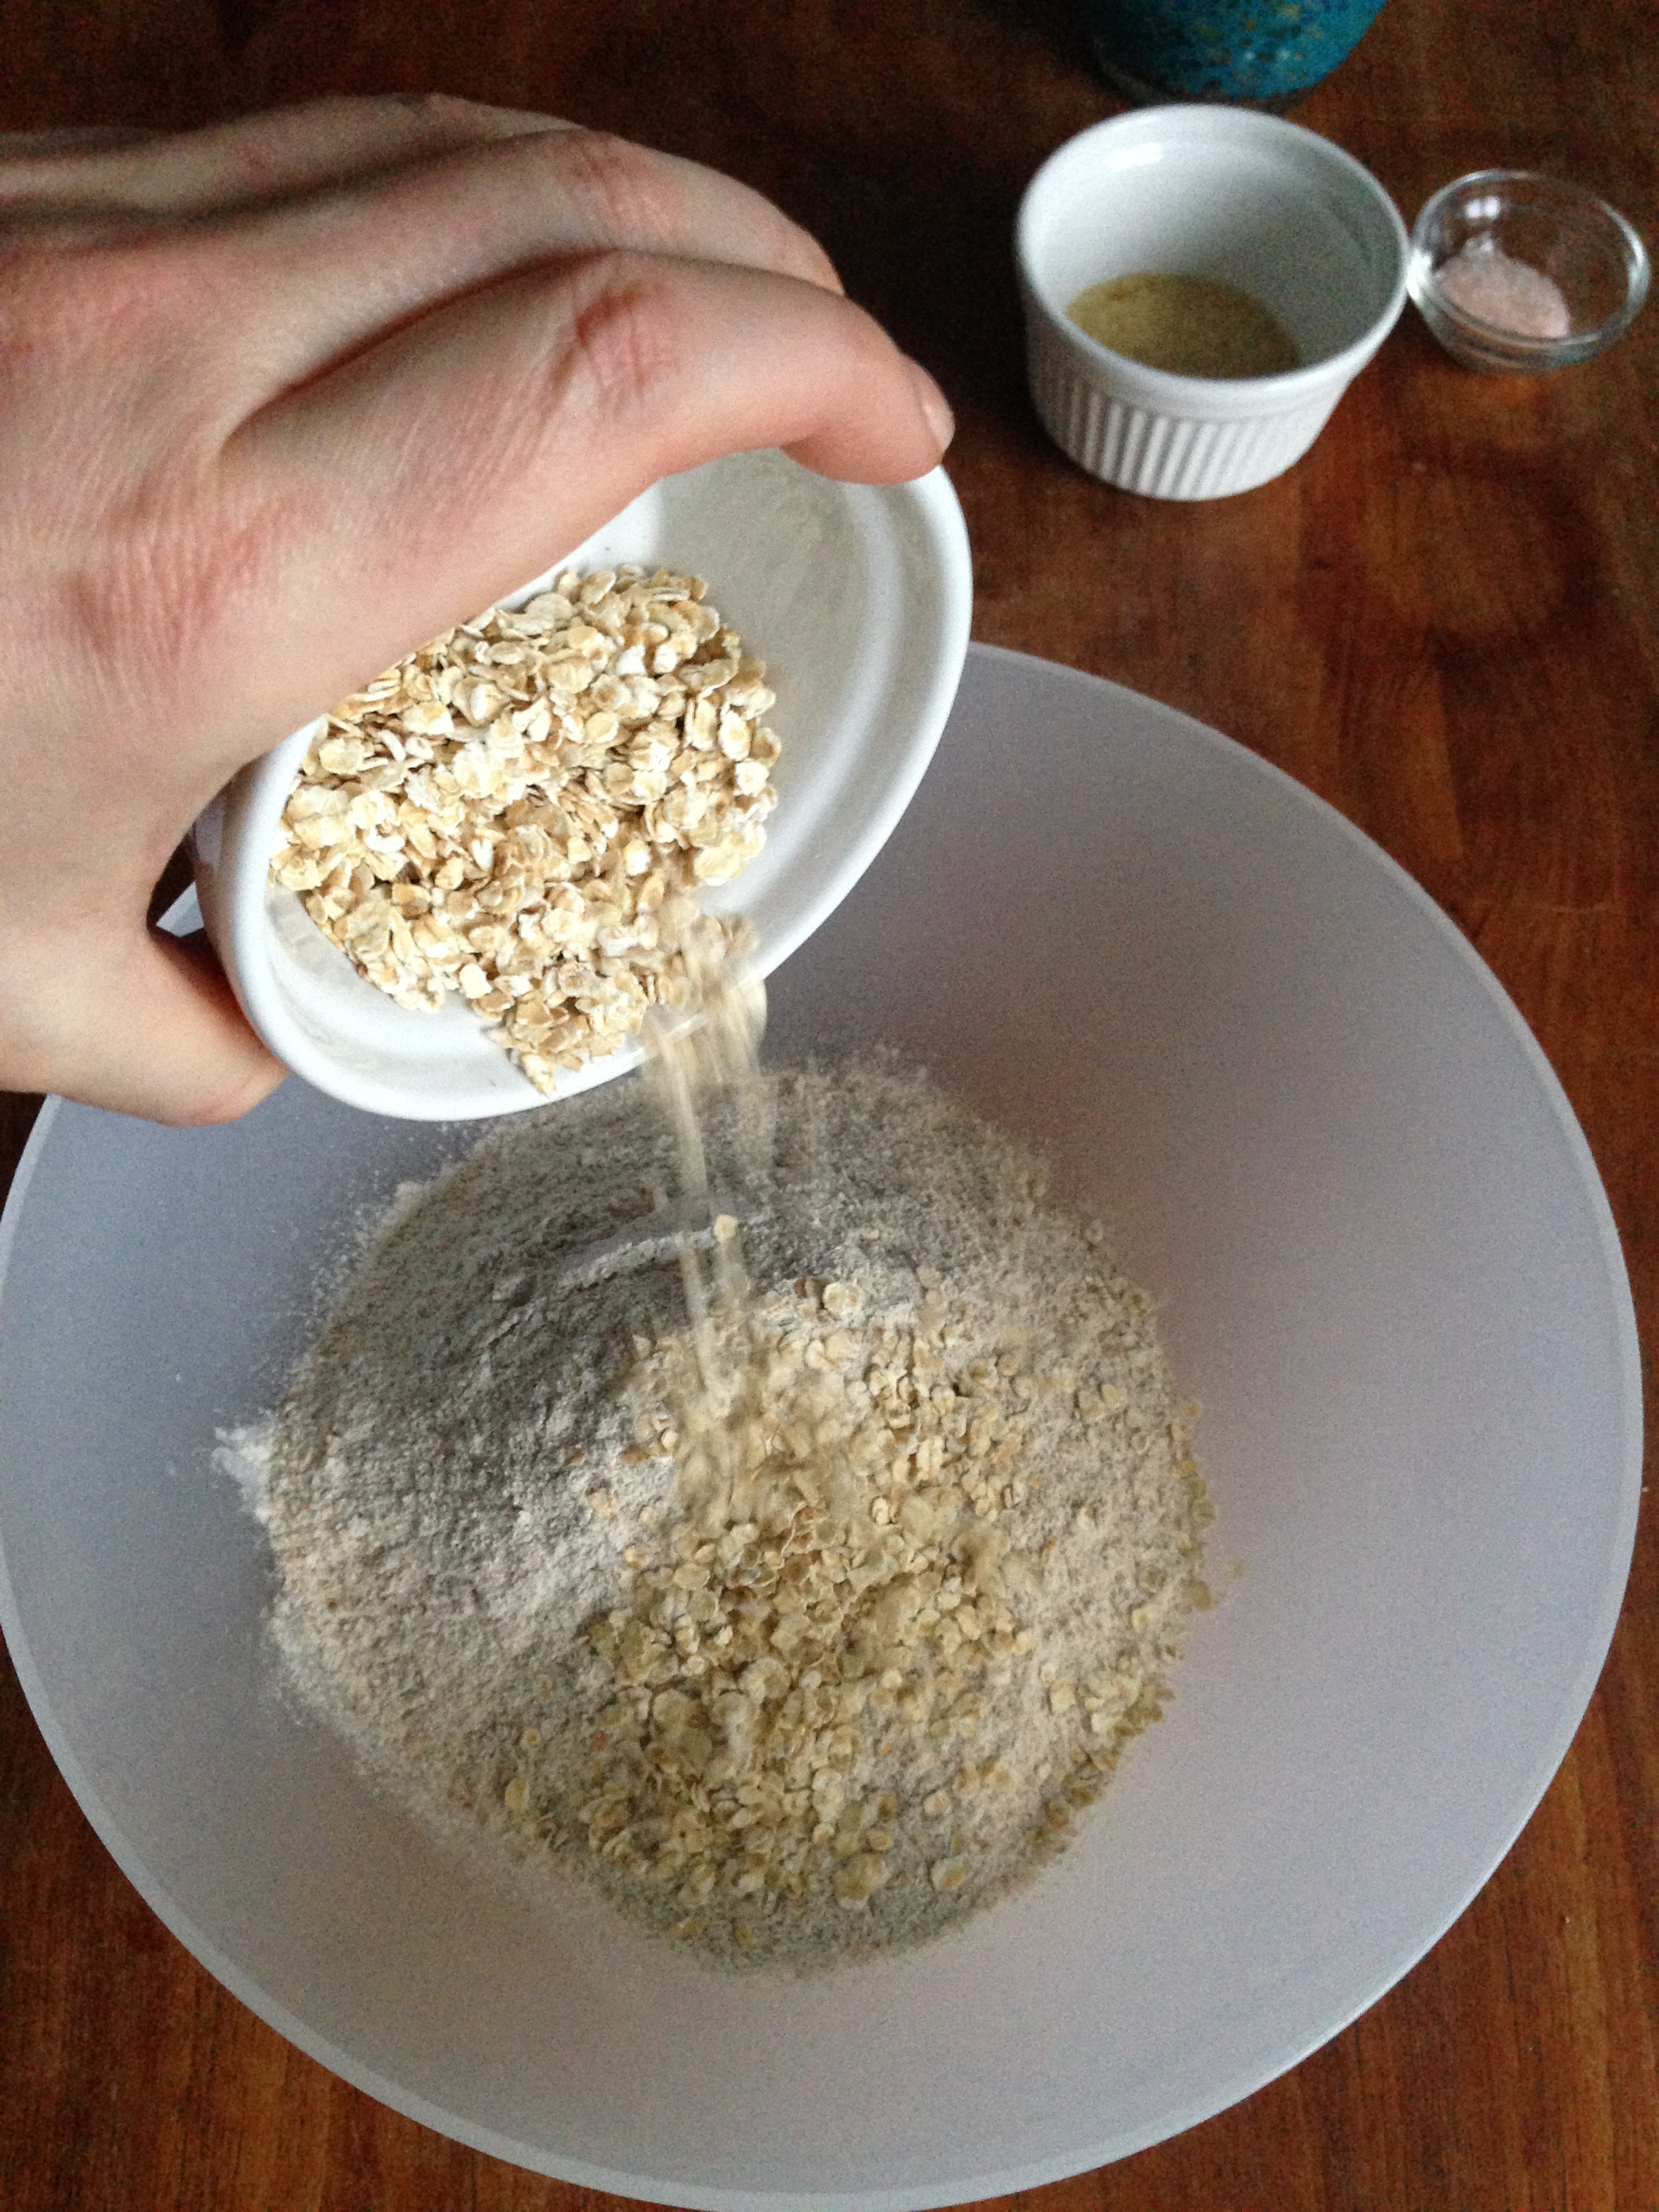
3 cups / 7.2 dl whole-wheat flour
1 cup / 2.4 dl rye flour
1/4 cup / 0.6 dl rolled oats (Finnish: kaurahiutale)
1 tbsp / 15 ml light brown sugar
1 plus 1/2 tsp / 7.5 ml salt (I used Himalayan sea salt)
3 tbsp pumpkin seeds (Finnish: kurpitsansiemen)
3 tbsp sunflower seeds (Finnish: auringonkukansiemen)
3 tbsp flaxseeds (Finnish: pellavansiemen)
and a bit more seed mixture to spread on top..

—
1. Pour milk in a pan and heat it a little just until it is lukewarm.
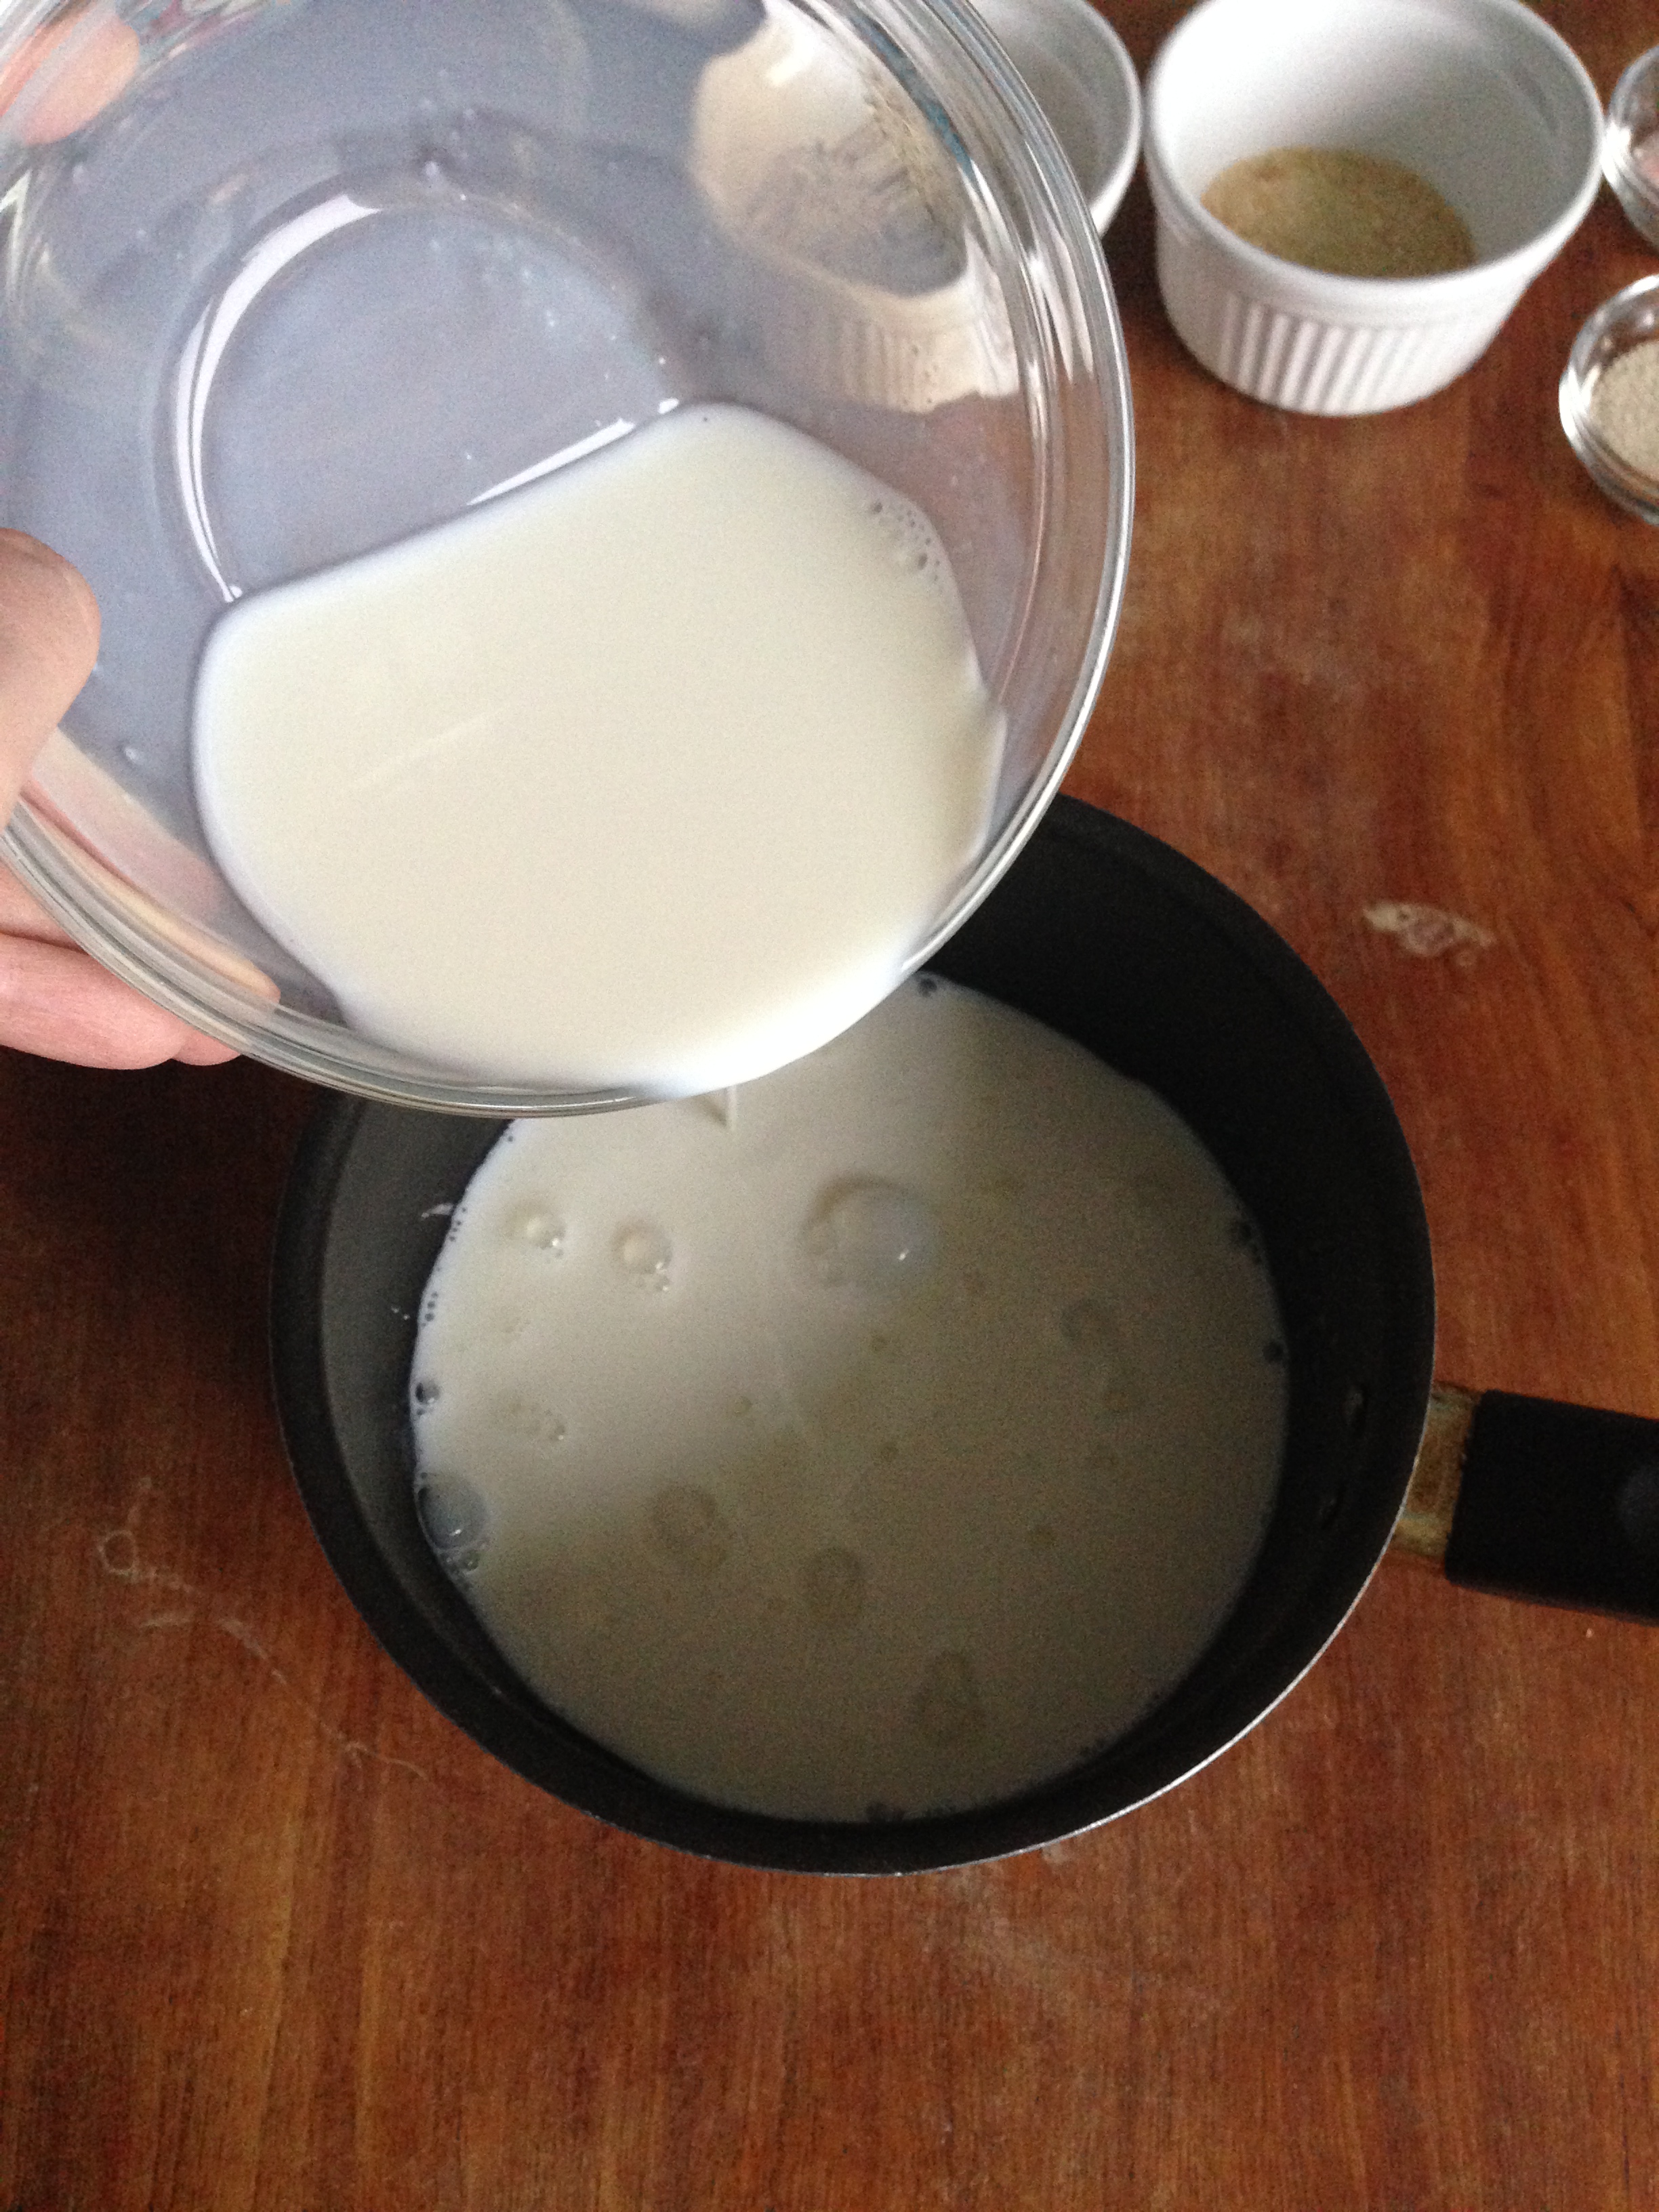

2. In a mixing bowl, pour lukewarm water, lukewarm milk and yeast and leave it for 10 minutes. It should look like the last photo at the end of 10 minutes.


3. In another mixing bowl, put remaining, dry ingredients: whole-wheat flour, rye flour, rolled oats, sugar, salt and seeds and mix a little.


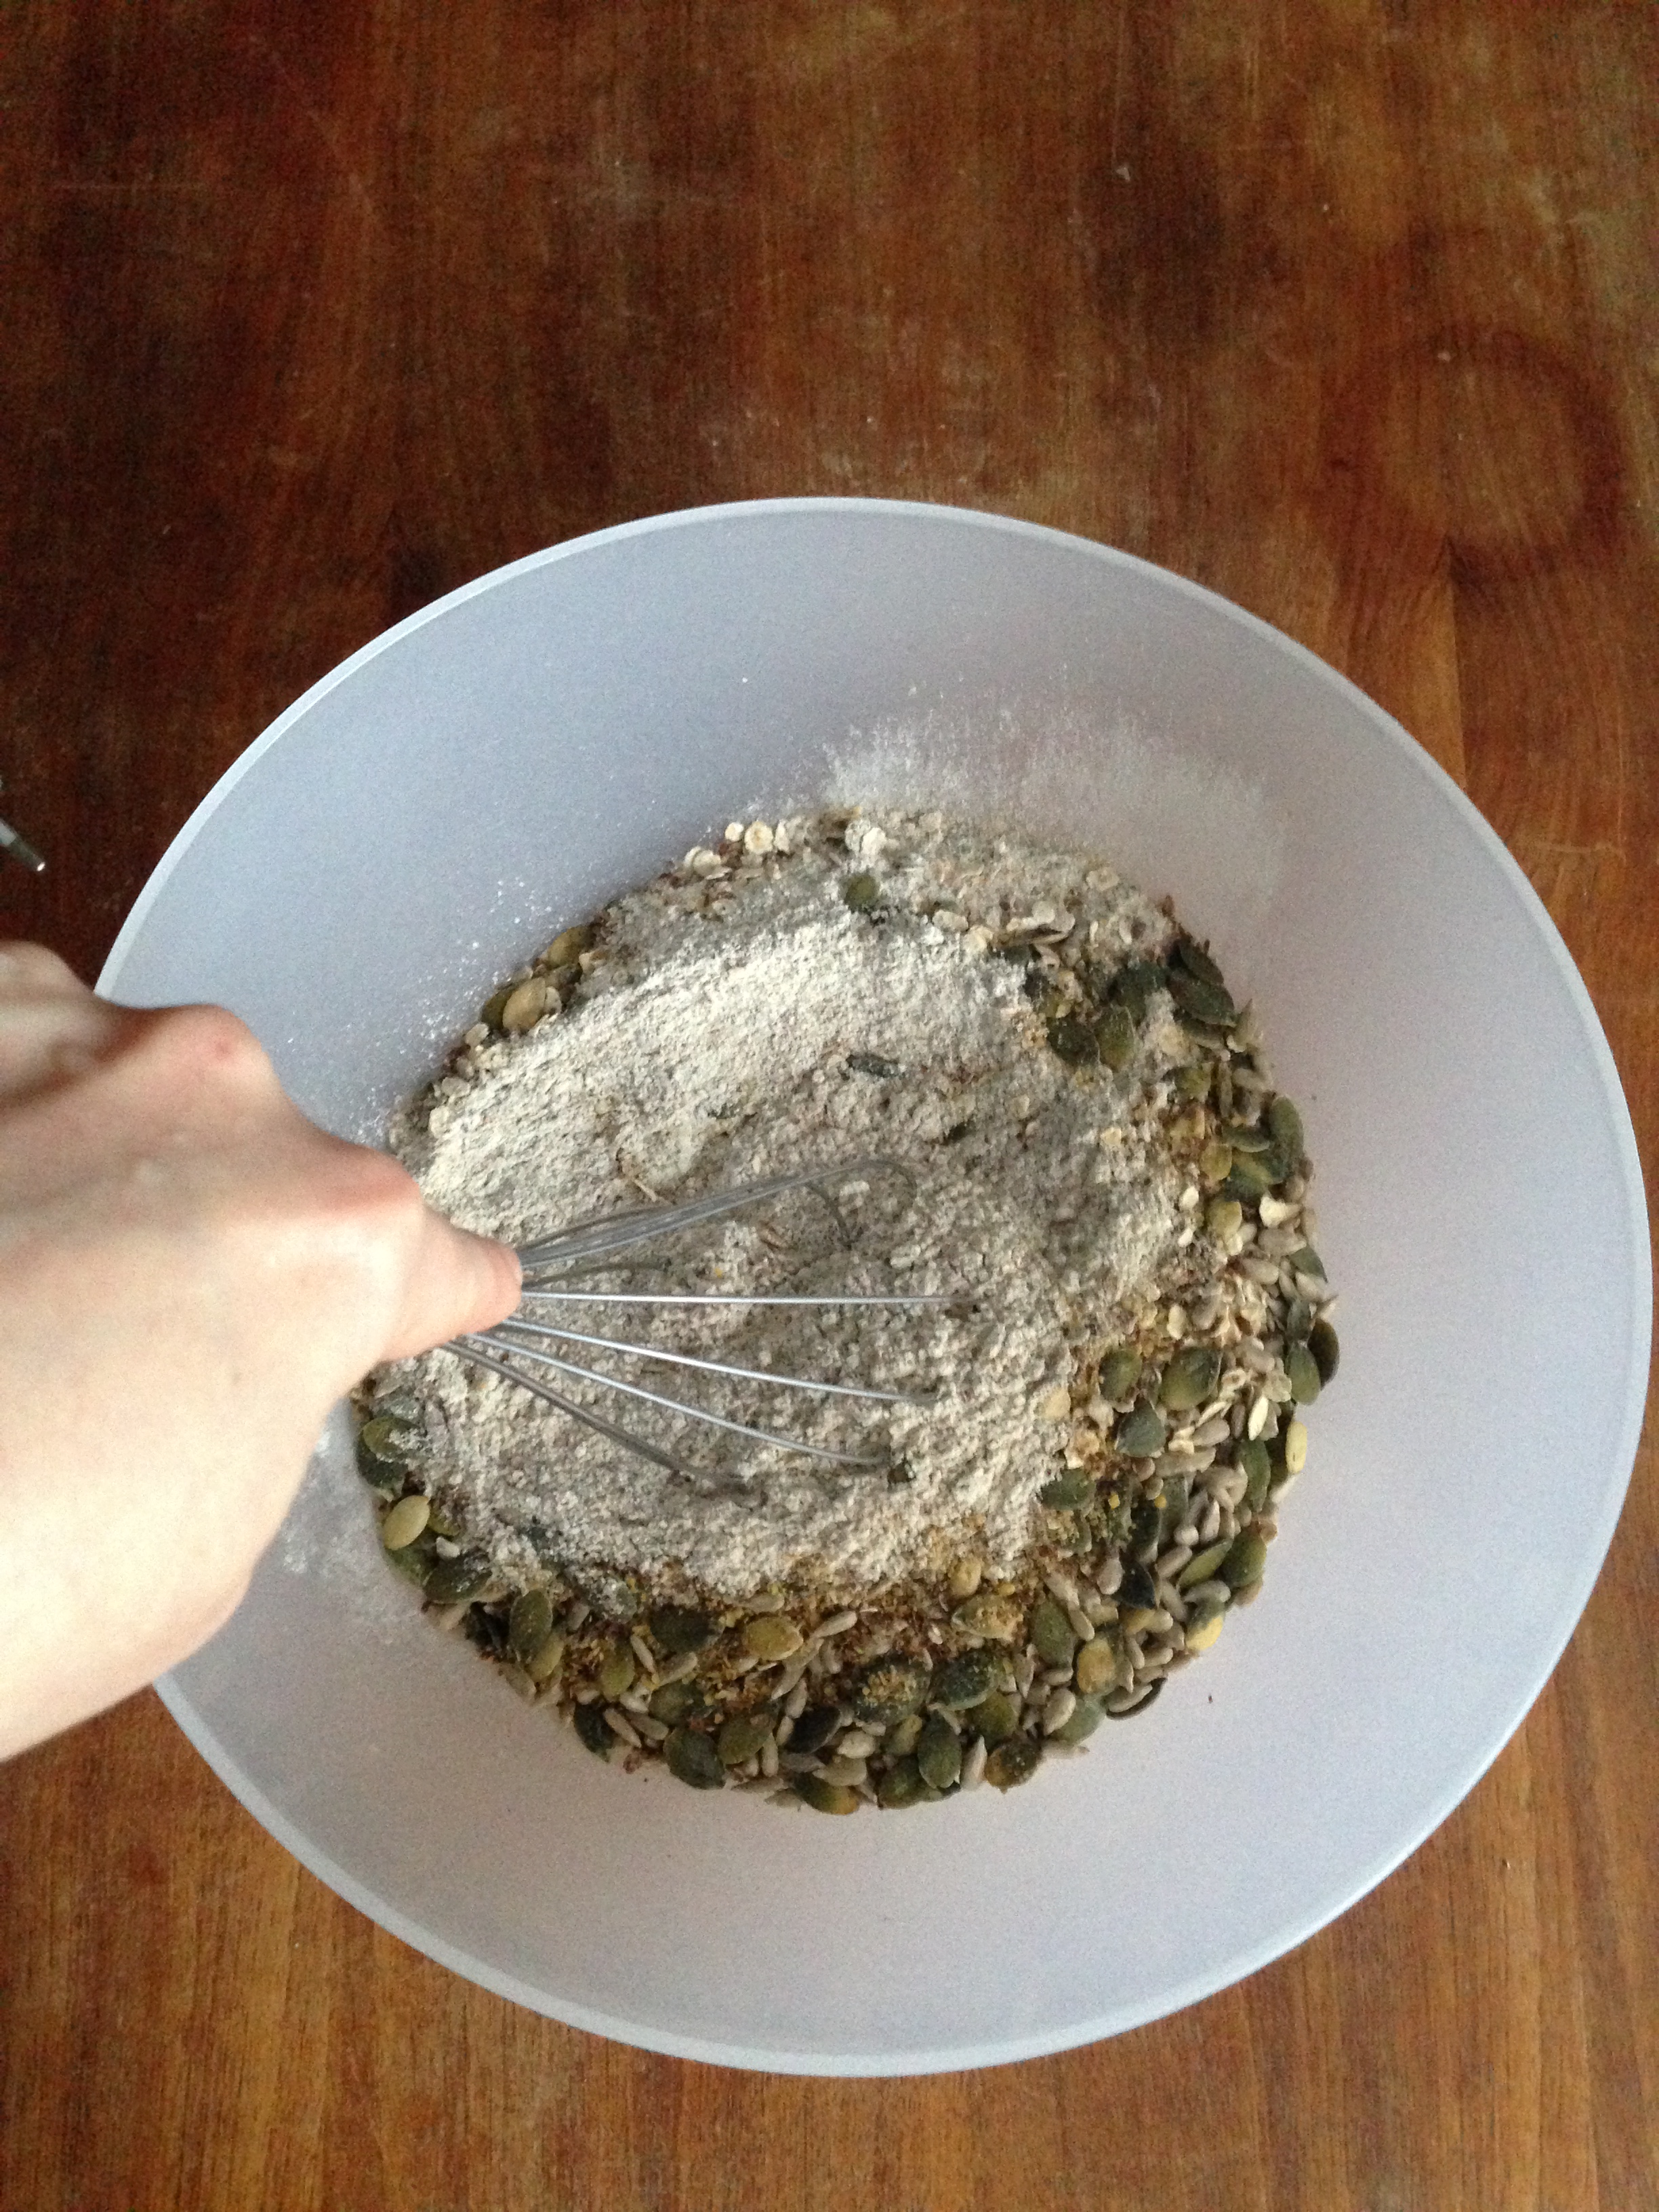
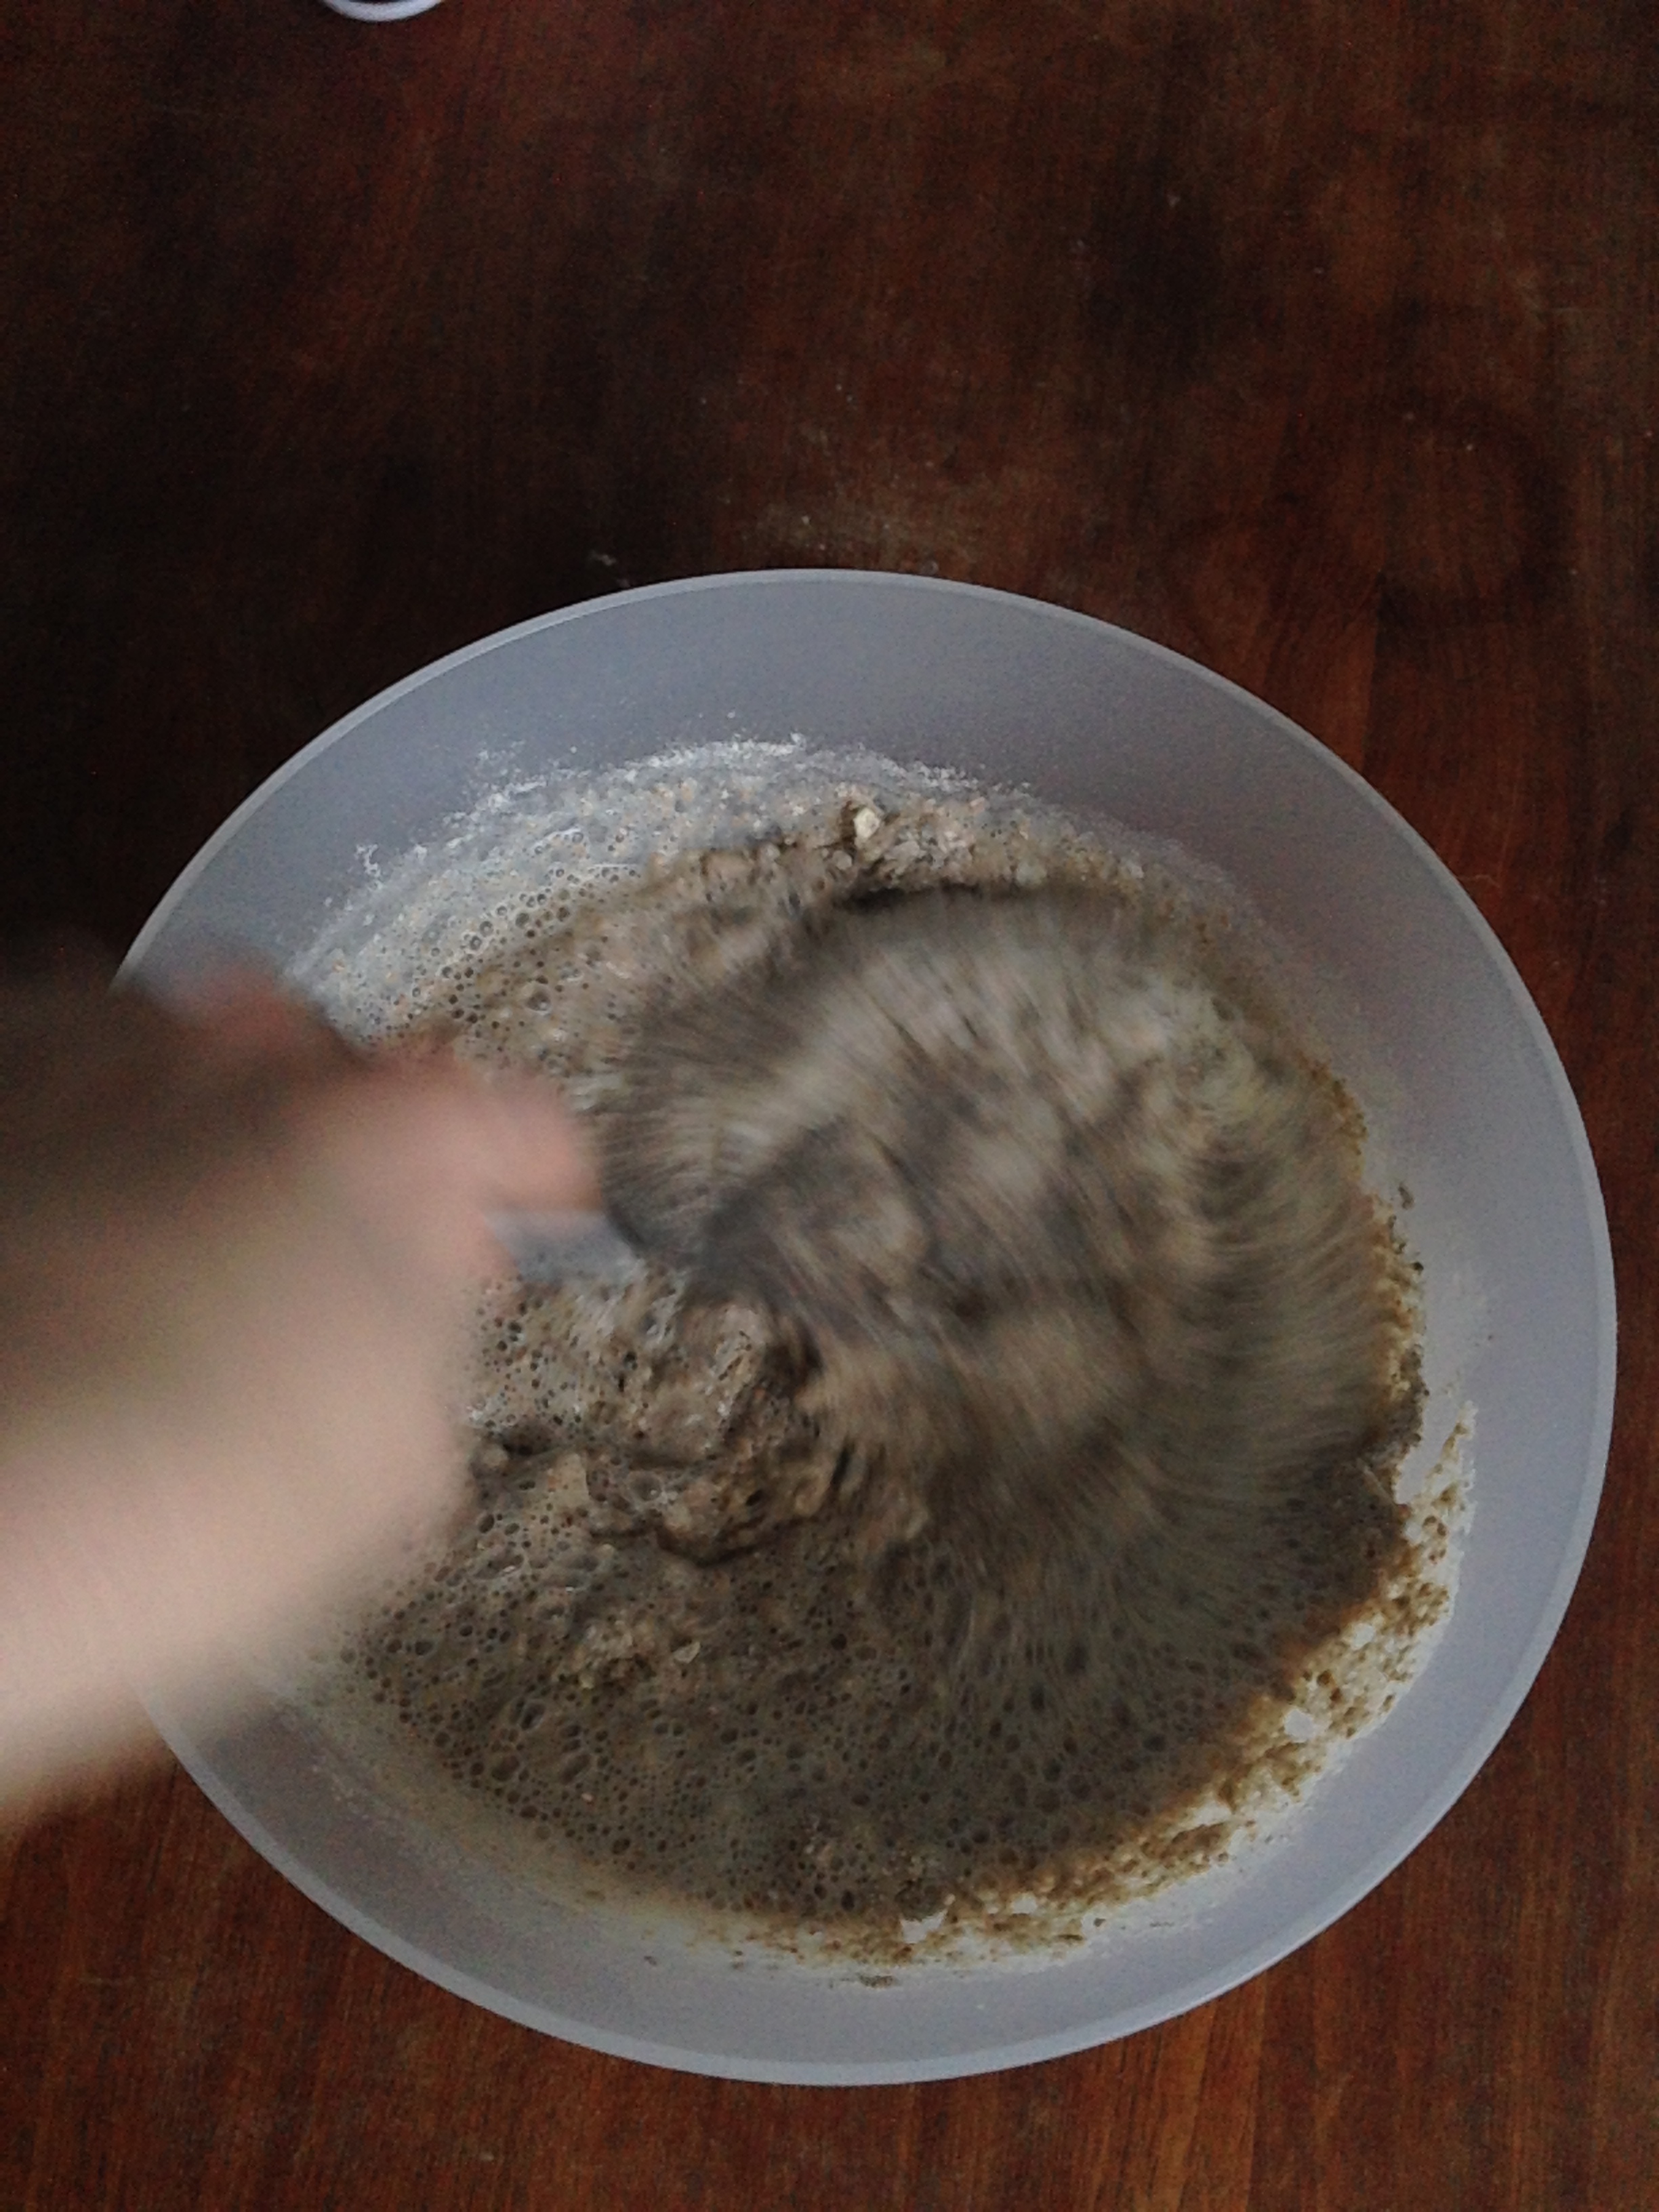
4. Pour liquid yeast mixture into dry ingredients and mix until all dry ingredients are covered with liquid. It will be an extremely sticky dough.

5. Flour your kitchen counter generously, scrape the sticky dough onto the surface, with the help of the extra flour on the surface (and maybe even more, if you feel like you need it) put the dough together on the counter and try to make a rough loaf shape.


6. Butter your loaf pan and put the dough in it. Put extra seeds on the surface generously.

7. Put the loaf in the oven, in middle rack, and heat the oven to 100C. After 30 minutes, put boiling water in an oven-proof pan and put the pan at the base of the oven. Increase the heat to 175C and bake for 1 more hour. At the end of it, test with a toothpick in the middle, if baked well, take it out of the oven.

8. After about 5 minutes, take the bread out of the mould. Leave it to completely cool down on a wire rack. Eat your first slice with a nice layer of butter on.. Yummmm!


Pingback: NORWEGIAN BREAD and RUSSIAN SALAD | Marina in Helsinki
Hello there! I was just in Norway for the second time and ate so much of this yummy bread! I am so happy to find your recipe!!! I am also a Designer and LOVE to cook and bake. Already following you on IG. Wish you all the best, all the way from Brasil! =)
Wow it’s great to hear! And I’m happy to know that you are a designer too! Cheers to Brasil, all the way from Finland!
I lived in Norway for eight wondefull years living the culture and cuisine. This looks the closest to the grovb I ate every day. Risen tak for the recipe.
Oh lovely to hear that! You’re welcome! :)
Thank you for this recipe–delicious! But most of the seeds came off the top; do you press them in? I was reluctant to do that, thinking I’d inhibit the yeast.
My first visit to Helsinki two weeks ago included a culinary tour of your beautiful city, can’t wait to come back.
Oh yes, Helsinki is lovely! And yes, you can slowly press the seeds. Cheers!
Pingback: Assignment 40: Norway – Wooden Spoon Wanderer
Hi Asli,
We just made this beautiful bread for our Norway post on our blog Wooden Spoon Wanderer (www.woodenspoonwanderer.wordpress.com). It was delicious. We will definitely be making another loaf soon!
Hi! Lovely to hear that, i’m very happy to see you likes it so much! Enjoy! ^^
Thank you for sharing this wonderful bread recipe! My mom has been talking about a Norwegian brown bread that she had for breakfast ever since her trip there! This was the closest recipe anything is ever come to it! I shared it with friends of mine my graduate program and other family members! Sending you appreciation and love from Ohio in the United States!
This is so lovely to hear! And I’m sending love and hugs to you and your mom & family!
Hi Asli!
I’m glad I found your site! I recently got back from Norway and have tried to make Fjellbrød 3 times. I used your recipe and I finally realized I was reading oven temperatures as Fahrenheit instead of Celsius as was listed and it was much better. I have still been plagued by a question you might be able to answer: serving size, calories and weight.
A slice of wheat bread at 100 calories per 38g a slice doesn’t translate well for these types of home baked breads. I’ve been bedeviled by a lack of information on making this calculation, especially when it comes to grams. At least with a measurement in weight, calories can be figured out.
I count calories and have dropped 45 lbs in 9 months doing so with exercise. Carbs are of little interest to me. Do you have any idea what the serving size for a ‘slice’ of bread like this might be as it translates to grams? The content is so different from standard bread that it has to be quite different.
Thanks,
John
(Sorry about the Orc icon if it shows up, I can’t figure out how to change it)
Hi John!
Thanks for your question. It’s an interesting one for me because I never counted / calculated calories in any of my cookings / bakings. I honestly have no idea what the calories may be. But I found this link: https://healthyeating.sfgate.com/determine-caloric-content-home-cooking-10191.html So next time you bake you can make a calculation and see the answer to your question! If I bake this bread again, I will try to do that too because I am now intrigued. :) Greetings from Helsinki!
Hi! Your recipe looks amazing- just what I’ve been looking for. Unfortunately, my oven is not working anymore. Do you think it’s possible to make it in a pan (essen style) on stove top? Thanks!
Hi! I’m glad you liked the recipe. :) About your question: I don’t see how it can be possibly made on the stove to be honest. It is a slow baked bread, with the help of steam inside the oven as in traditional bread baking and it needs fermentation etc. I also personally never made bread on the pan except for some flat bread types so yes, as I said, I don’t see how or if it can be made on the stove, but i’m sceptical about it..
Hallo Asli!
This recipe was forwarded to me by a friend… I’ve recently moved to Norway and I’ve started to also fall in love with their food. I wanted to try this recipe but I generally don’t like super dense breads. Do you think leaving the dough to rise for 30 mins before baking it would work, and give it a bit more “lift”? Thanks!
Hei! Lovely to hear that you moved to Norway! As for the bread: this bread is supposed to be dense (but it is not super dense). You can try to let it rise to make it lighter but I’m not sure if it will help. Also, you might need to add a bit more yeast if you want to really “lift” it, I’m not sure how much though. Good luck!
Just like to post an update and say that I tried 3tsp of yeast and did not let it sit for a rise – it came out wonderfully. Crisp crust with a soft, dense (but not too dense!) middle. Perfect for some slices of brown cheese. Thanks for the recipe. :)
Great! Bon appetit!
This bread looks great and I’m excited to make it!
In Step 7, it says, “Put the loaf in the oven, in middle rack, and heat the oven to 100C.” Does this mean to put the loaf into a cold oven and then start heating it to 100C? Or do I preheat the oven to 100C and then put the loaf in? Thanks!
Hi, yes you put the bread in the oven and THEN start heating the oven. Happy baking!
Pingback: Around the world in 80 bakes, no.22: Fjellbrød from Norway – Polything
Is there a non dairy substitute for milk?
Yes there are many types of non dairy milk alternatives out there. I think for this recipe oat milk would be a good option.
Hi Asli, this bread looks amazing. I’ve had Danish bread before and can’t wait to try this recipe. Should I use raw seeds or roasted seeds? I’ve tried to find out online, but had no success.
Hi Lisa! I used raw seeds. If you want, you can also lightly roast them too but not much. Hope you like it!
Hi, I would like to try your recipe here but can I use it in a bread making machine? I have a Lakeland Bread Maker Plus. Or can I change the ingredients somewhat to be able to use that? Thanks in advance!
Hi, not sure if my first reply worked so forgive me if this is a repeat…….I just wanted to know if I can use this recipe in a bread machine? I have the Lakeland Bread Maker Plus. If not, do you know how to change the recipe in order to use it? Thank you very much in advance…..I have subscribed to your blog and am anxious to try out many of your recipes! I also followed you on Facebook!
Wayne Watts (American in Ho Chi Minh City, Saigon!)
Hi. I’m happy to hear that you subscribed to the blog! But unfortunately i can’t help you with the bread machine – i never used one in my life and i have no idea how the recipe can work in it. :/
Fair enough. Thank you for the reply. Don’t worry, subscribing to your blog was a no brainer as we say in the USA. Your food looks fantastic! Anyway, I start using the bread machine tomorrow, and after I’ve gotten the hang of it and figured out the whole process a bit better, I will do my best to make your bread here, in the machine and if I can get it just right, I will share it with you for your audience.
Looking forward to hear about your experiment! Cheers!
Oh…..the problem here is that 99% of apartments and homes don’t have a proper oven! Mine doesn’t either……so I bought a bread machine to make bread!
I would like to know if it worked out in the breadmachine? I am looking forward to hear from you because i would to transform this bread also.
I tried it in the bread machine and it worked out great! I put in all of the wet ingredients first and used the whole wheat setting on my bread machine. I waited until the second need to add the seeds and monitored the blending of them in order to make sure that they didn’t fall to the bottom. I did not add seeds to the top prior to baking because I didn’t want to disrupt the heat from the rise. So the bread doesn’t look quite as pretty but it is very delicious.
Pingback: Veganized Cheeses From Around the World – Vegan Vixen Ventures