
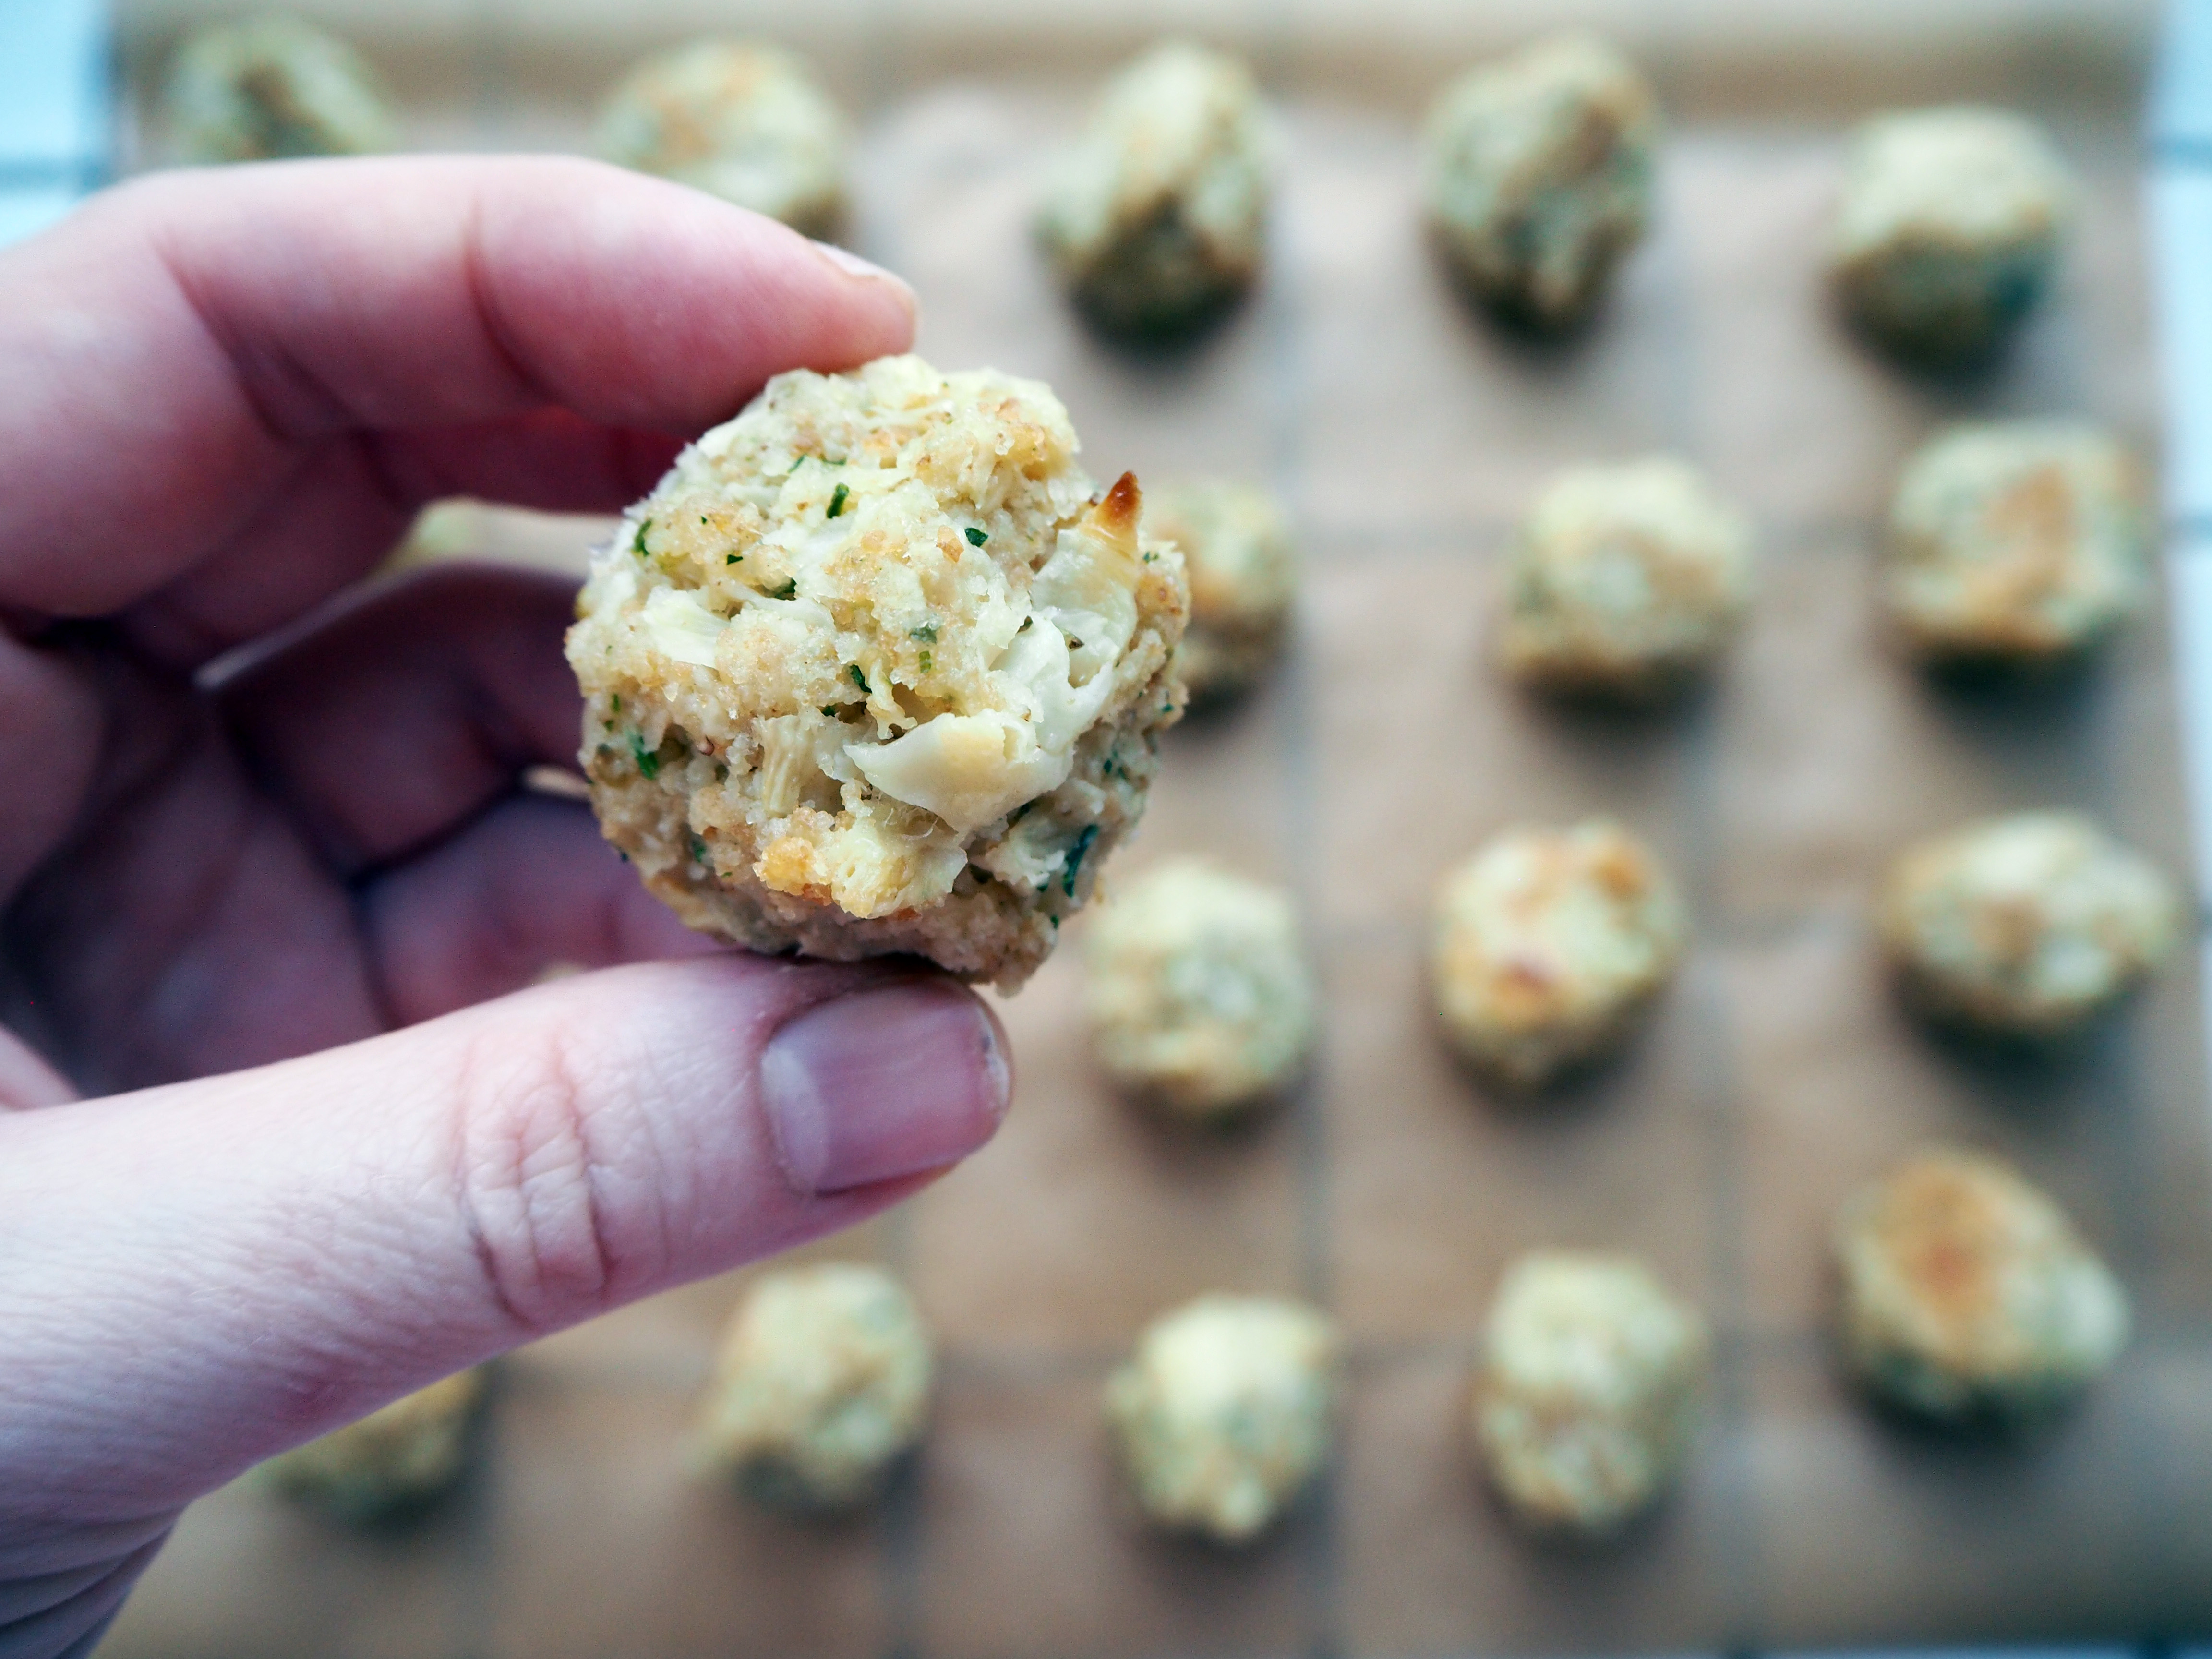
Yes, celeriac is my favourite vegetable. I posted several celeriac recipes over the years (find them here). This is yet a new trial, turning them into vegetable balls!
I made these cute little balls for the first time when I was on holiday in Sinop a few weeks ago. I made them for family lunch and the celeriac lover members of the family loved them. They don’t know much about vegetable balls in general (nobody is vegetarian in my family except me) and they had never seen celeriac used this way.
For me, though, any veggie can be turned into balls! In this one, there is also a generous amount of cheese and I think cheese and celeriac are great together (something I discovered by making these balls). I used Emmental, but you can also use another hard, grated cheese, like gruyere or gouda or even cheddar. For me, the mild taste of Emmental worked best though.

I used gluten free breadcrumbs to keep the moisture level checked, but you can also use regular breadcrumbs if you like, or you can even use corn flour (not starch, but corn meal) however, you might have to use a different amount than gluten free breadcrumbs.
Enjoy your celeriac balls with fresh salad, or some rice, or pasta…!
—
Ingredients:
Difficulty: Easy
(makes about 34-36)
Printable PDF-recipe (no photos)
2 lt. water
2 tsp lemon juice
650 gr. celeriac
100 gr. grated Emmental (or another hard cheese you like)
2 tsp dried oregano
2 cloves of garlic, mashed
a small bunch of parsley, finely chopped (about 2 tbsp)
1 egg
2 dl (or 3/4 cup + 4 tsp) gluten free breadcrumbs*
2 tsp olive oil
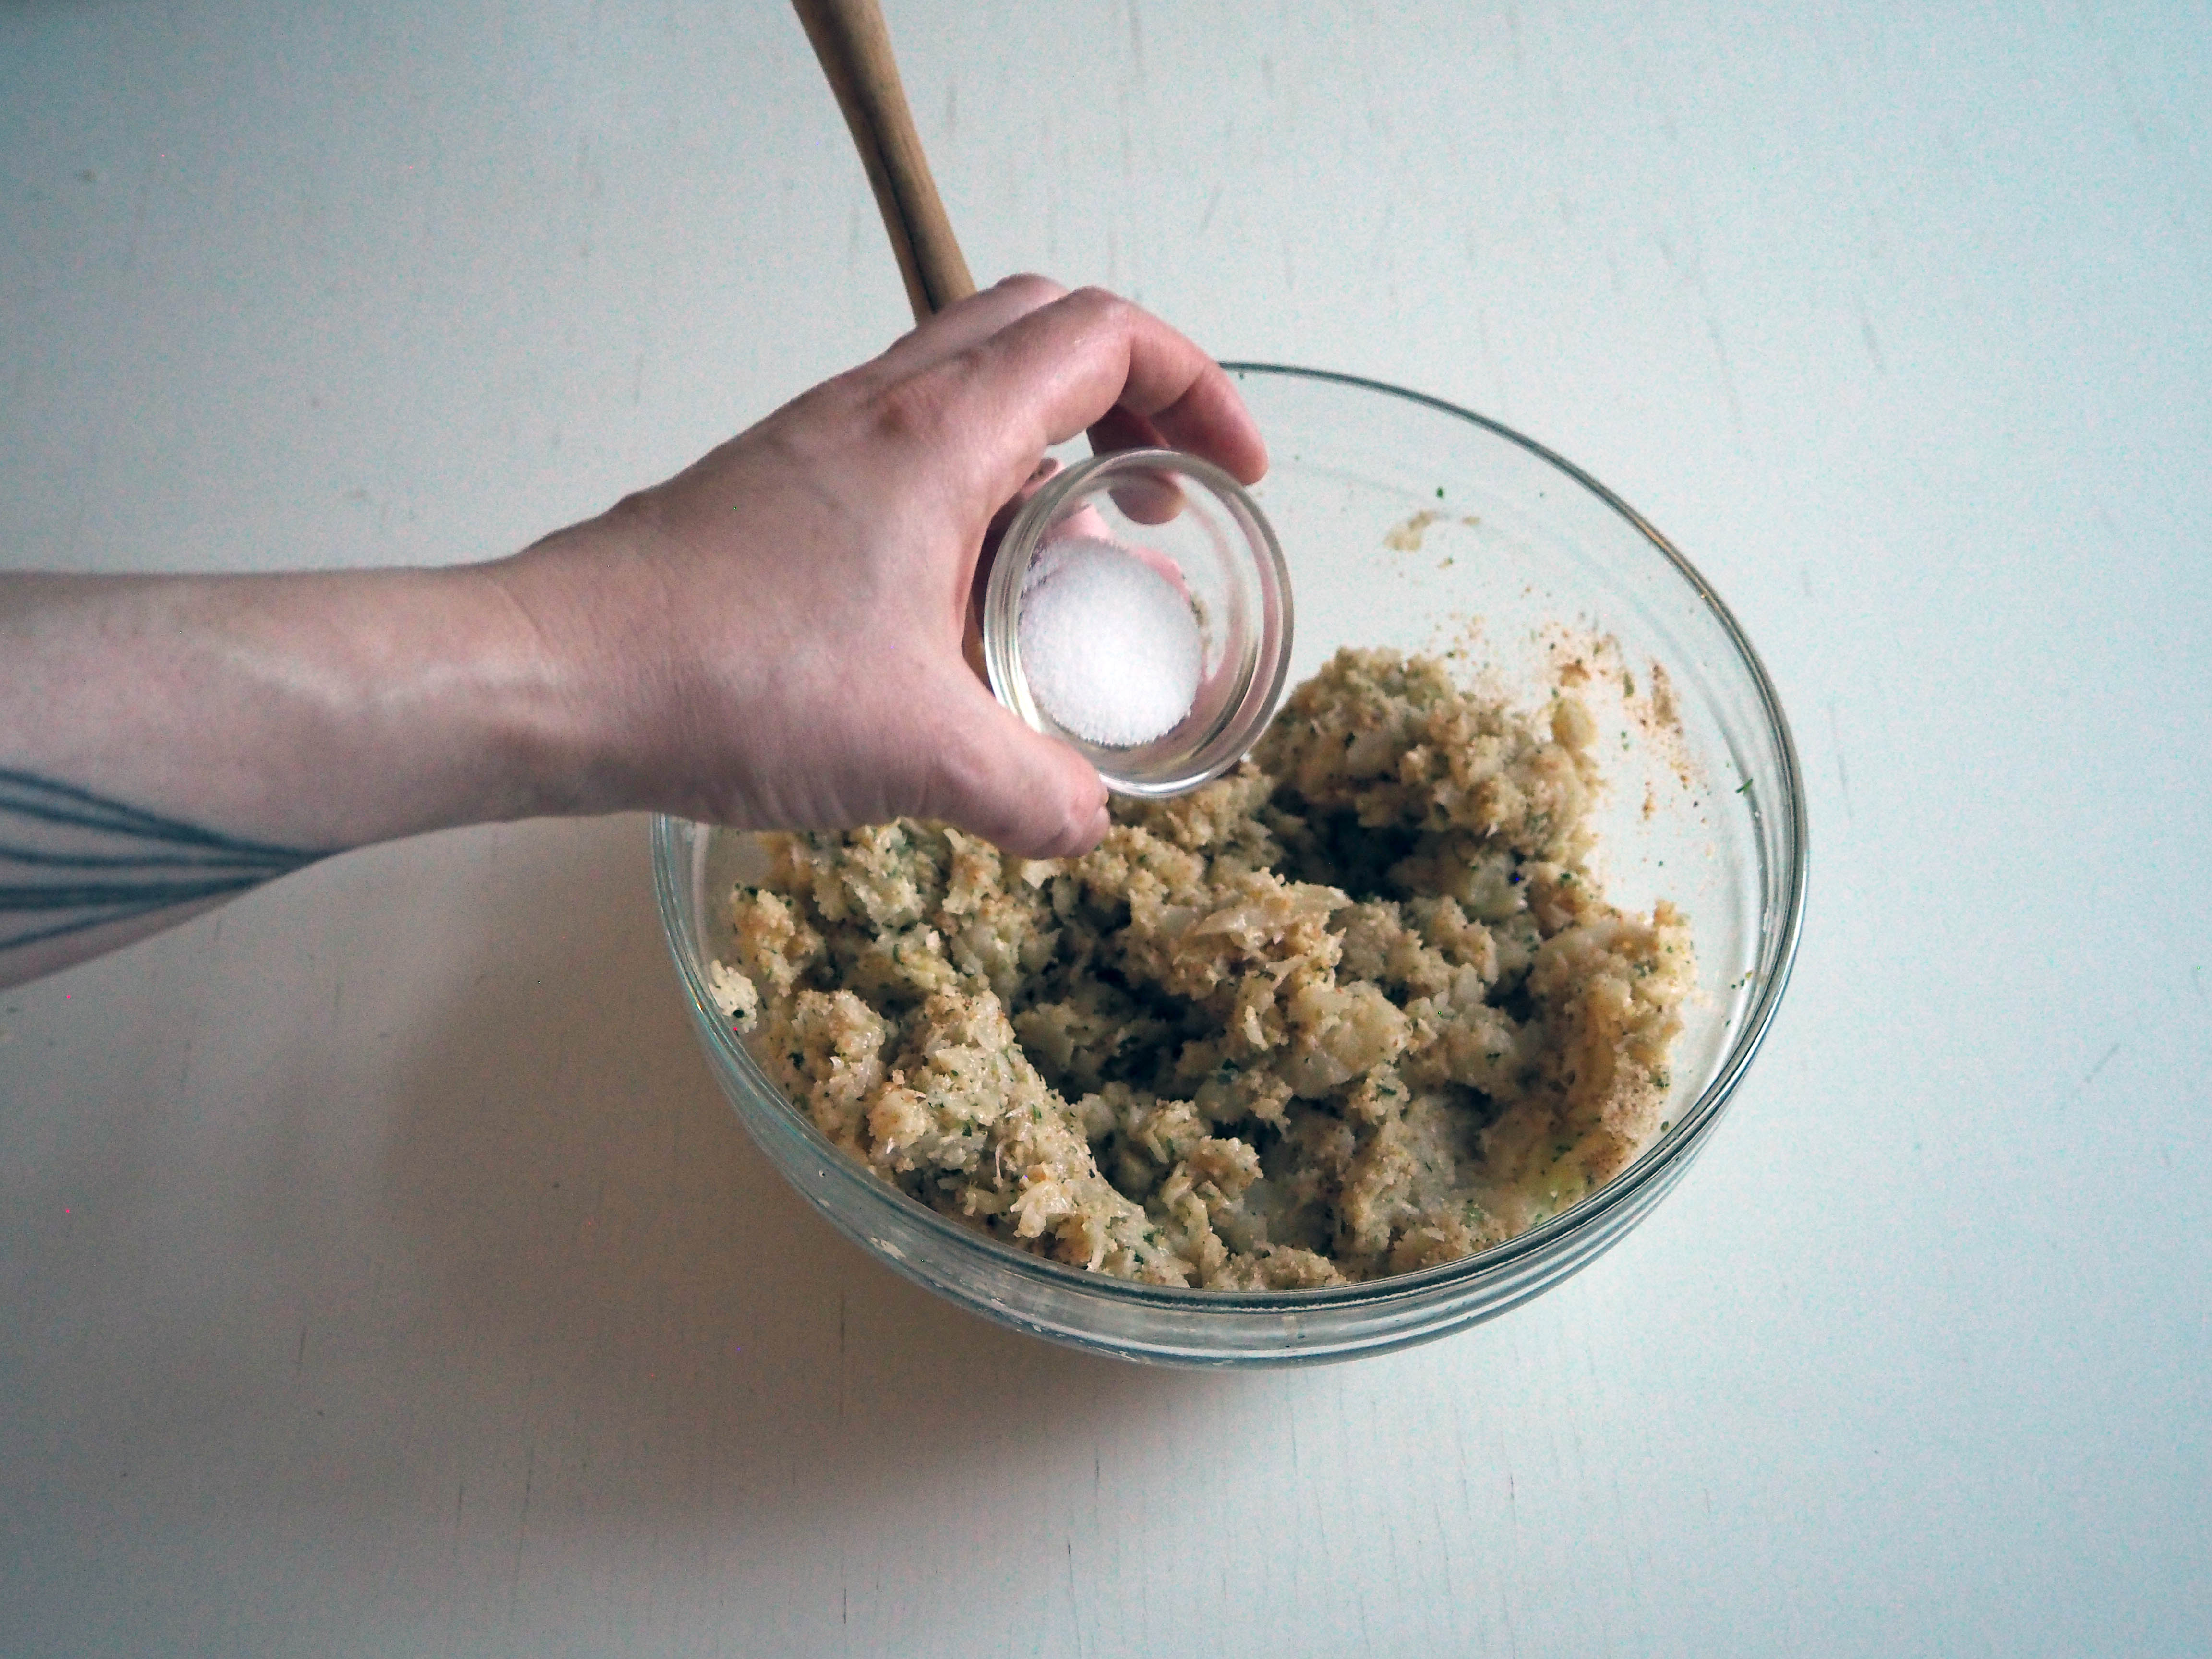
1 tsp salt
*If you are not trying to make it gluten free, you can use regular breadcrumbs. You can also use corn flour (not starch, but corn meal) but I am not sure about the exact amount you need to use in that case. So start with a small amount and add gradually until you reach the desired consistency.

—
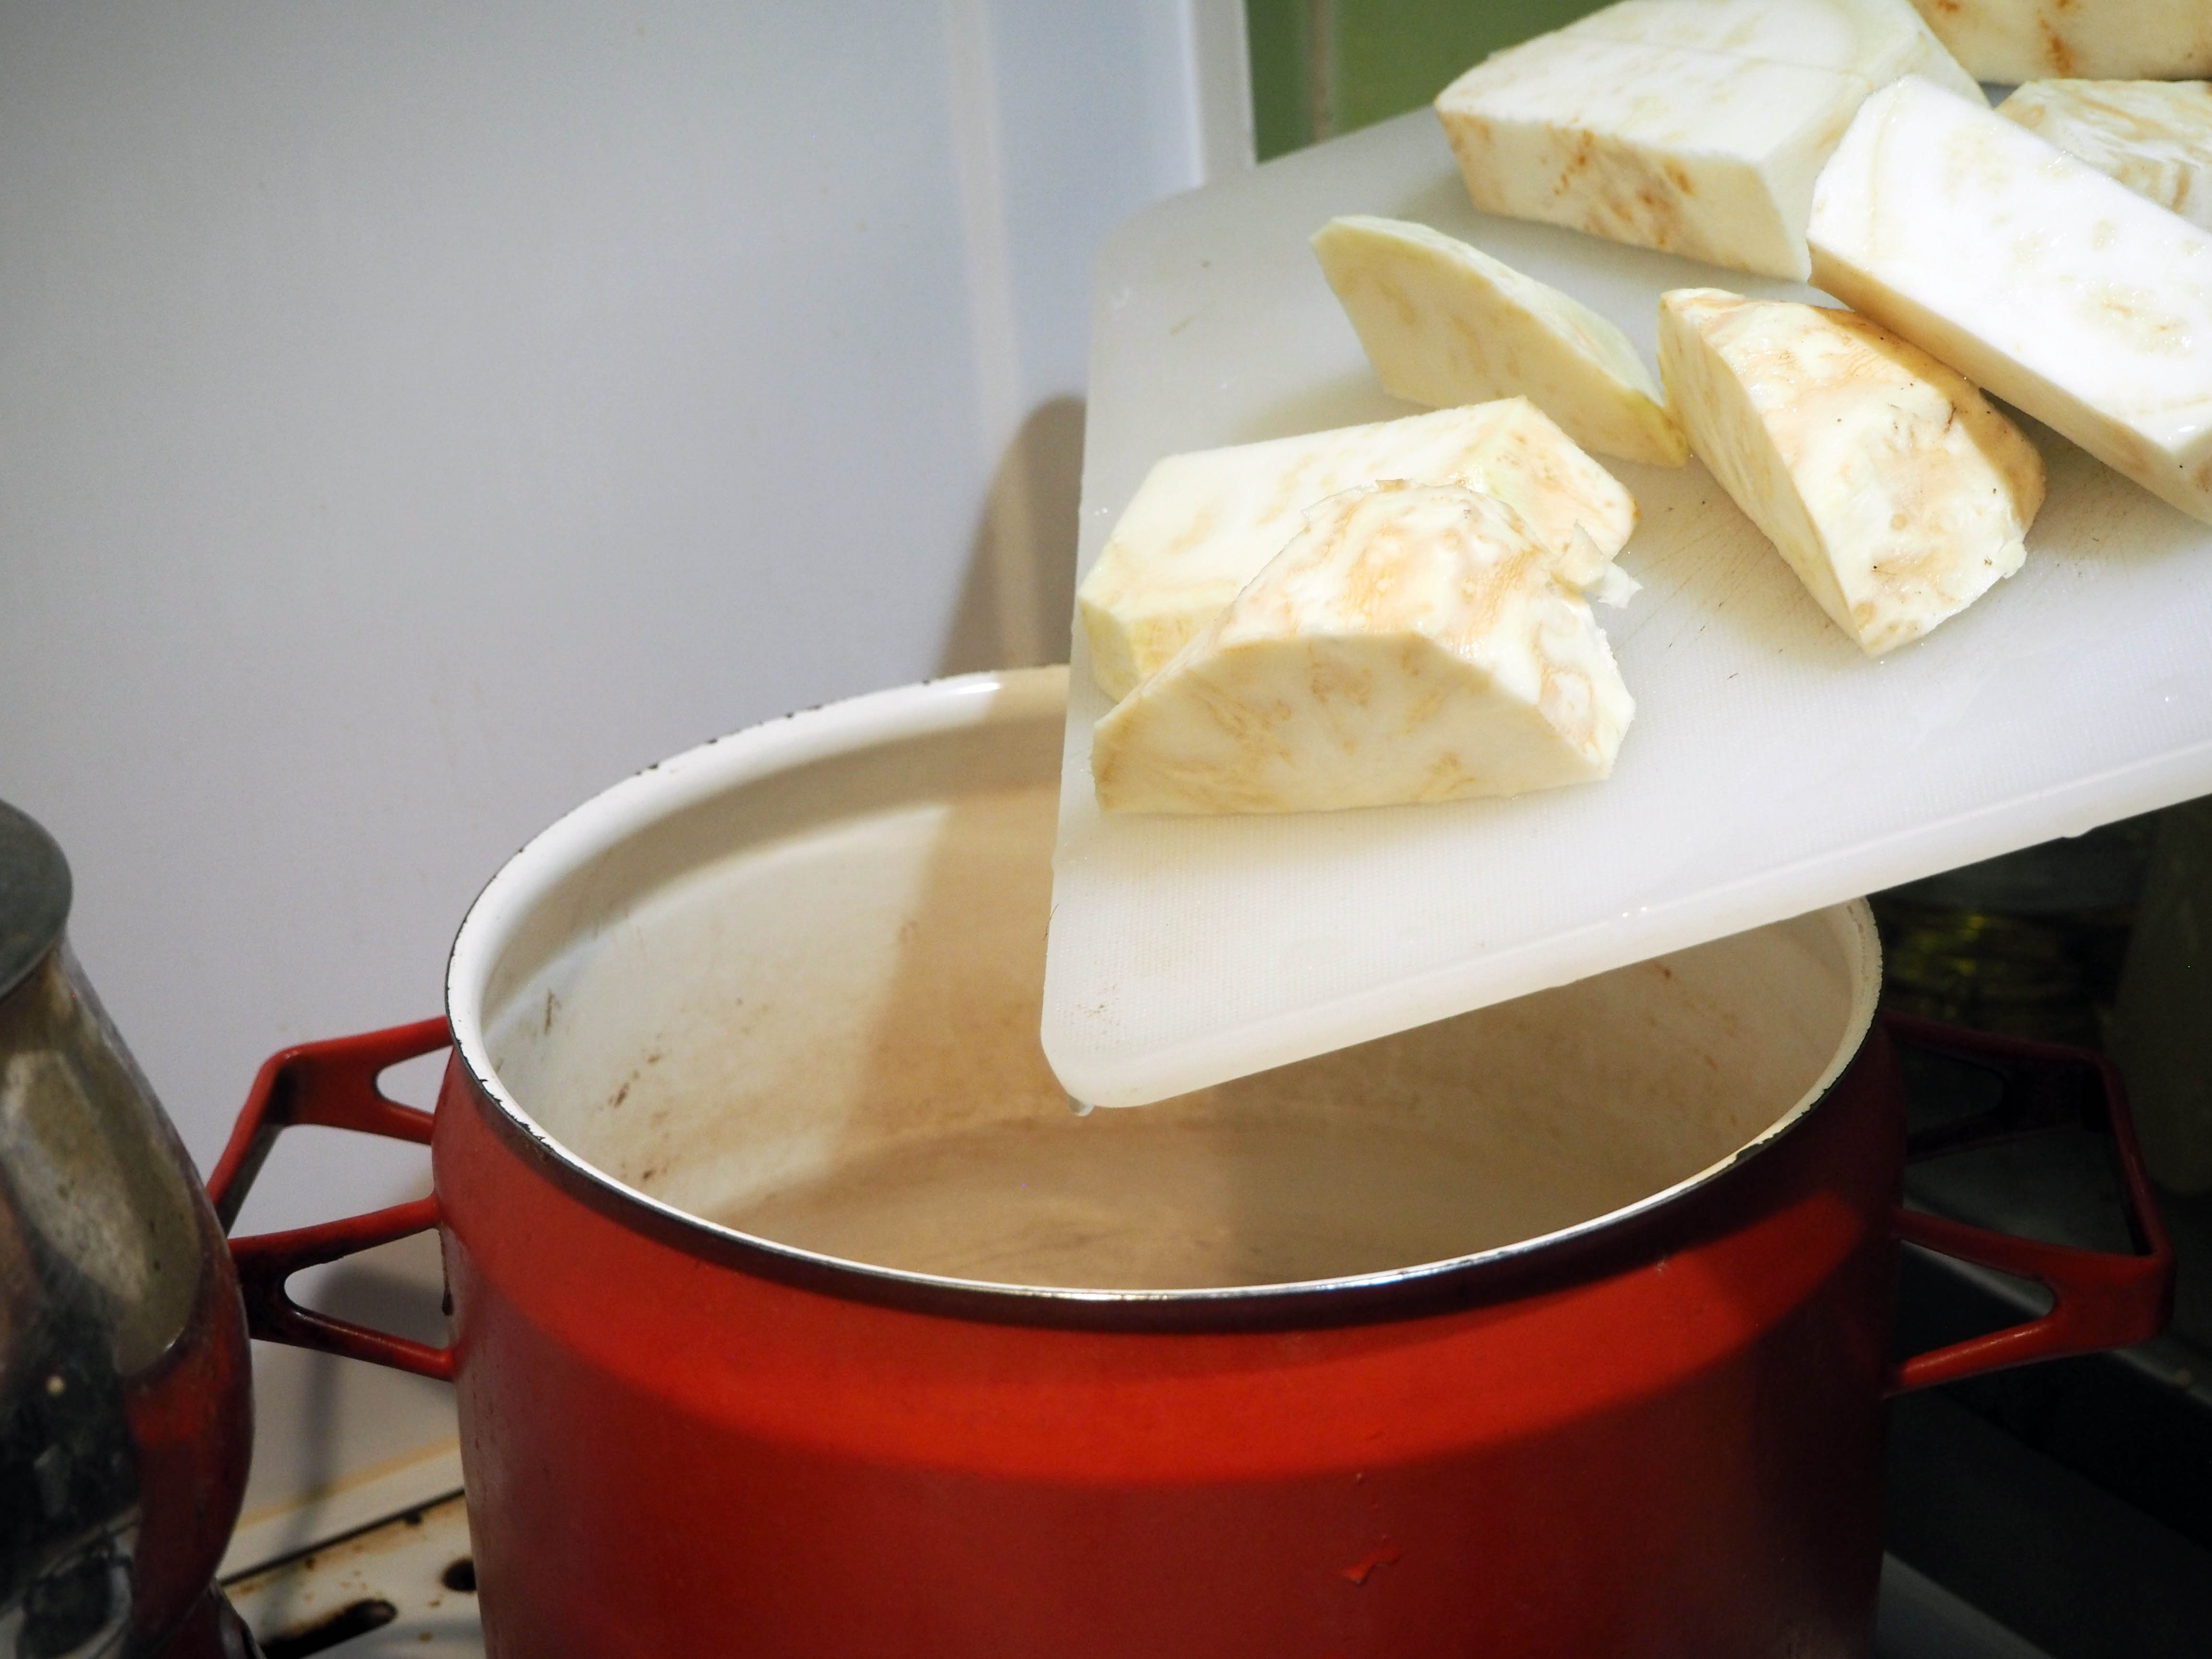
1. Put 2 lt. water and lemon juice in a pot and put on medium high heat to let it boil.


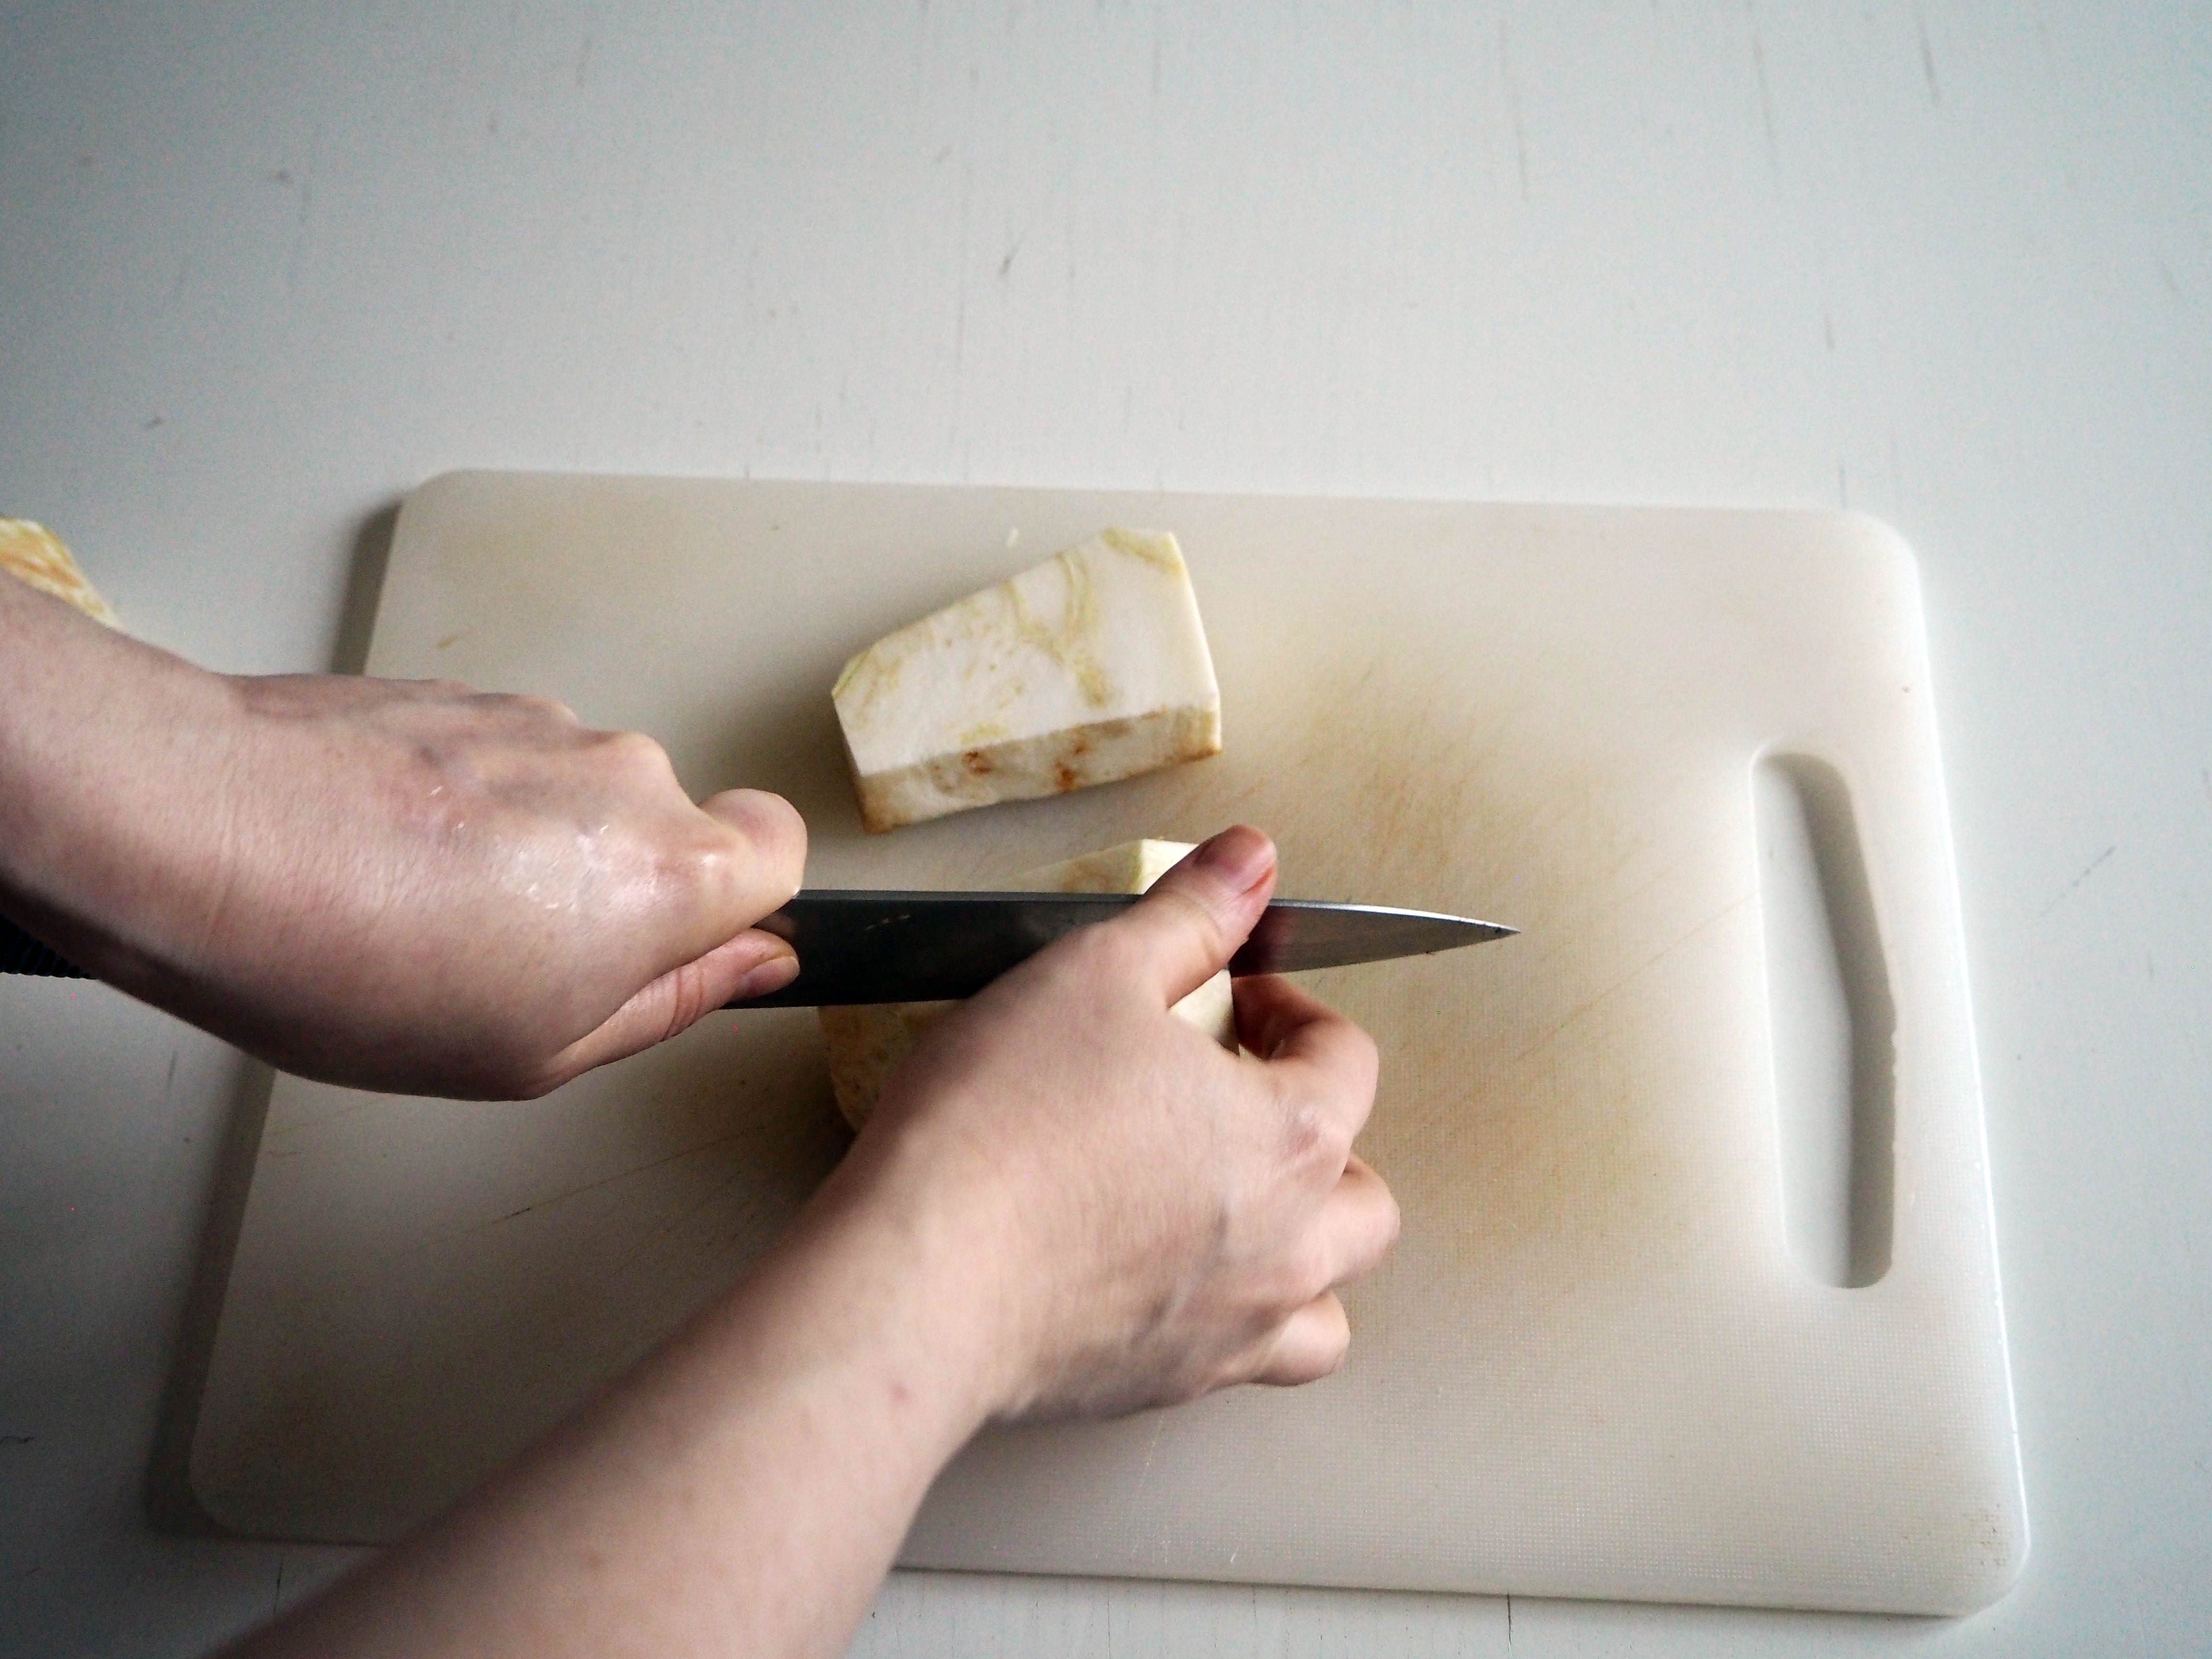
2. While water is boiling, trim and peel celeriac.


3. Cut celeriac in large chunks to cook and later process easier.

4. Put celeriac pieces in boiling water and cover the pot. Let them cook for about 10 minutes, until they are tender, but not too soft (check with a fork frequently to prevent cooking too much). When ready, take out of the heat and drain the water.

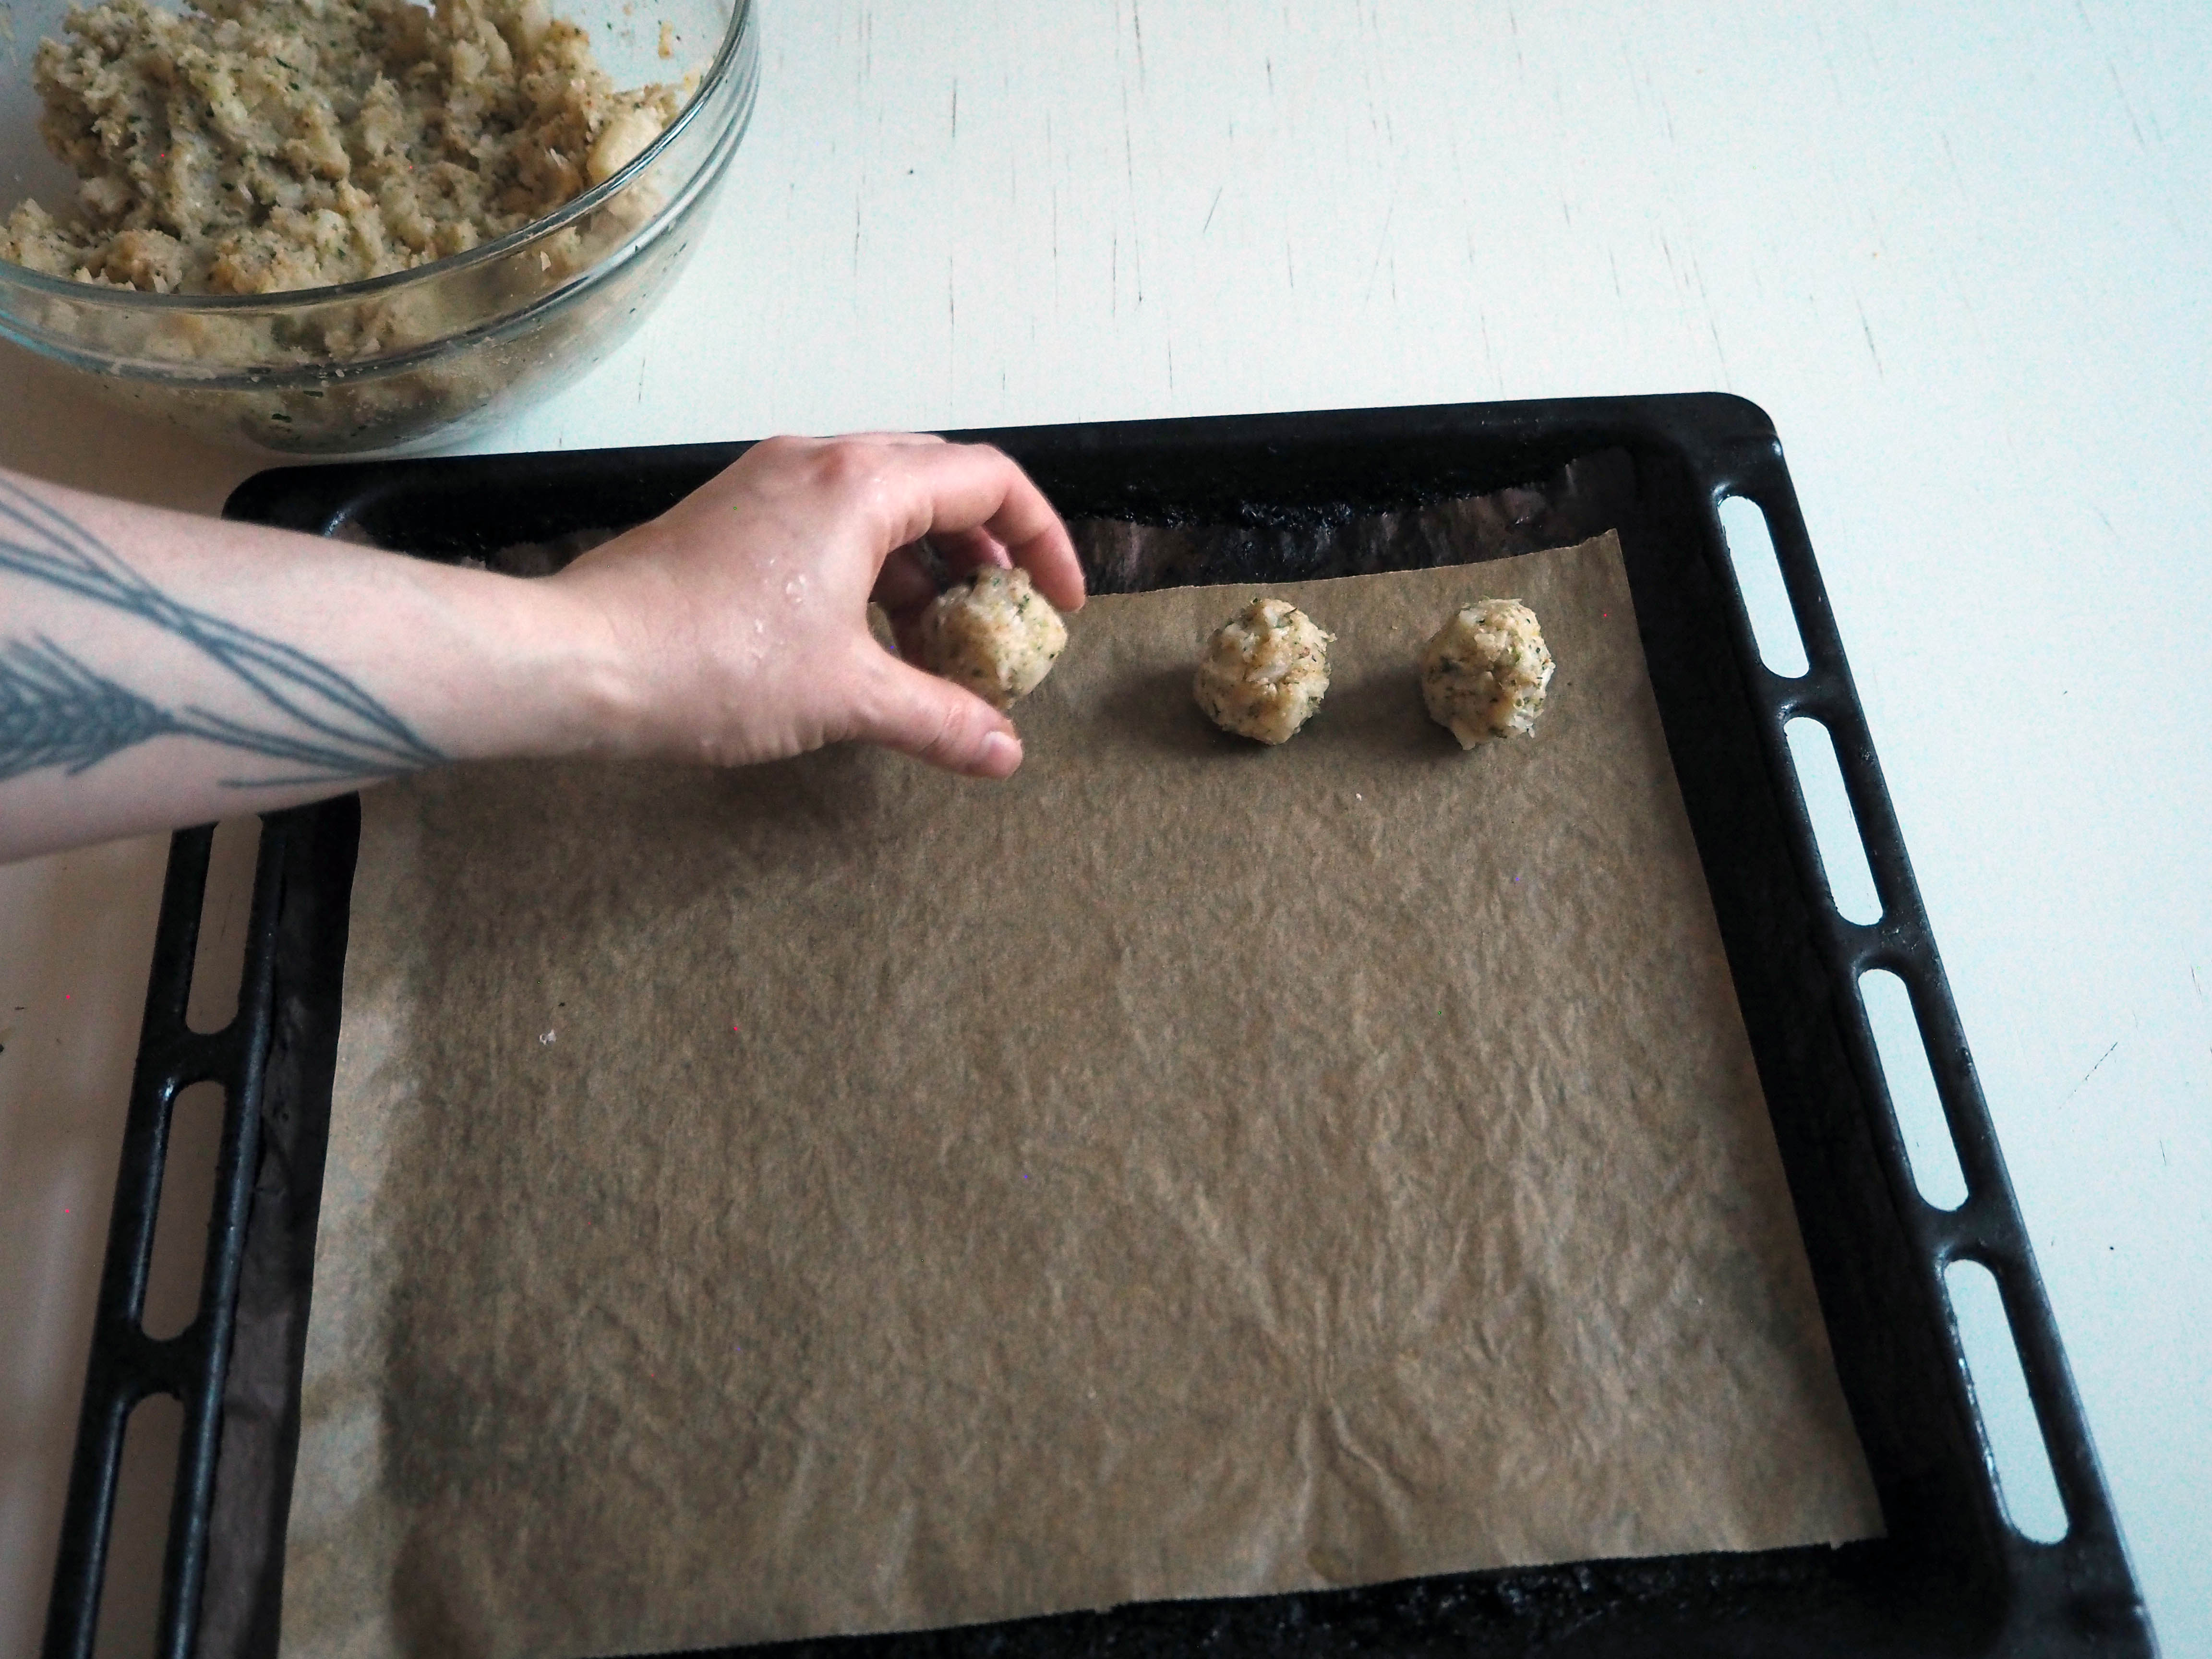
5. Preheat the oven to 200C. Prepare 1 (or 2, depending on the size of your oven) oven tray by covering with a baking paper.
6. Grate cooked celeriac pieces. Alternatively, do what I did: put them in food processor and process briefly – the idea is to chop the pieces into very small pieces but not to puree them.

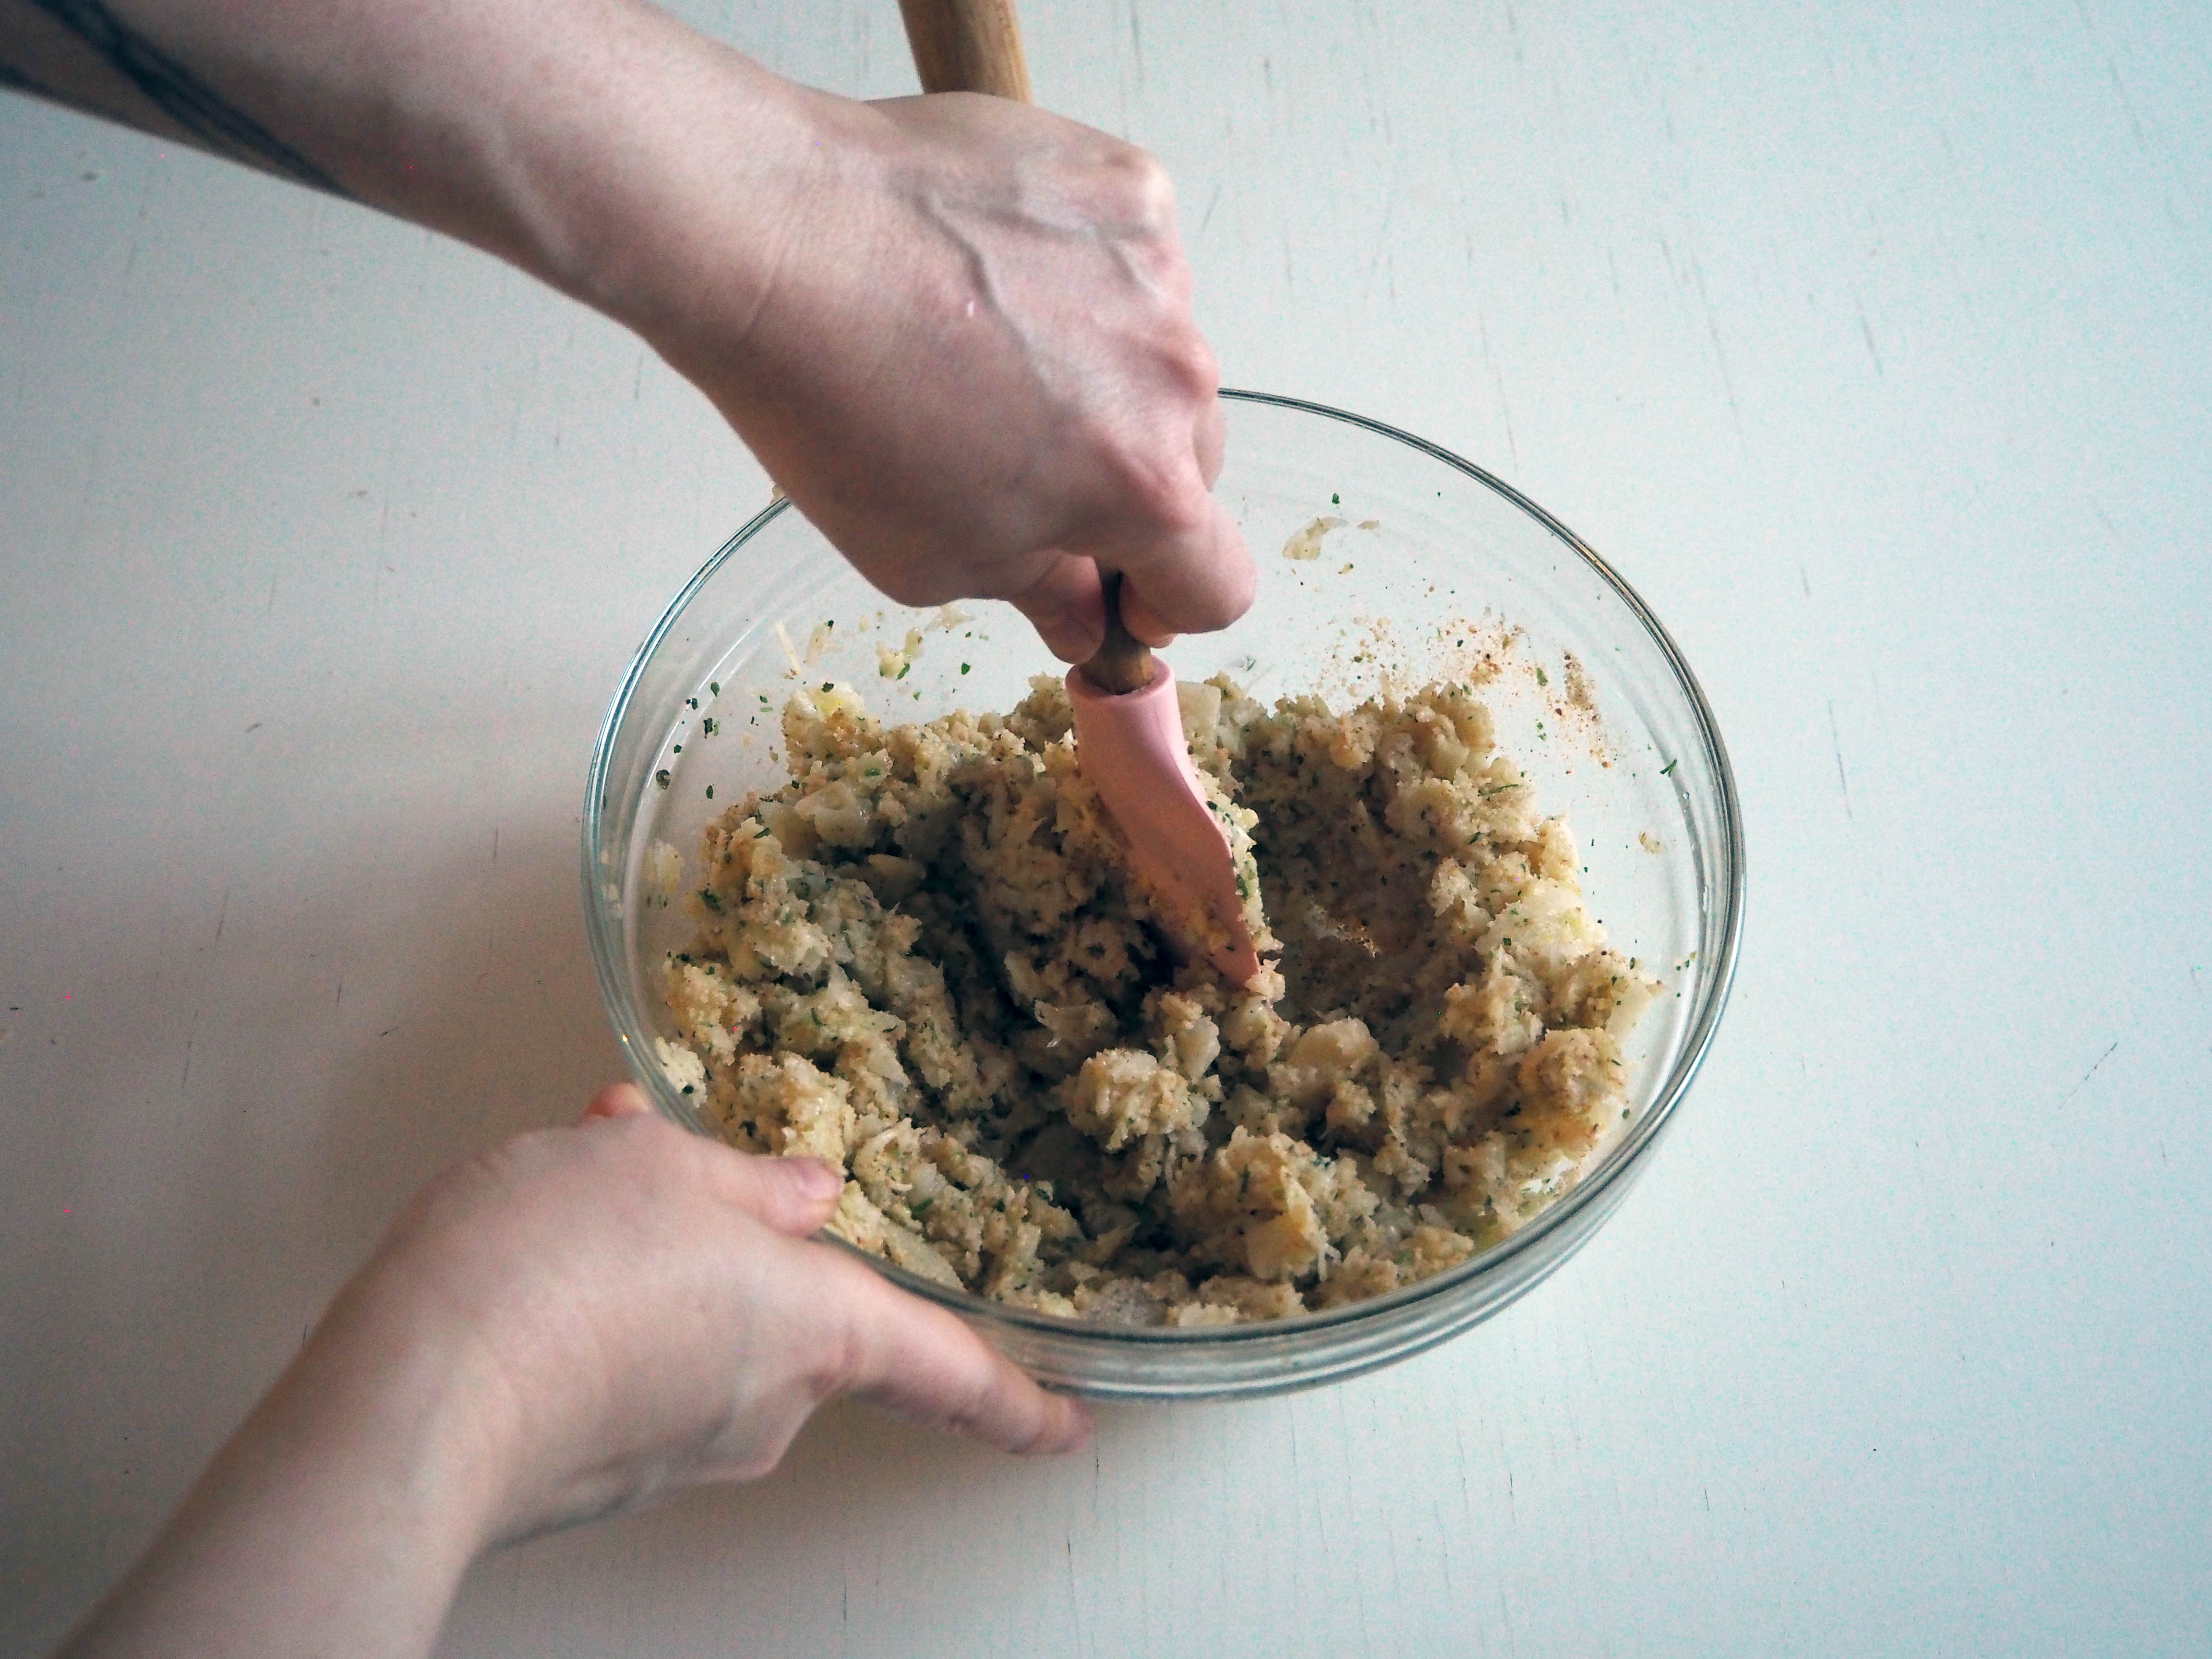
7. In a mixing bowl, put chopped or grated celeriac and all the rest of the ingredients. Fold them together. You can also use your hands and knead like making meatballs. If the well mixed mixture is still too moist, add a little more breadcrumbs, gradually, until the mixture feels dry enough to keep its shape when the balls are made.
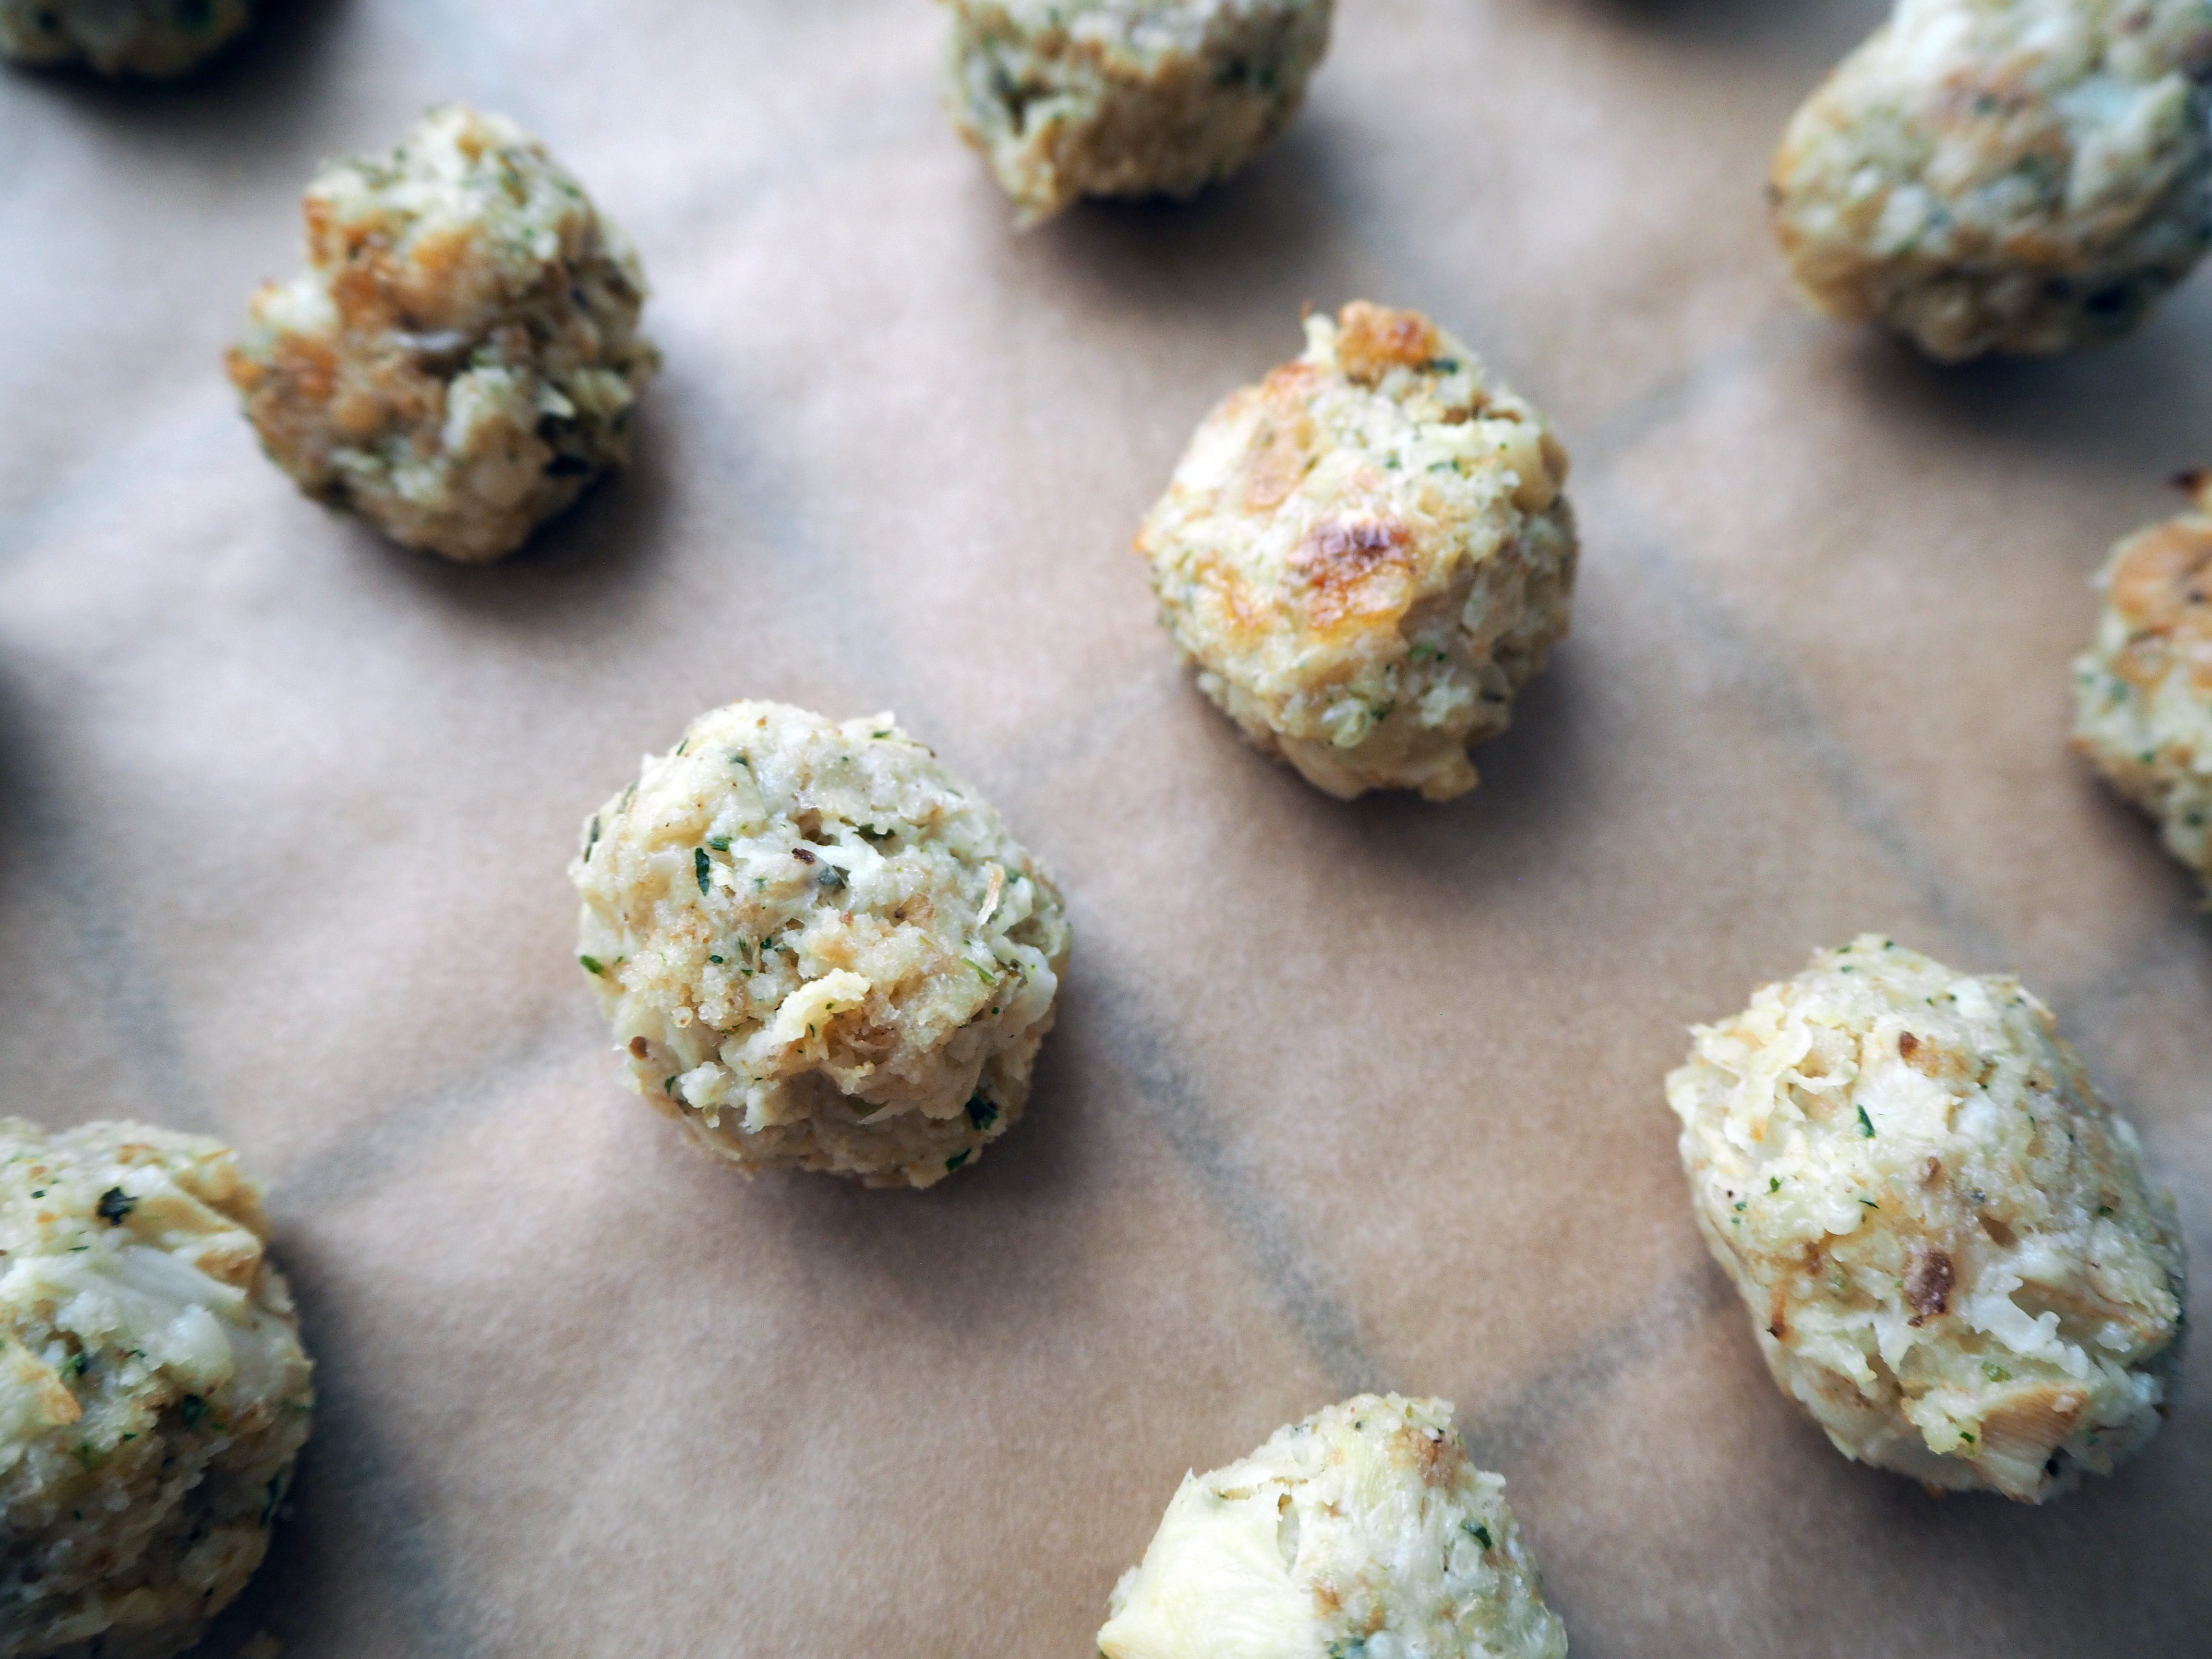
8. Make balls, about a walnut size each. Put the balls on prepared oven trays. Leave a little space between them. You don’t have to put them too further away from each other as they will not spread or get bigger or melt…

9. Put the tray(s) in the oven, in medium rack and bake for 15 minutes (if you are making in several batches, put 1 tray in the oven each time). After 15 minutes, take the tray out of the oven briefly and turn the balls to let other sides bake and then put back in the oven. Bake for 10 more minutes, then take out of the oven. Let the balls cool just a little before serving. Enjoy with fresh salad or with a side dish, like rice or pasta.


Great post😀
Thank you!
No problem :) check out my blog when you get the chance 😁
These look delicious 🌿
Thank you! ☺️
Very curious…celeriac. I have heard of this and now I want to try it.
It’s the most delicious vegetable!
They were lovely!
Great!
Pingback: Celeriac veggie balls | Gluten Free | The Petwood Hotel Blog