I’m not going to lie, I love baking, I love what measuring each ingredient carefully, I love learning about what happens inside the oven, the science behind baking.. That’s why I don’t think I will ever be a raw-only person. But I like trying new tastes every now and then, and this time I tried a 3-layers lingonberry raw cake, inspired by Pim Pauline’s recipe. I must say, though, making a raw cake in Finland needs a nice, large budget – there’s generally a big amount of nut varieties in raw cake recipes and they are really expensive here… (But then again, what is NOT expensive?!) And I decided to put the recipe now, as it looks, and with berries and cinnamon it tastes, like Christmas!


I also don’t have much experience with lingonberry – actually, I’ve never used it in anything I cooked before, and I don’t also eat it often, if ever. But in this recipe, it makes an incredible little twist in the cake – adding sour taste to the whole thing.
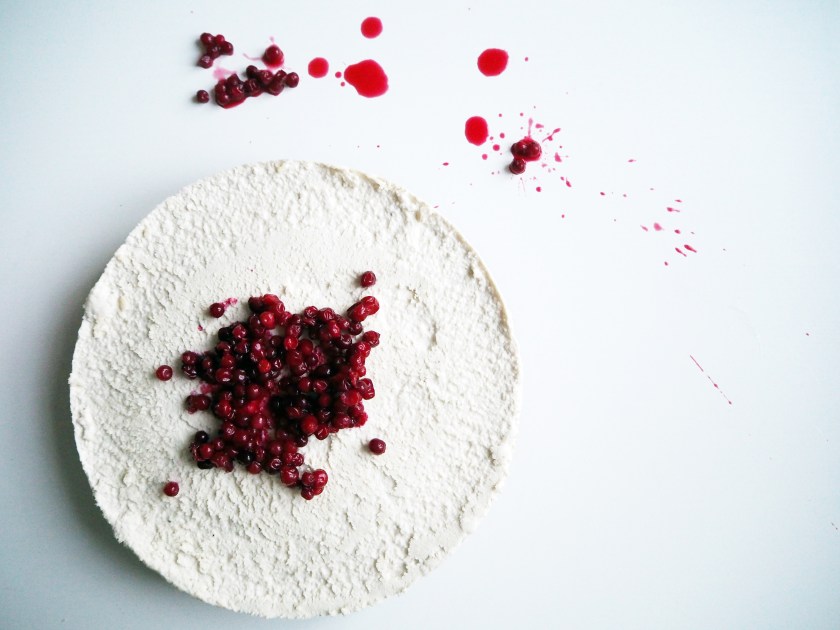
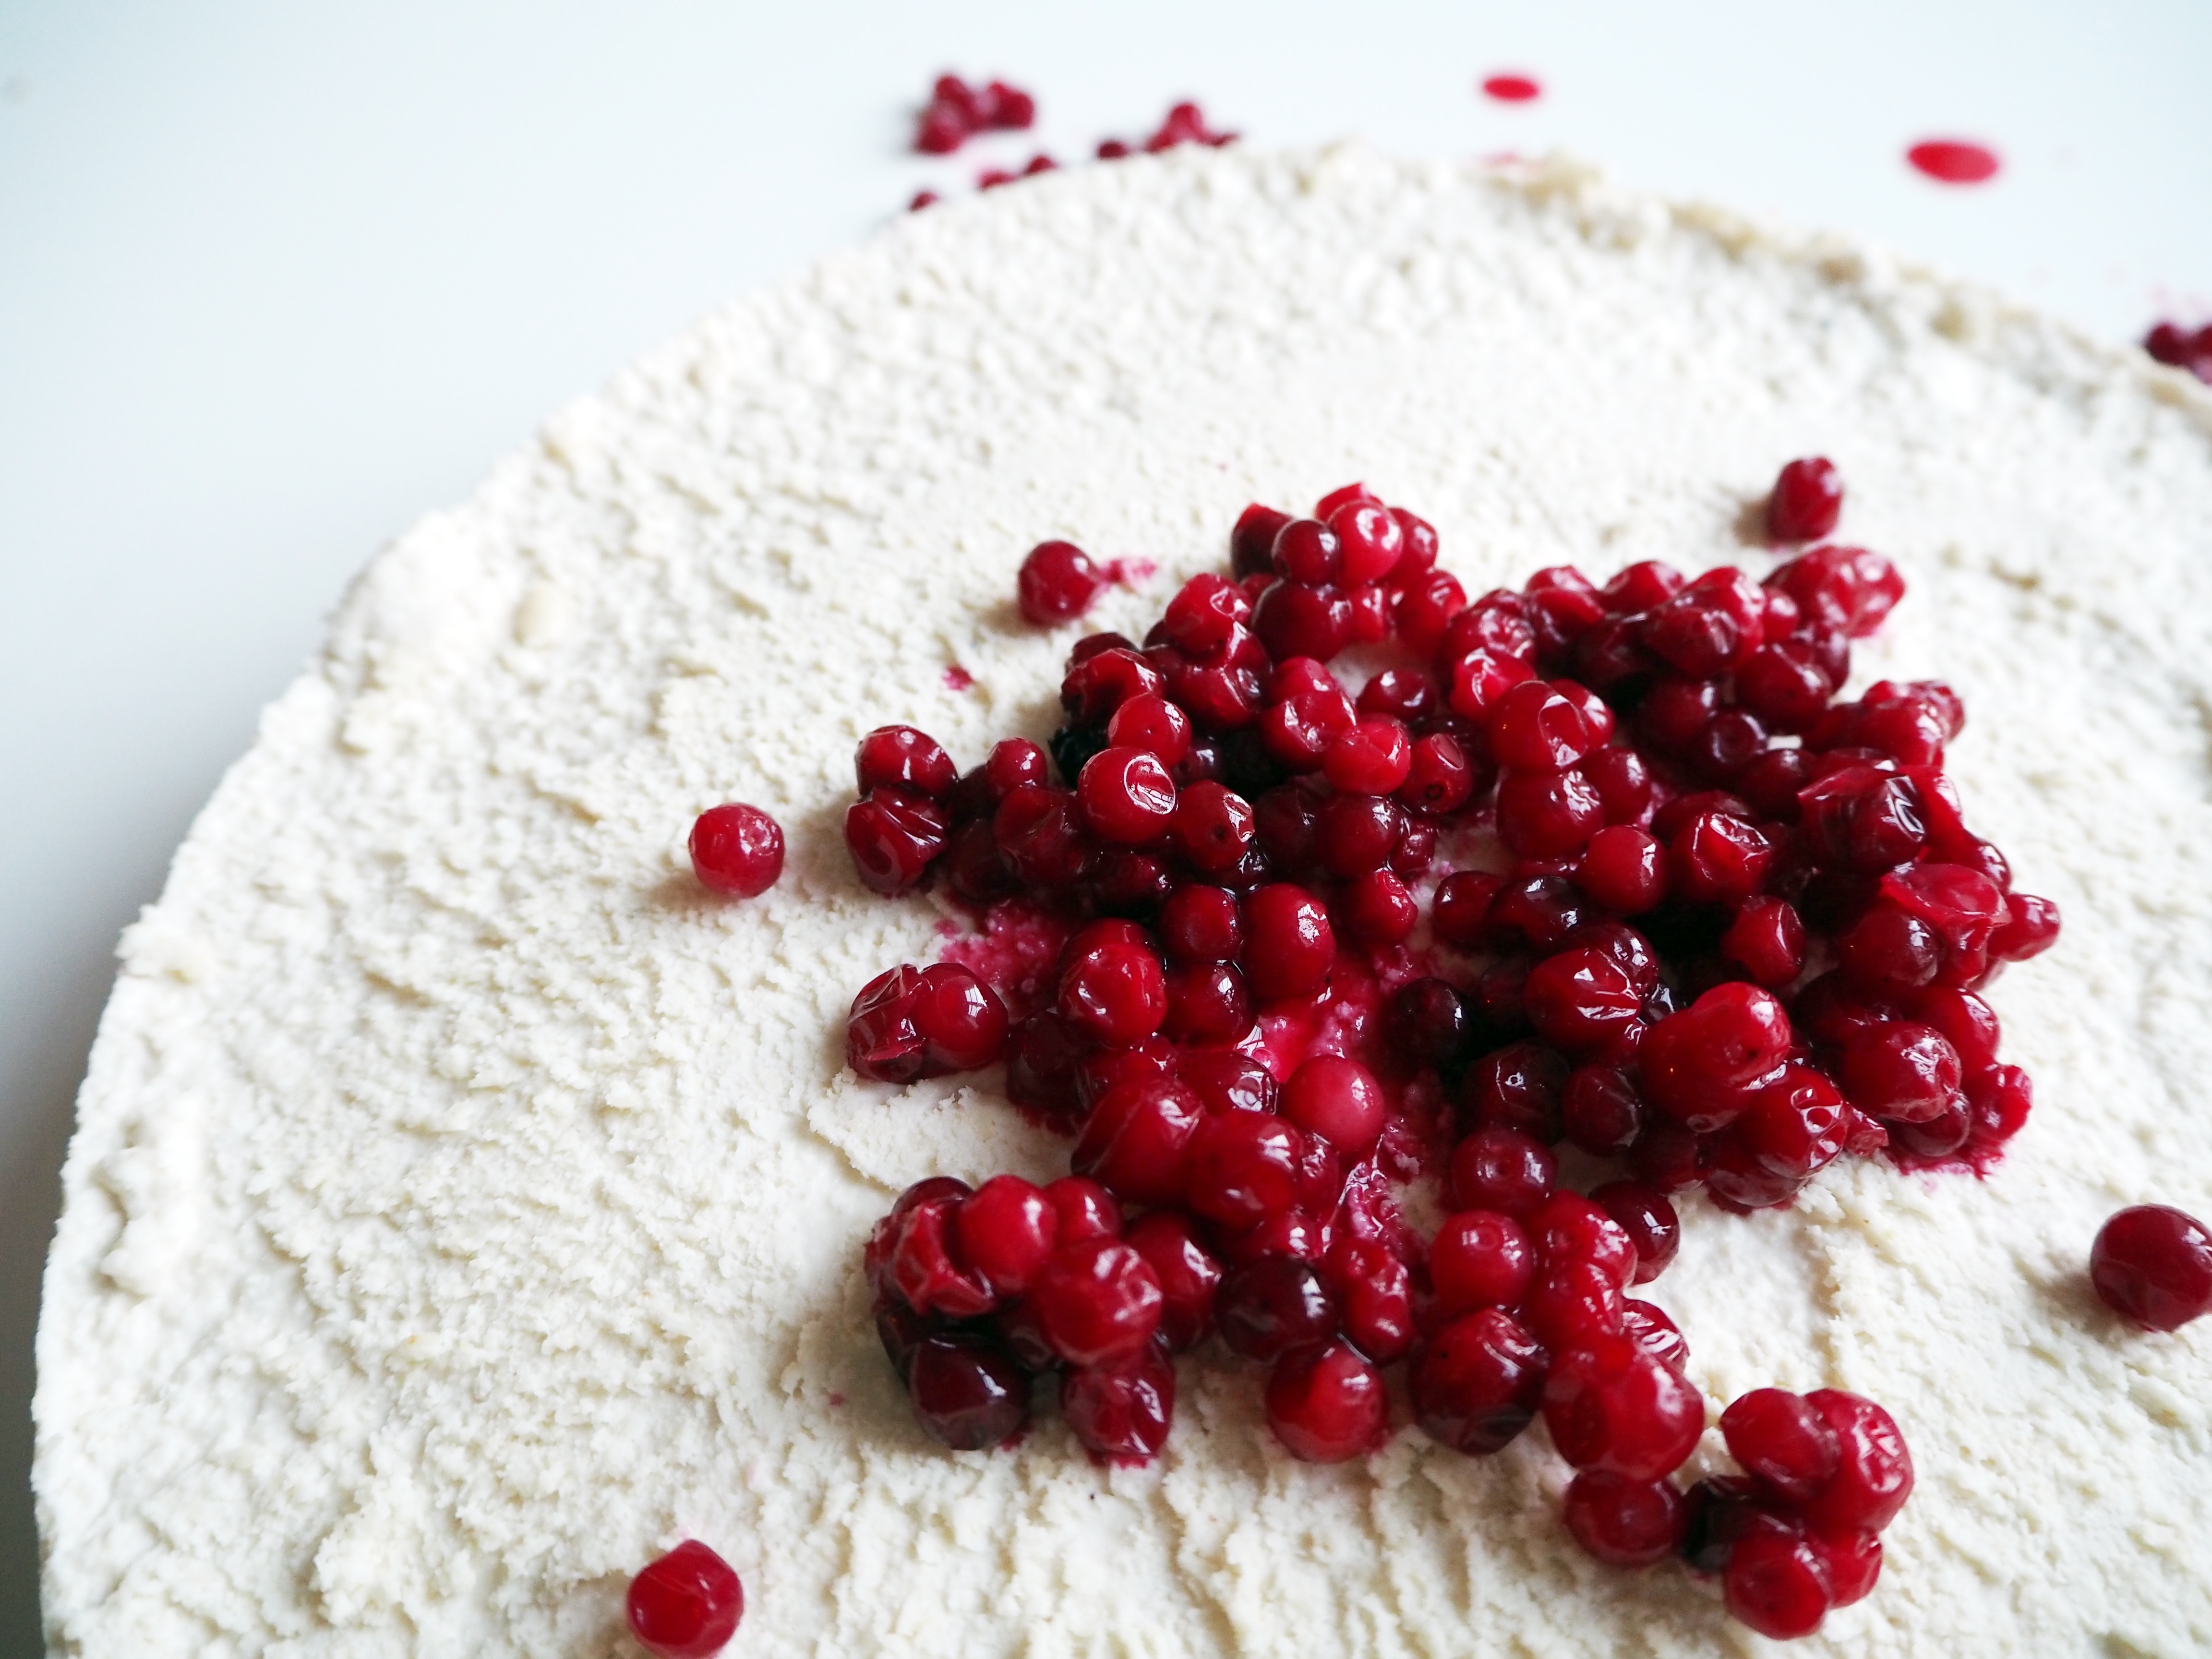
In the original recipe the surface of the cake is really smooth. I don’t know how she did it and I don’t have any spatula to do such a thing, so I just left it rough. In any case, I like rustic look for the foods anyway..

The cake is kept in the fridge – I kept it a little more than 24 hours in the fridge so that the tastes would develop slowly and nicely. As it is not kept in the freezer, it is soft enough to cut even as soon as you take it out of the fridge. However, in order to get the taste and the combination of all the layers and ingredients well enough, I would suggest to keep in room temperature for about 15 minutes before eating.
And one other good thing: the cake is both gluten free and vegan! Enjoy your raw cake!
—
Ingredients:
Difficulty: ★☆☆ (easy)
(good for a springform cake pan which is 24 cm in diameter)
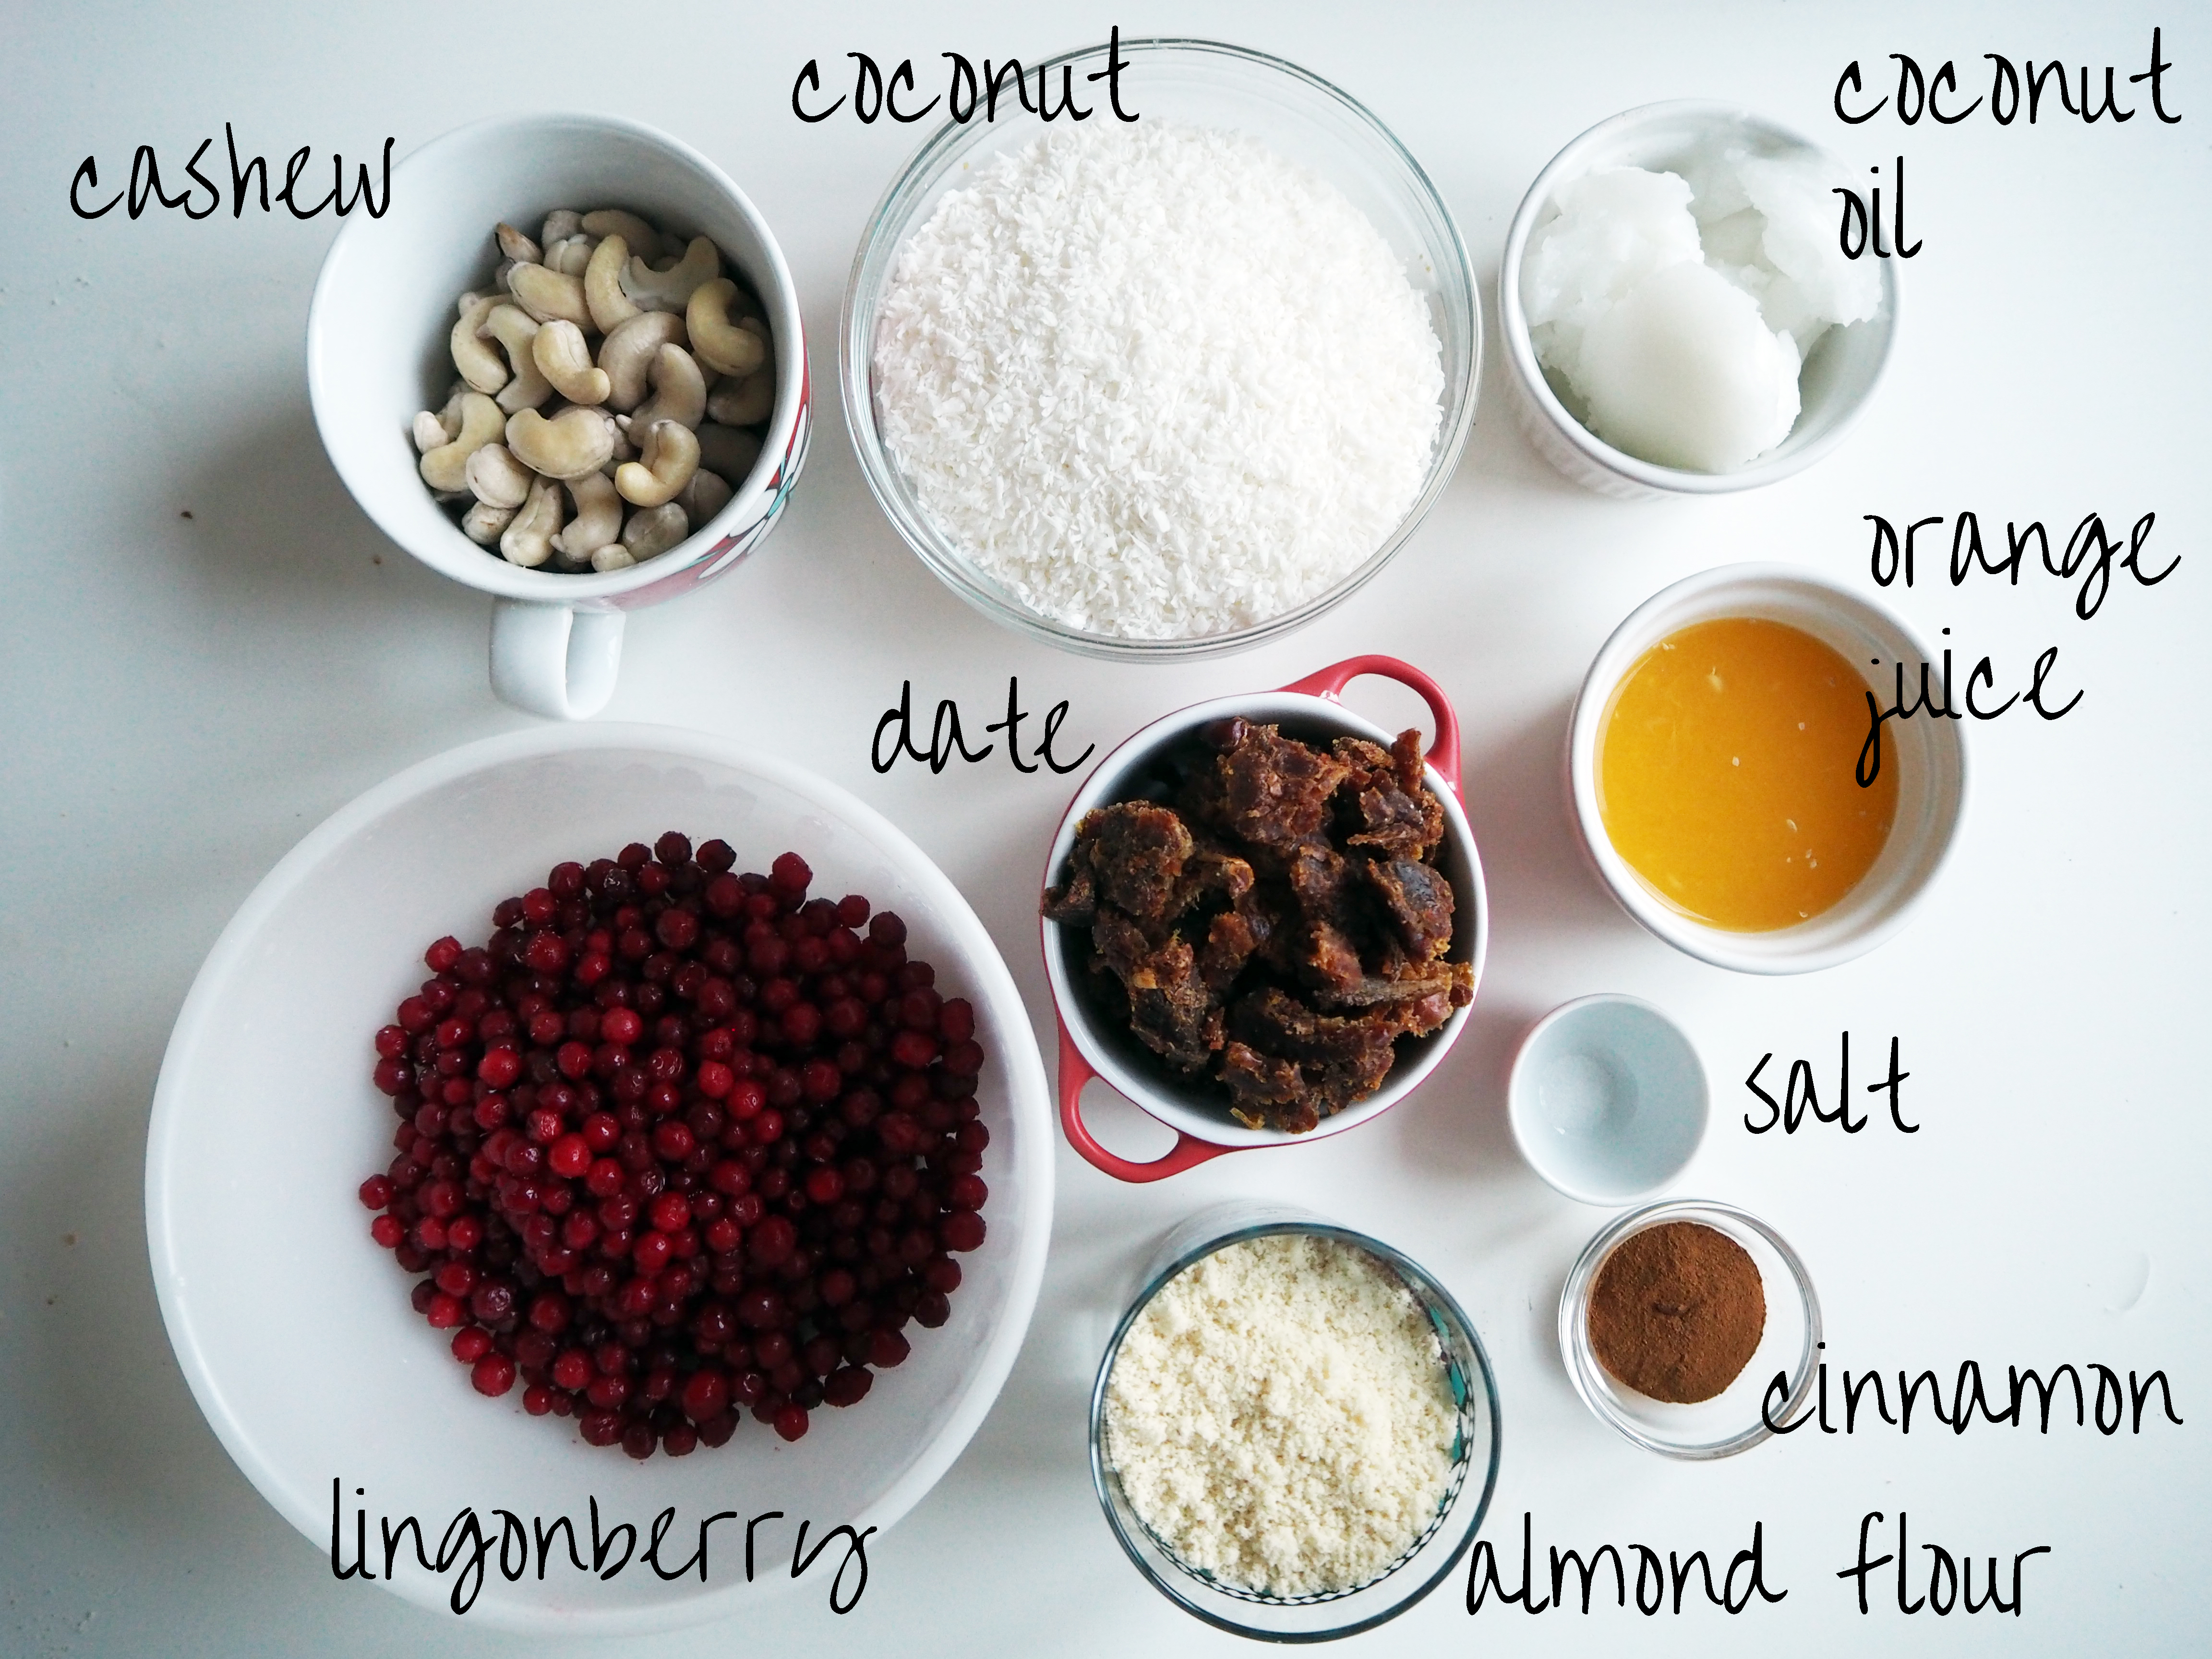
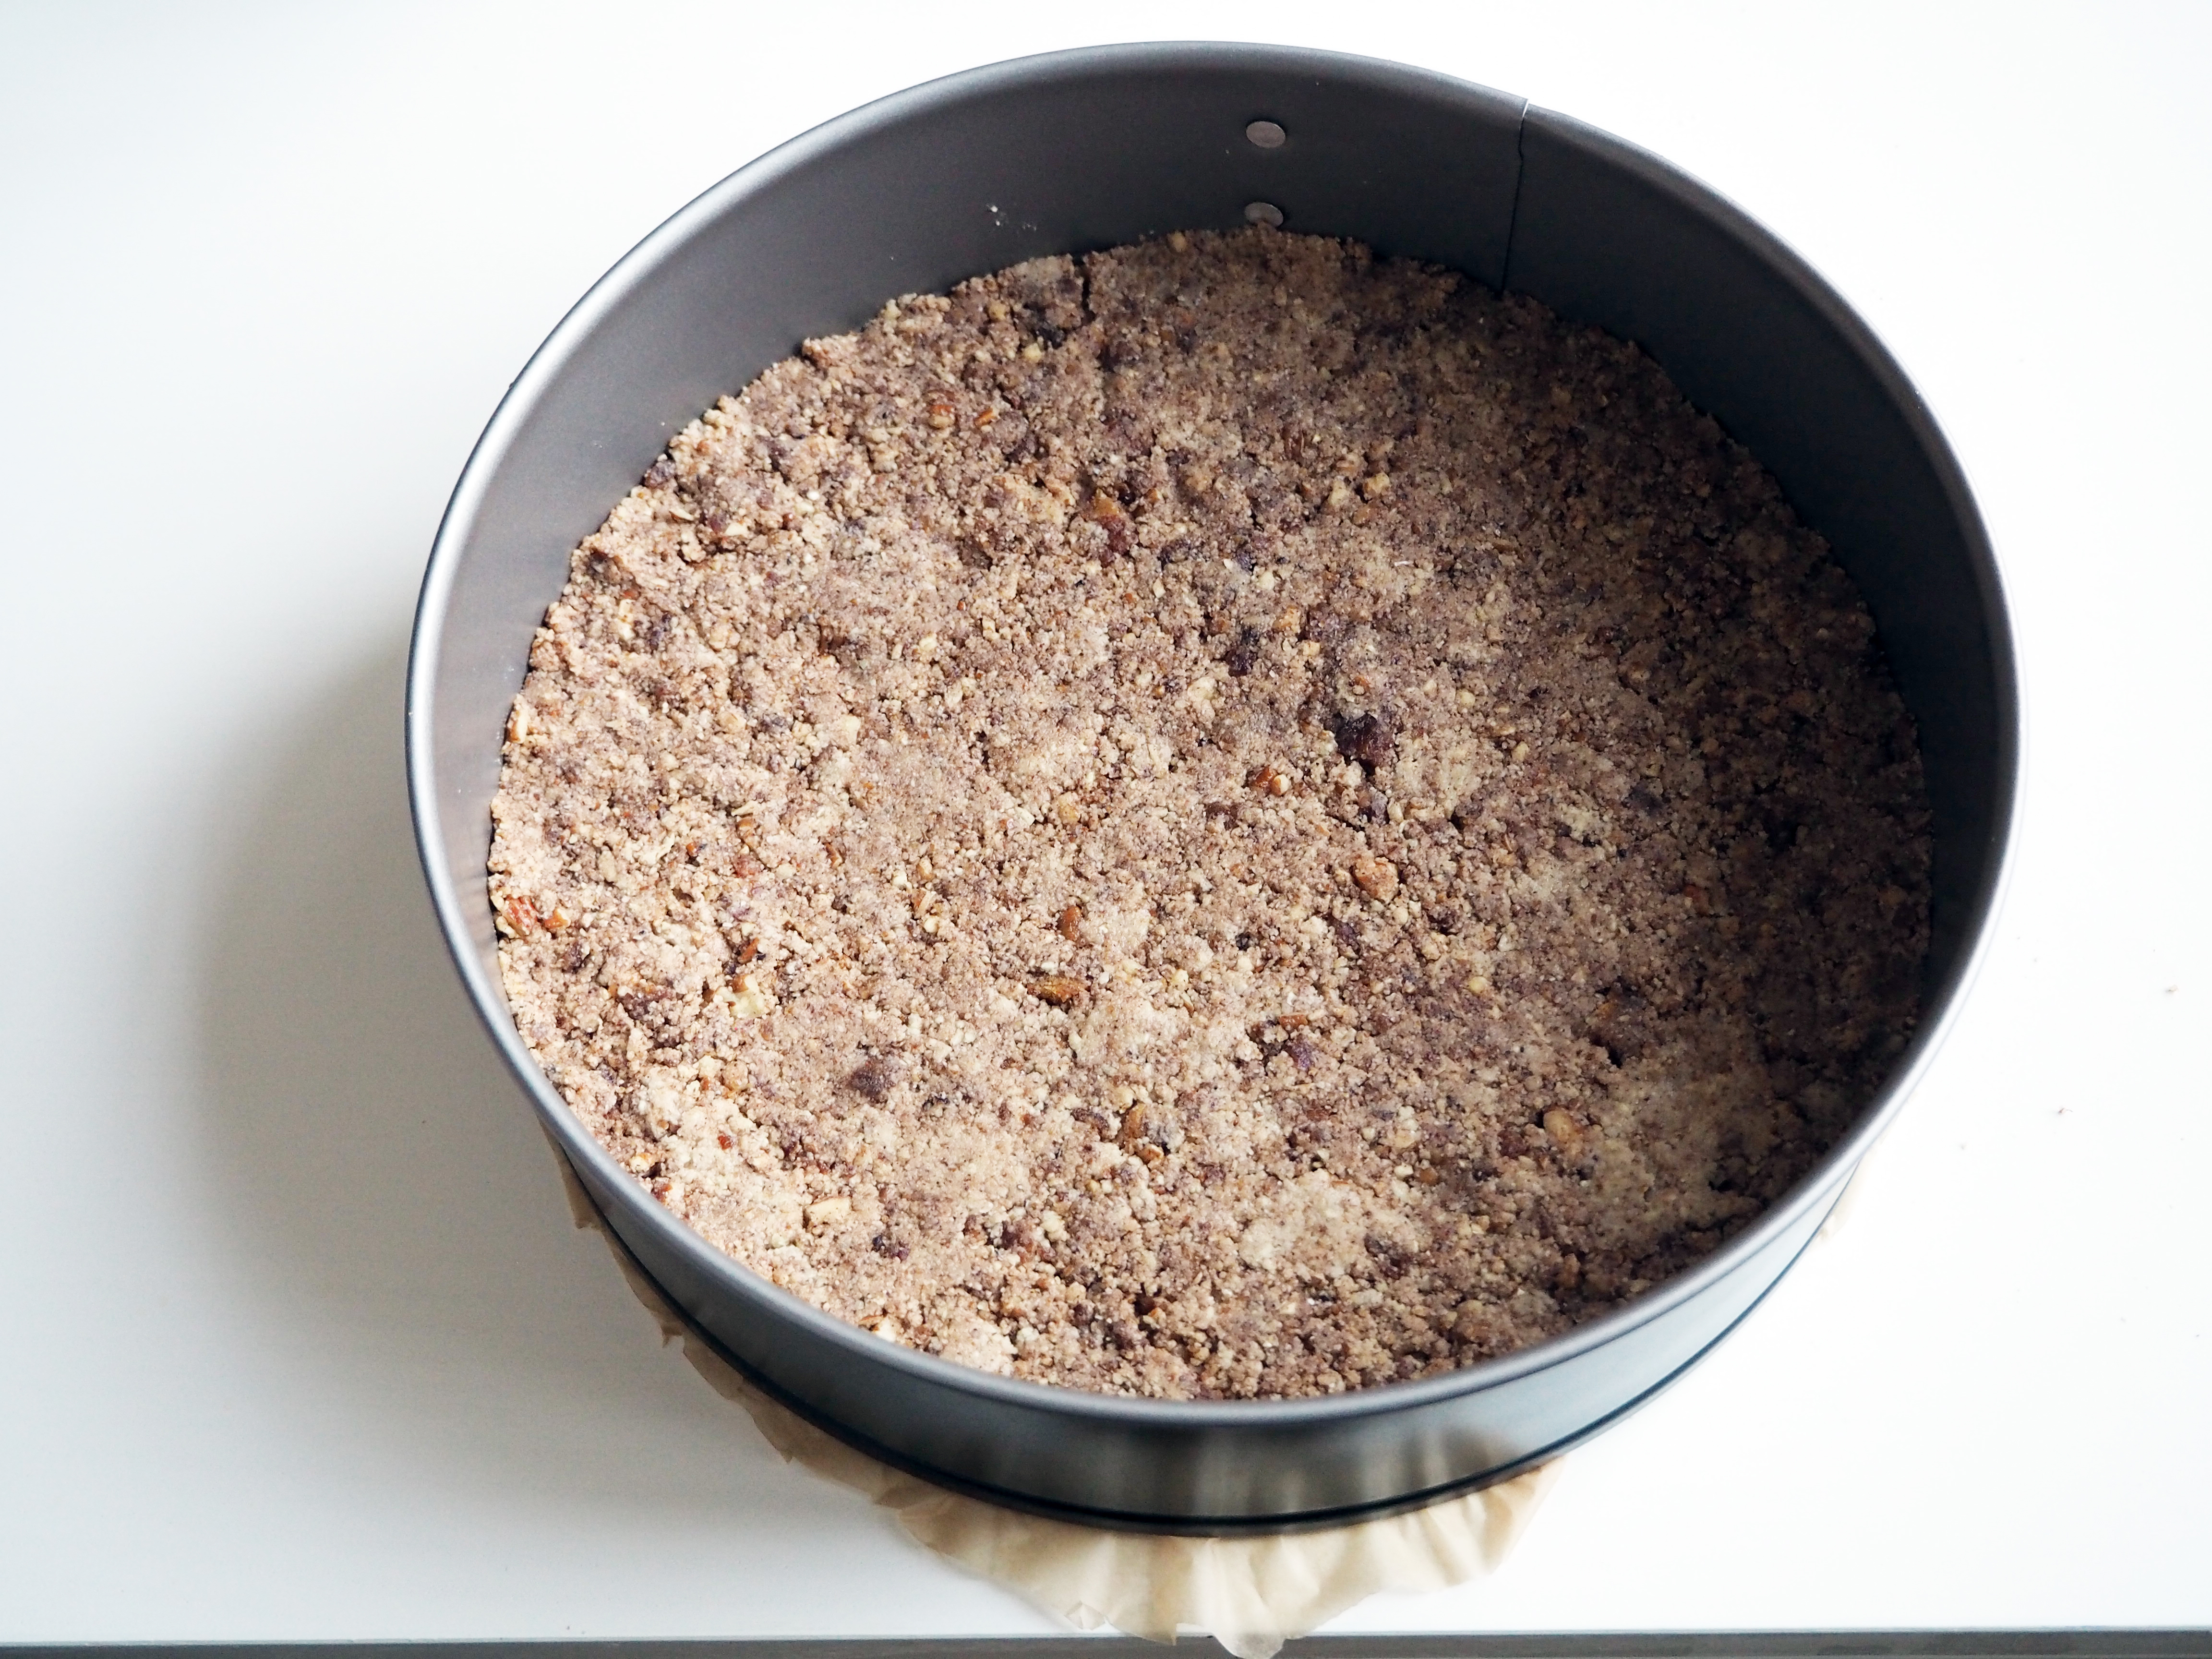
For the crust:
1 cup / 2 dl + 2 tbsp + 2 tsp pecans
1/2 cup / 1 dl + 1 tbsp + 1 tsp almond flour (I used store bought ground almonds)
1/2 cup / 1 dl + 1 tbsp + 1 tsp pitted dates, roughly chopped
3 tbsp coconut oil (leave in a warm spot, or under a direct, warm light for a while so that it gets liquid – mine in the photo below was taken before it melted. This condition is the same for all coconut oil in the recipe. Measure before it melts.)
1 tbsp cinnamon
1/2 tsp cardamom
A pinch of salt
For the middle layer:
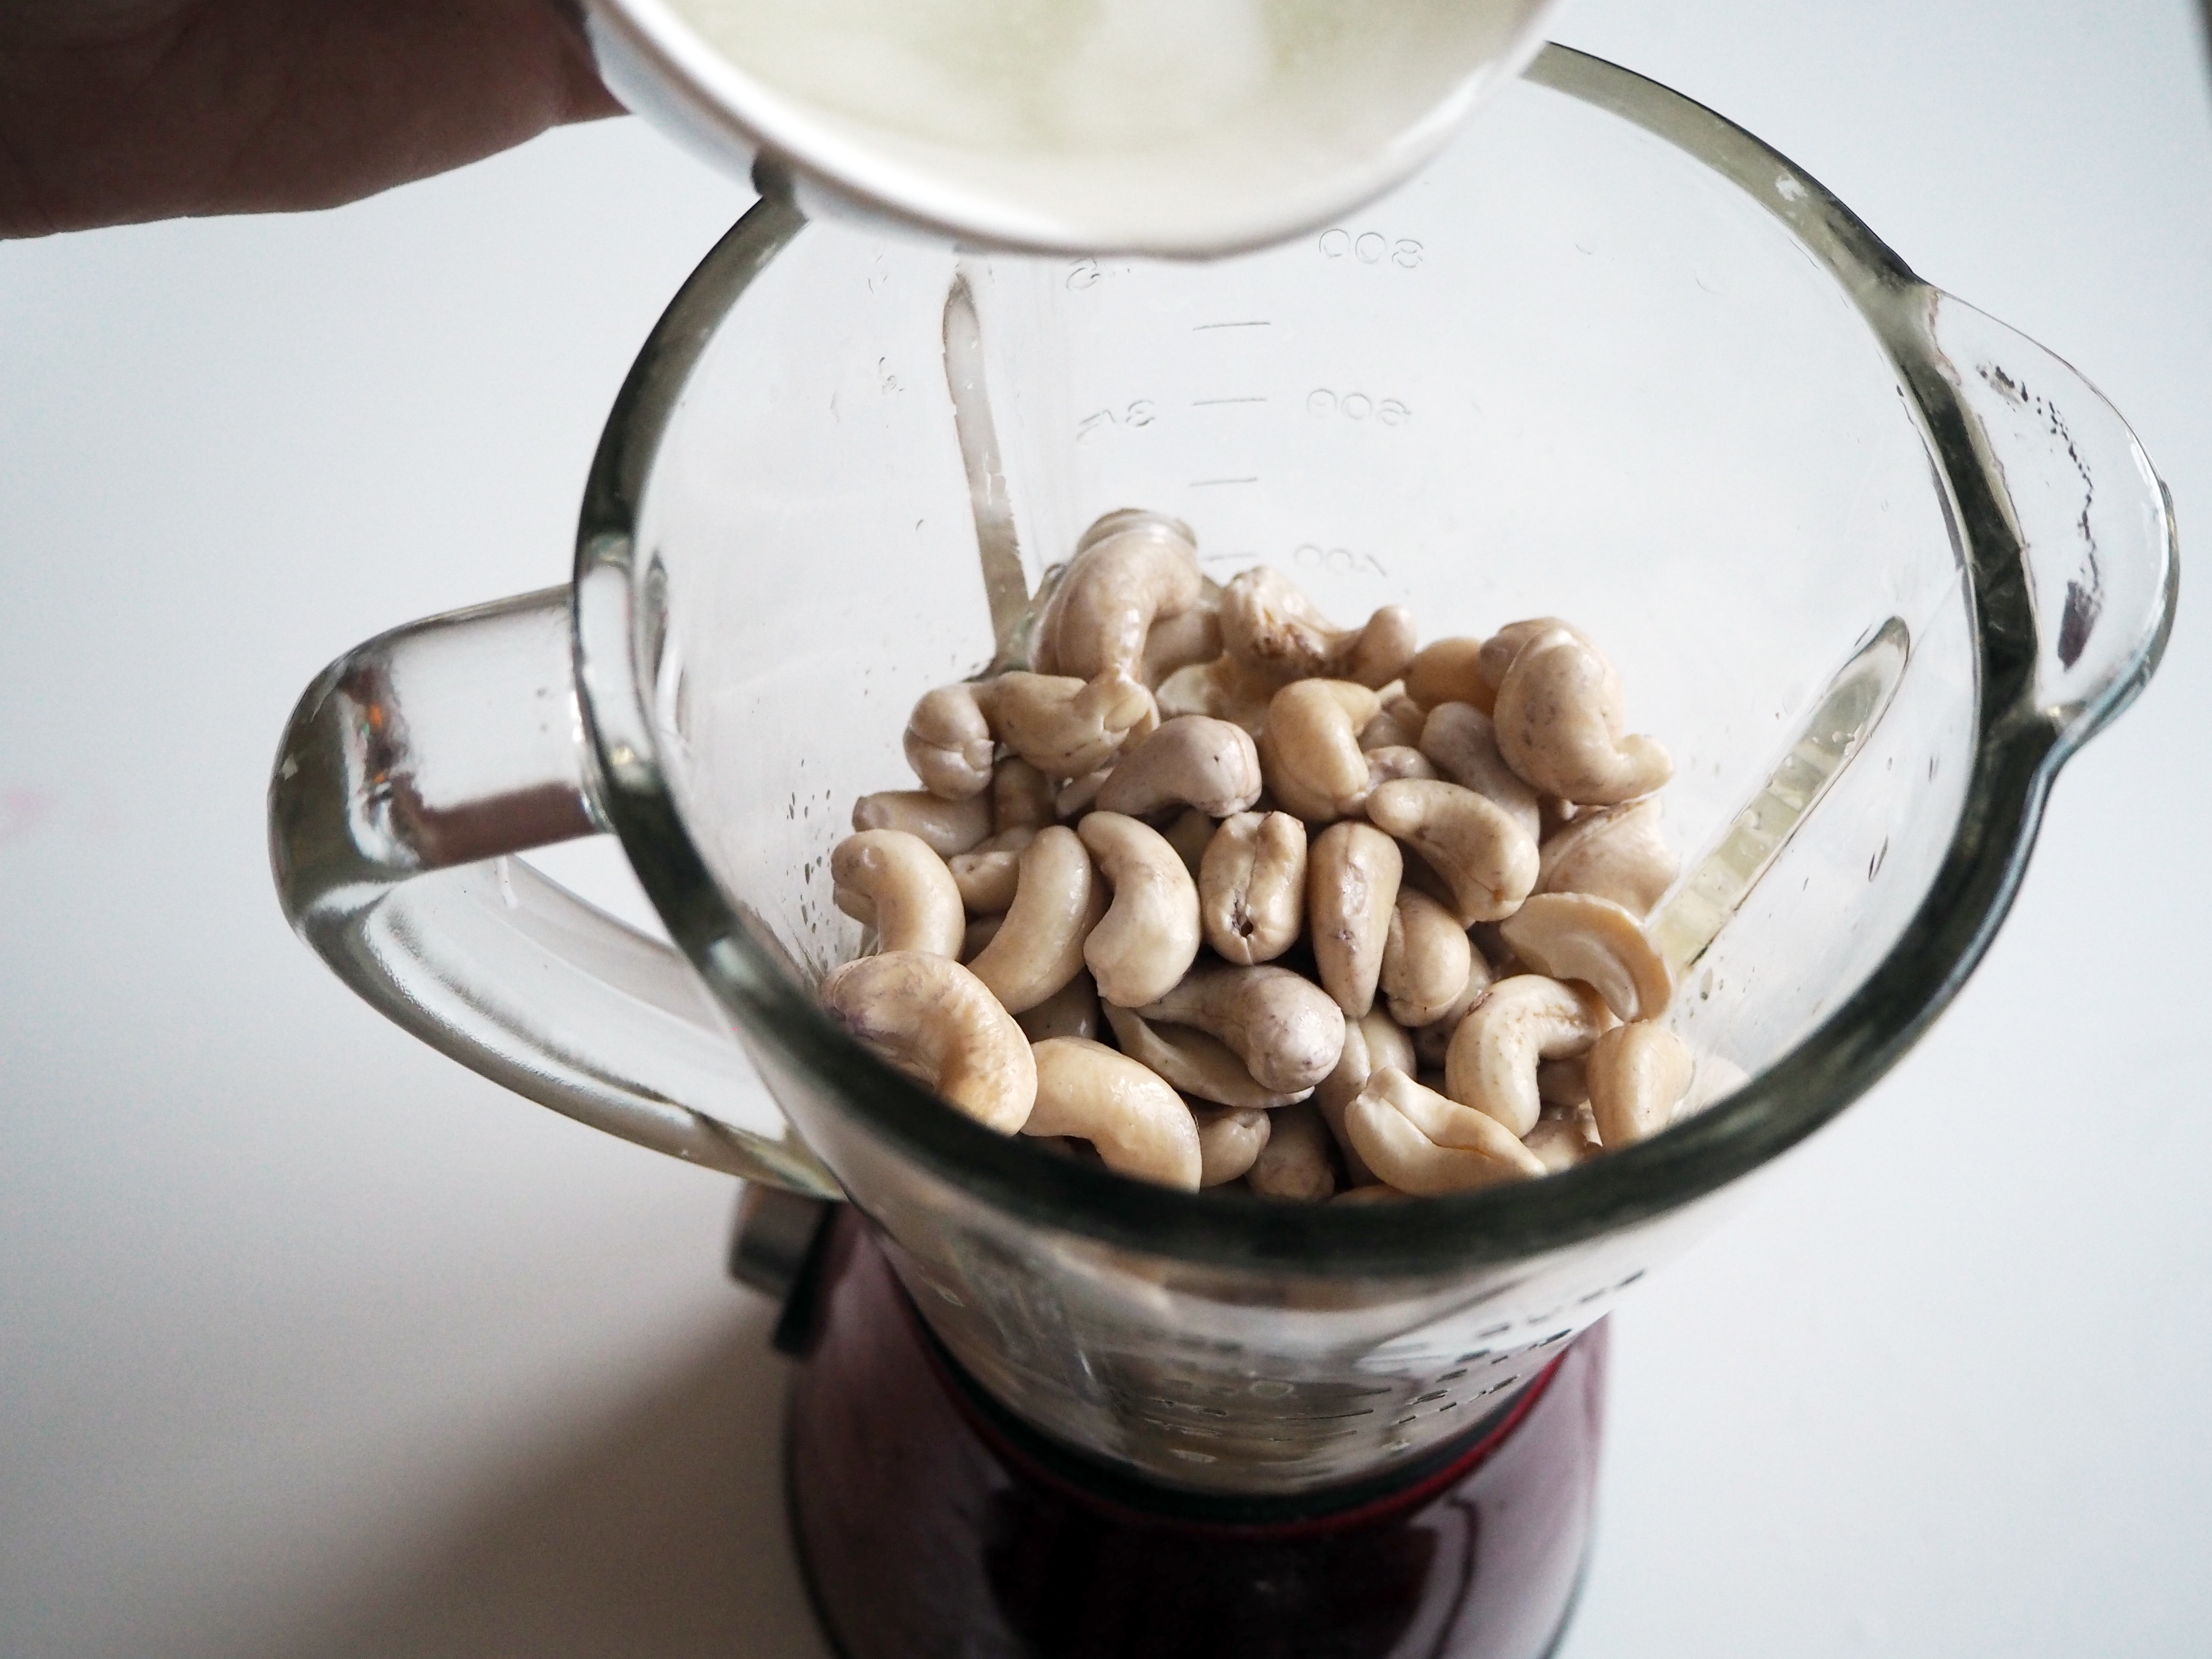
1 cup / 2 dl + 2 tbsp + 2 tsp cashew nuts, soaked in lukewarm water for at least 4 hours
1 cup / 2 dl + 2 tbsp + 2 tsp ground almonds
2 cups / 5 dl minus 1 tbsp and 1 tsp desiccated coconut
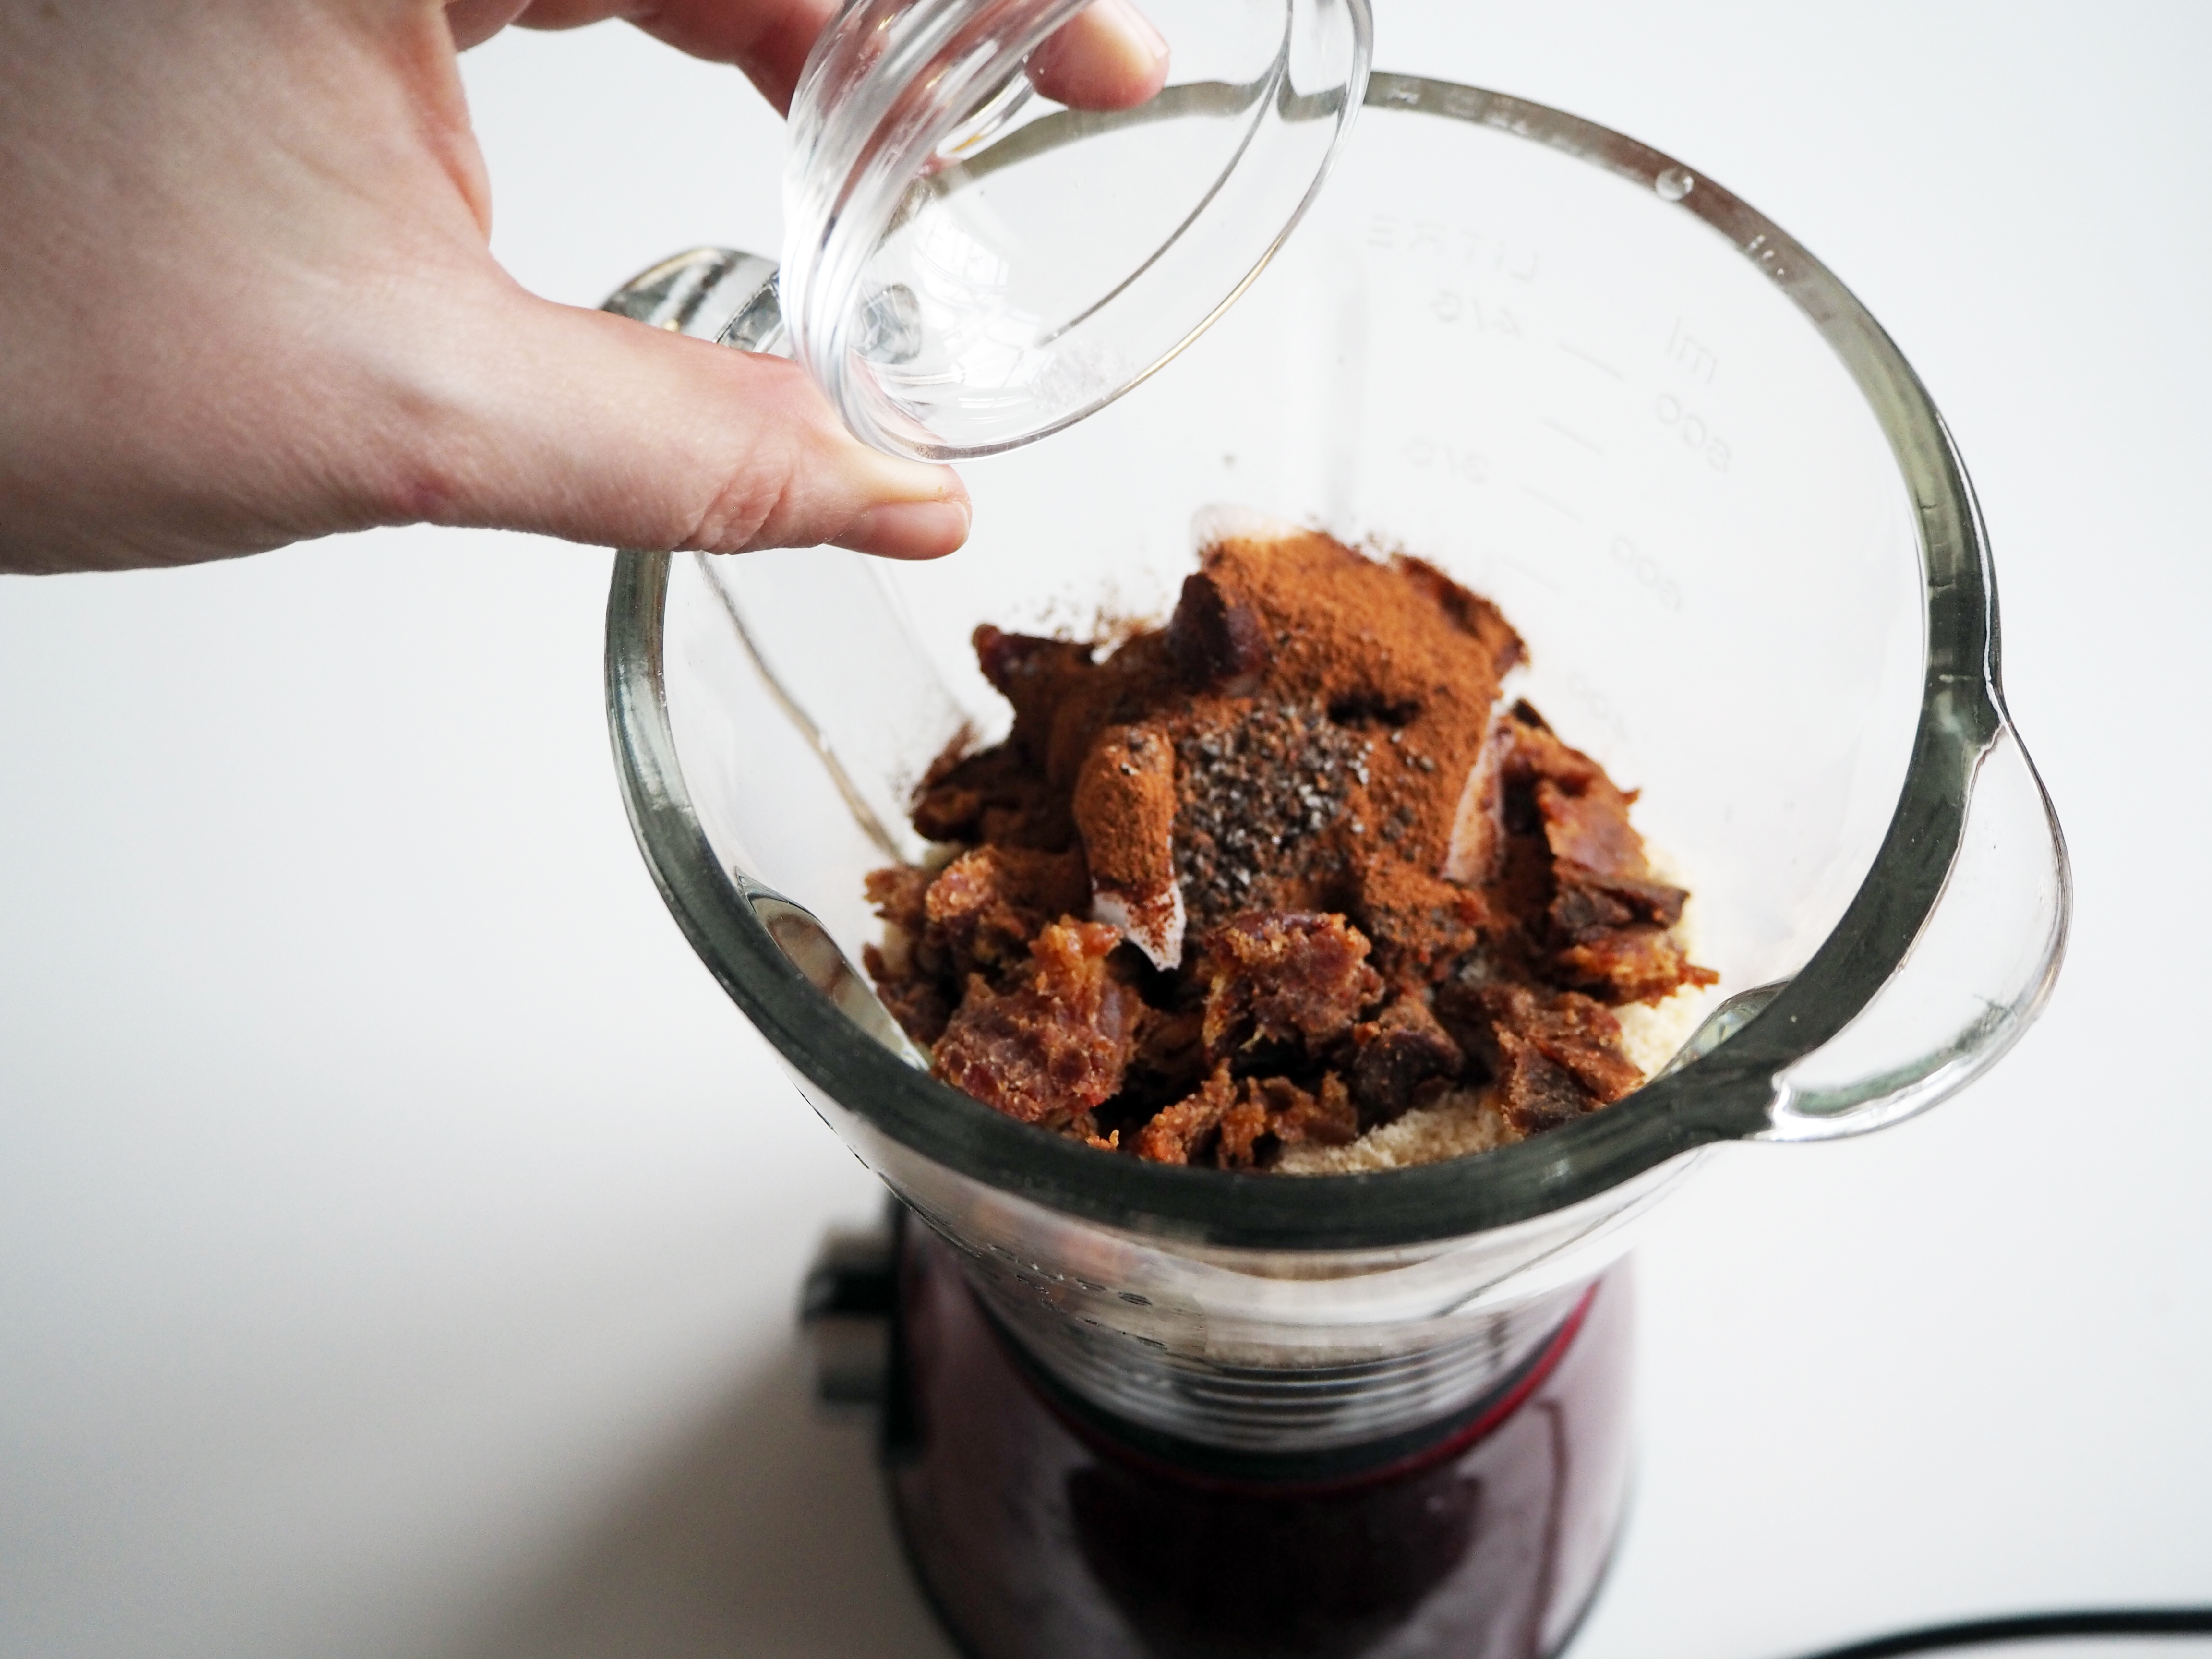
1 1/2 cups / 3 dl + 4 tbsp pitted dates, roughly chopped
1/2 cup / 1 dl + 1 tbsp + 1 tsp coconut oil
1/2 cup / 1 dl + 1 tbsp + 1 tsp orange juice, freshly squeezed
1 tbsp cinnamon
A pinch of salt
1 1/2 cups / 3 dl + 4 tbsp lingonberries (I used frozen), plus a little more later for decoration
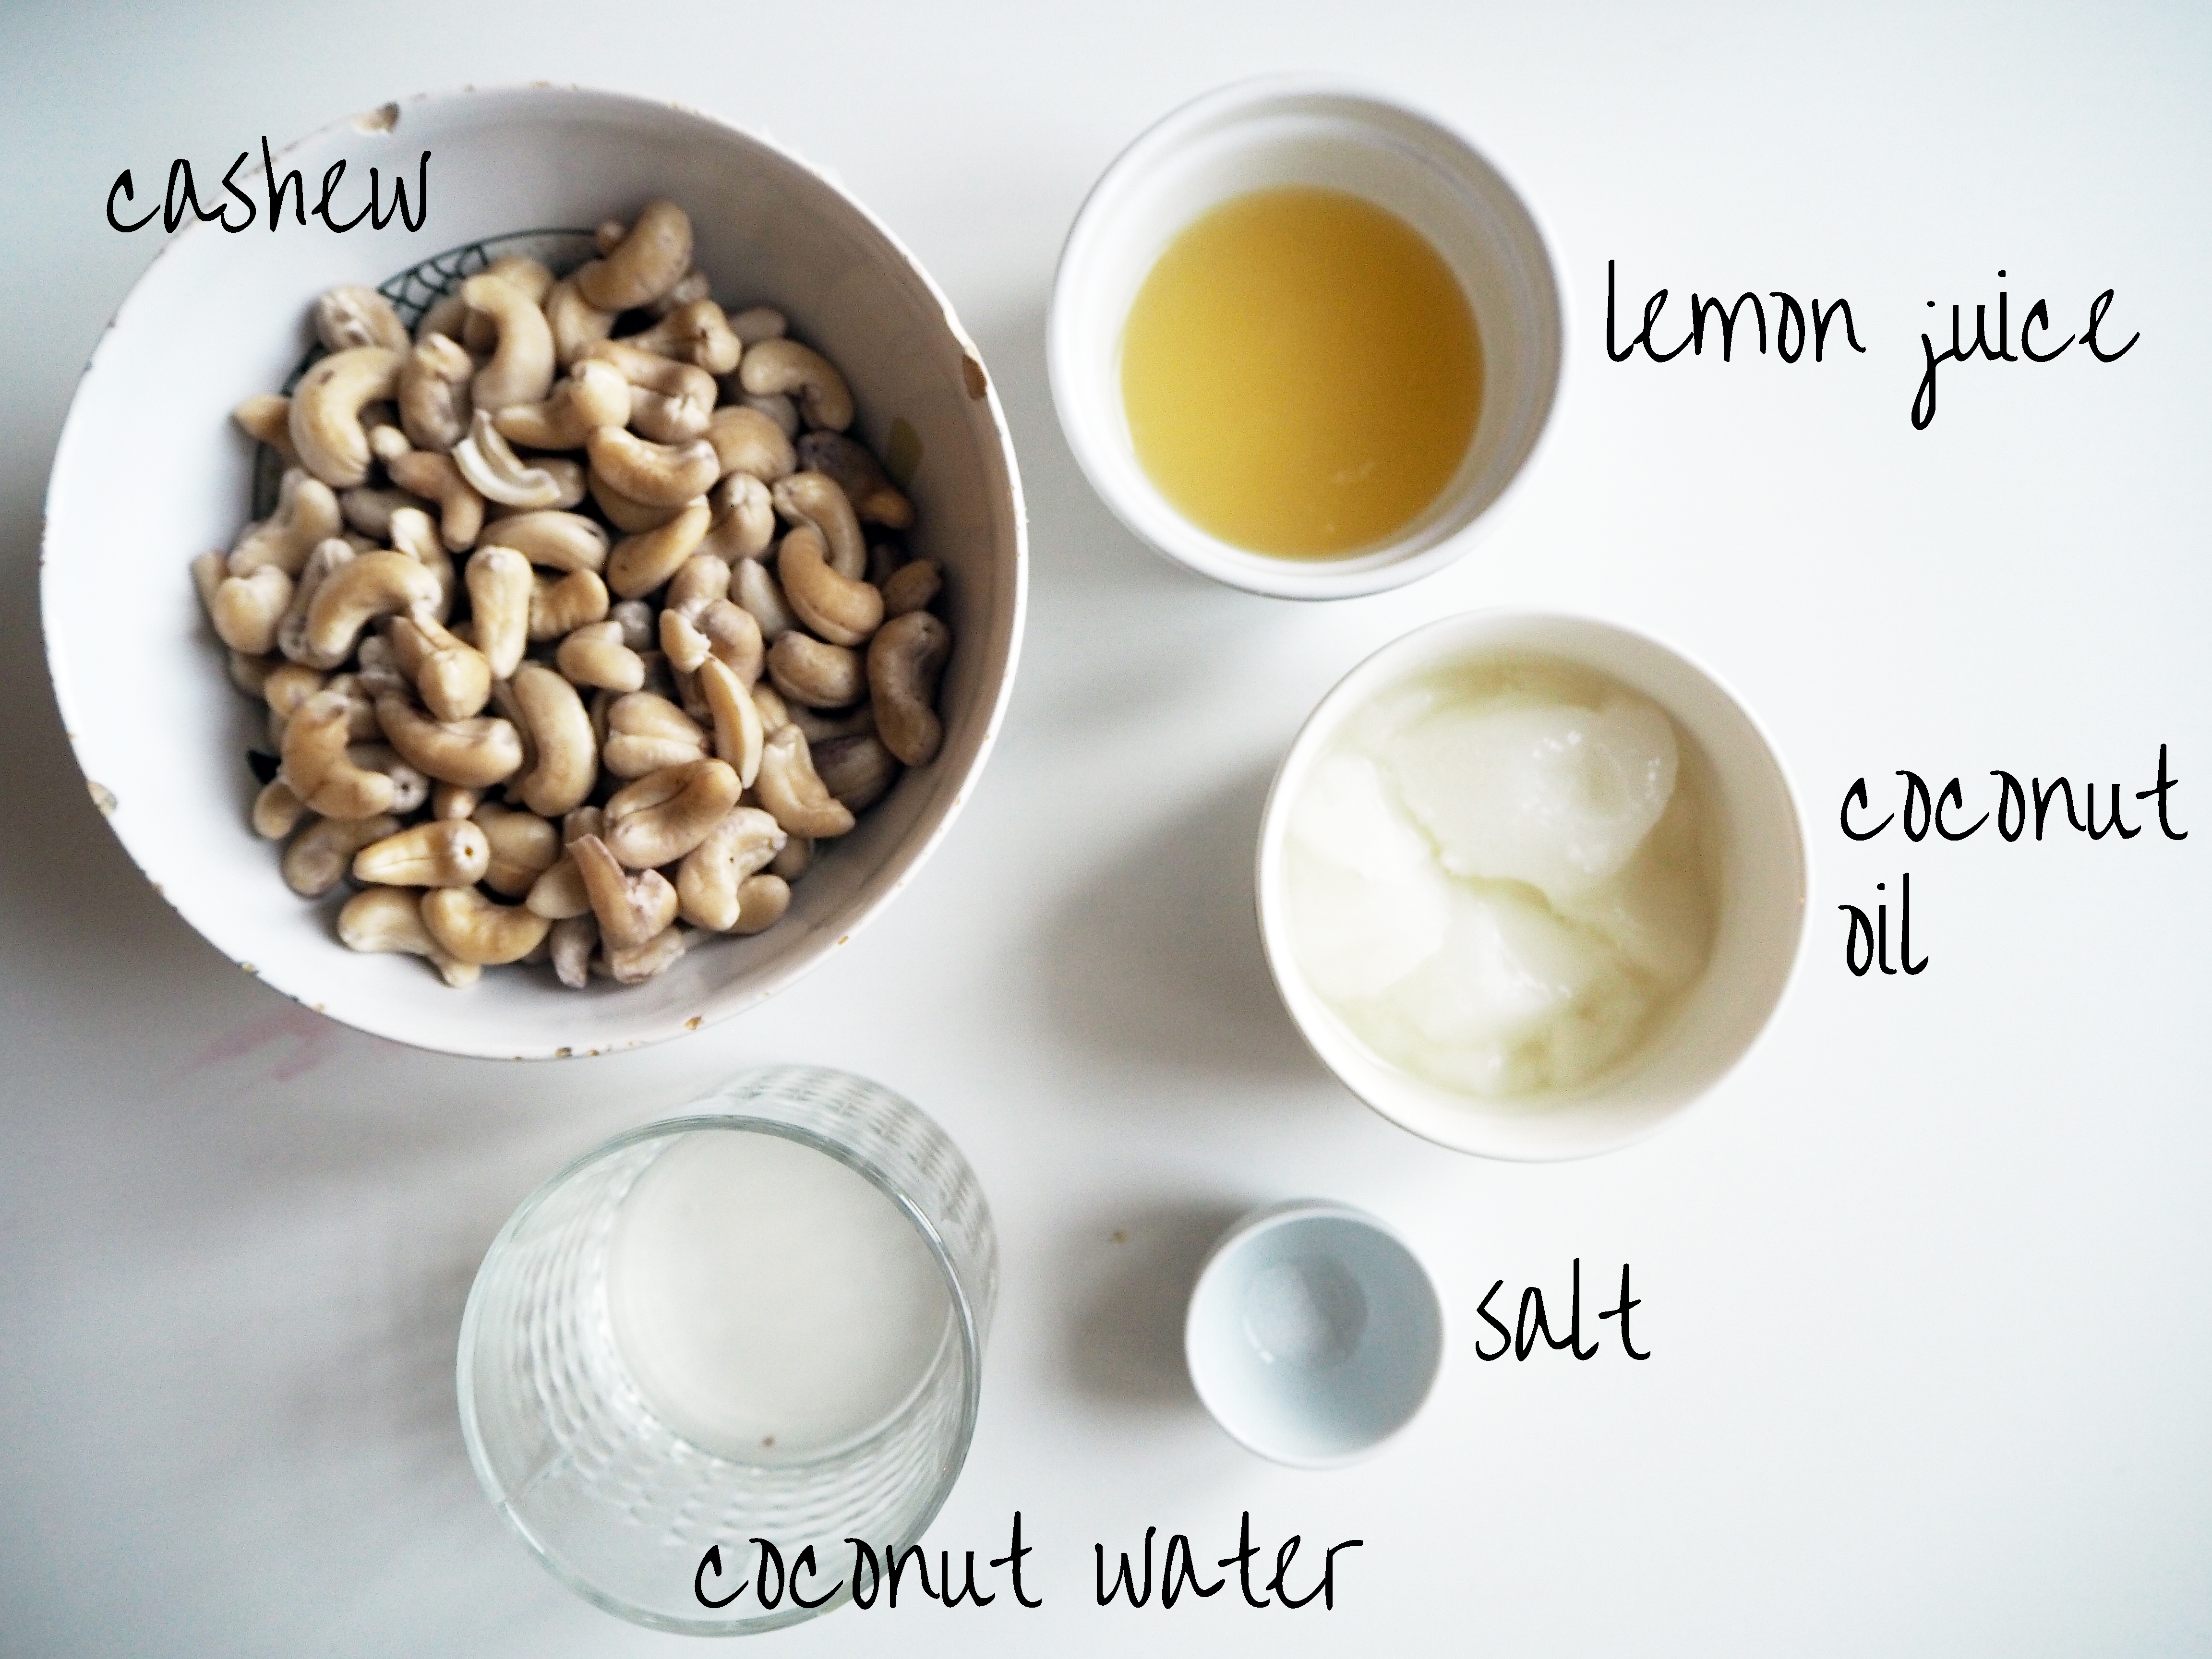
For the top layer:
2 cups / 5 dl minus 1 tbsp and 1 tsp cashew nuts, soaked in lukewarm water for at least 4 hours
1/2 cup / 1 dl + 1 tbsp + 1 tsp coconut oil
1/2 cup / 1 dl + 1 tbsp + 1 tsp lemon juice, freshly squeezed
6 tbsp coconut water
A pinch of salt

—
1. Make the crust: Put ALL THE INGREDIENTS FOR CRUST in a food processor / blender and process until it’s crumbly but feels like a dough, which can stick to the cake pan.


2. In the base of a springform cake pan (or any other mould you want) which is covered with non sticky baking sheet, put the crust dough and pressing with your hand, cover all the base. Put it in the fridge while you are working on the next layer.


3. Make the middle layer: Put ALL THE INGREDIENTS FOR MIDDLE LAYER EXCEPT LINGONBERRIES in a food processor / blender and process until they blend well and get as smooth as possible.


4. Add lingonberries in the mixture and mix well, but try not to crush the berries. Spread this on the crust layer. You can use a spoon or another tool to spread it firmly and in the meantime some of the berries will be crushed for sure. Just try to do it as carefully as possible. Put the cake back into the fridge while making the last layer.


5. Make the top layer: Put ALL THE INGREDIENTS FOR TOP LAYER in a food processor / blender and process it until it is as smooth as possible.

6. Pour the top layer on the rest of the cake and spread evenly. Try to make the surface as smooth as possible, or leave it in a rustic look. Put back in the fridge, overnight. I left for a little more than 24 hours. Decorate with lingonberries while serving.


I absolutely love your photography, the cake looks so moreish! And I completely agree about the expense of vegan baking, the cost of a packet of cashews is outrageous!
Thank you! The only thing i miss about living in Istanbul is the price of such nuts – abundant and cheap! But well, i just don’t make raw cakes too often then hehe. :)